X735
Contents
Foreword
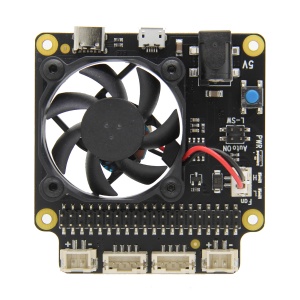
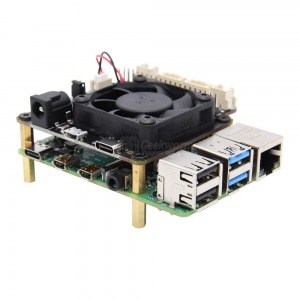
X735 V3.0/V2.5 supports Raspberry Pi 5 hardware also.
X735 v1.0 was released in April 2019. It is designed based on Raspberry Pi 3 and has undergone several upgrades. The current version on sale is V3.0. After our test, X735 V3.0 can still work based on Raspberry Pi 5. If you need to use it on Raspberry Pi 5, it is recommended that you power X735 v3.0 through DC Jack. It is recommended to use a 12V 3A or higher power adapter to obtain a stable 5A output capacity. If you are powering the X735 via Type-C or Micro USB, the X735's power supply capacity is entirely dependent on the power adapter used. For example, if you use a Raspberry Pi 5 PD27W power supply, the X735 will be able to provide enough current output for the Raspberry Pi 5 to 5A.
If you are using it on Raspberry Pi 5 hardware and you know that the X735 can output enough power to 5A, then you need to run the following command in the Raspberry Pi bookworm OS to suppress the 'This power supply is not capable of supplying 5A' message appear
sudo rpi-eeprom-config -e
Add PSU_MAX_CURRENT=5000 at the end of the file, then press Ctrl-O, then enter, to write the change to the file, press Ctrl-X to exit nano (the editor), then reboot the Raspberry pi 5
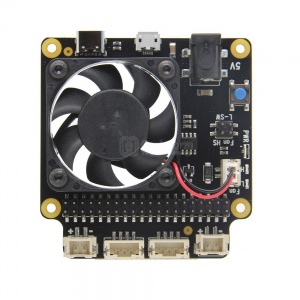
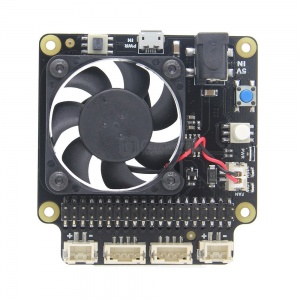
There are 5 version of X735: V3.0, V2.5, V2.1, V2.0, V1.0:
Version 3.0(Updated on Mar. , 2022):
Some new features of X735 v3.0:
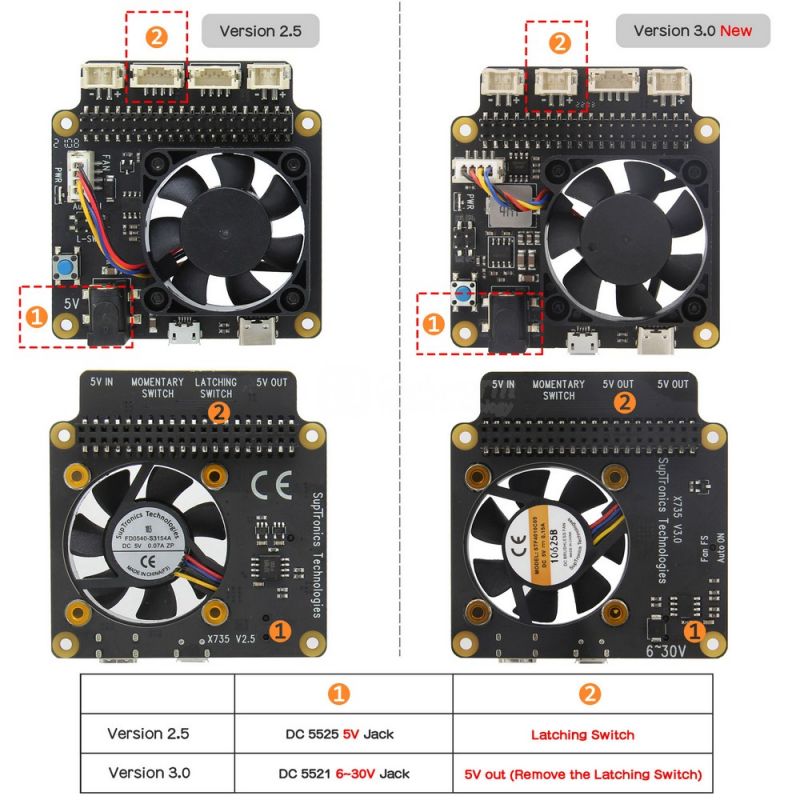
- Support width voltage DC 6V-30V input (only DC port), you still can use 5V PSU via type-c or micro usb port.
- Remove the latching switch connector(the latching switches are no longer supported.), and add a XH2.54 5V OUT connector;
- Replace the L-SW jumper with FAN FS jumper to control the PWM fan;
Because we found that there are some beginner who don't know how to install the script to make the PWM fan run, or the installation script doesn't support 3rd party OS, at this time, you just need to remove the FAN FS jumper, the PWM fan will run at full speed.
Some new features of X735 v2.5:
Version 2.5(Updated on Mar. 15th, 2021):
Some new features of X735 v2.5:
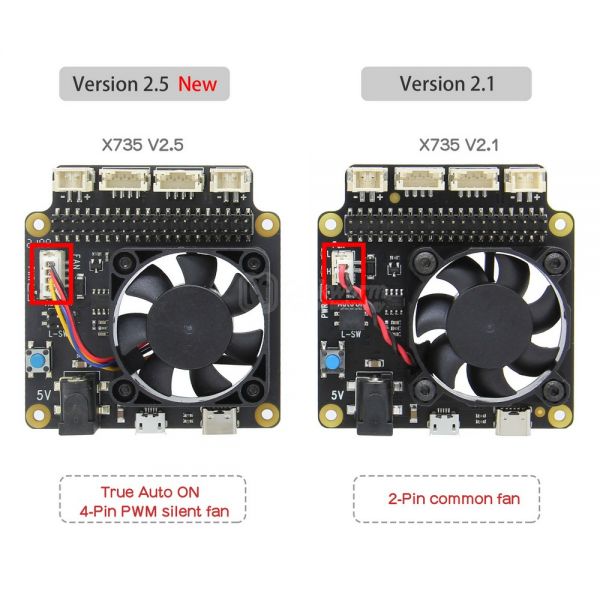
- Use the silent PWM cooling fan, and support fan speed is control by script, support read fan speed, and we provide sample python code.
- You must install shell script to enable the PWM fan work fine since it's a PWM fan, refer to X735-script
- Support TRUE AUTO ON function (in the old version,the power management function is disabled if AUTO ON is enabled)
- Considering that some customers use X735 together with other DAC shield, we adjusted the GPIO pins used.
- Please install shell script to get safe shutdown function. please refer to X735-script
- Remove the 2pin power cable from X735 v2.5
- No any size changes.
FAQ
A: How to detect that the X735 v2.5 hardware is working fine?
Q: DON'T insert the X735 V2.5 into the Pi 4 board, only power the X735 v2.5 alone, then press the on-board switch, fan rotation means hardware is ok.
Version 2.1(Updated on Oct. 30th, 2019): Only change jumper 'FAN_HS' to 'AUTO ON' function; because we found 'AUTO ON' function is more useful to user.
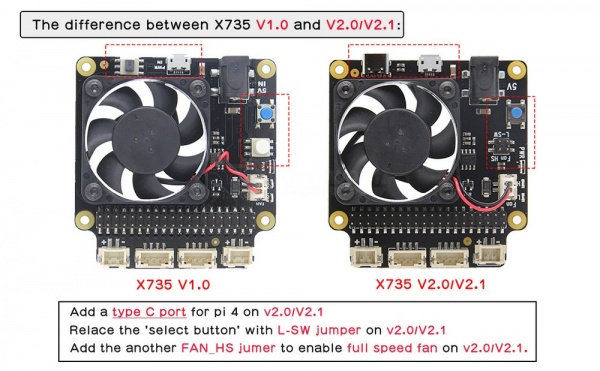
Version 2.0(Updated on July, 30th, 2019): special update for raspberry pi 4 model B. Support all current models of the Raspberry Pi using a 40-pin header including pi 4 / 3B+/3B/2B/B+.
Add TYPE C power port for Raspberry pi 4 model B, and replace the 'select button' with L-SW jumper, add the another FAN_HS jumer to enable full speed fan. In fact, X735 v2.0 can have more performance.
Version 1.0:(Released on April, 2019) : designed for raspbery pi 3B+/3B/2B/B+
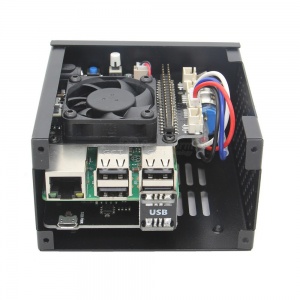
2.The X735 works seamlessly with the X825/ X883/ X828/ X829/ X857/ X862/ X832/ X835/ X872/ X820/ X850/ X830/ X860/ X870/ X852/ X822 to build your NAS storage center. At the same time, considering that you need a matching shell, we also design cases that can support X735.
At this point, you already have a mini linux working host.
Overview
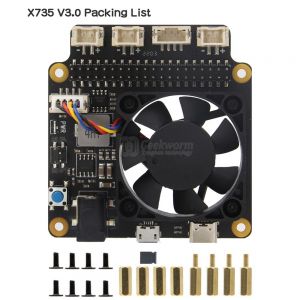
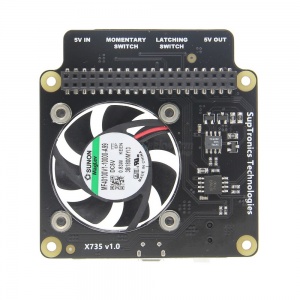
The X735 is a multifunctional expansion board for all current models of the Raspberry Pi using a 40-pin header. It provides intelligent and safe power management, safe shutdown and full poweroff through software, an automatic temperature controlled fan which enables the use of the Raspberry Pi in extreme conditions including very high temperature environments. The X735 also reserves the 40-pin header that can be stacked with other Raspberry Pi accessory boards for enhanced applications.
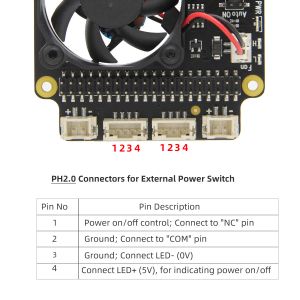
At the same time, x735 reserve a 4PIN power switch (momentary switch) port, you can connect the additional power switch to safe control the power on/power off;
Important Note
- Safe shutdown script: Document
- Full power off via software is not supported when using a external latching switch;
- "L-SW" Jumper on X735 should be removed when using onboard switch / momentary switch;
- "Auto On" Jumper on X735 should be removed when using external switch;
- Both "L-SW" & "Auto On" Jumper caps should be removed when using momentary switch;
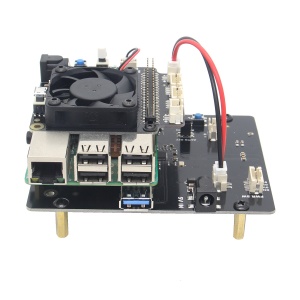
- Support 4 kinds of power supply: Micro USB, Type C(rccommend), DC5525 port (recommend), XH2.54. (Do not power the Raspberry Pi via the Raspberry Pi's Micro-USB socket)
- Don't use this X735 power mgnt board with other power mgnt board like X725, X750, X705, etc.
- When use X735 with X835/X832, please DO NOT power from X735, please power via X835/X832 DC 12V IN PORT.
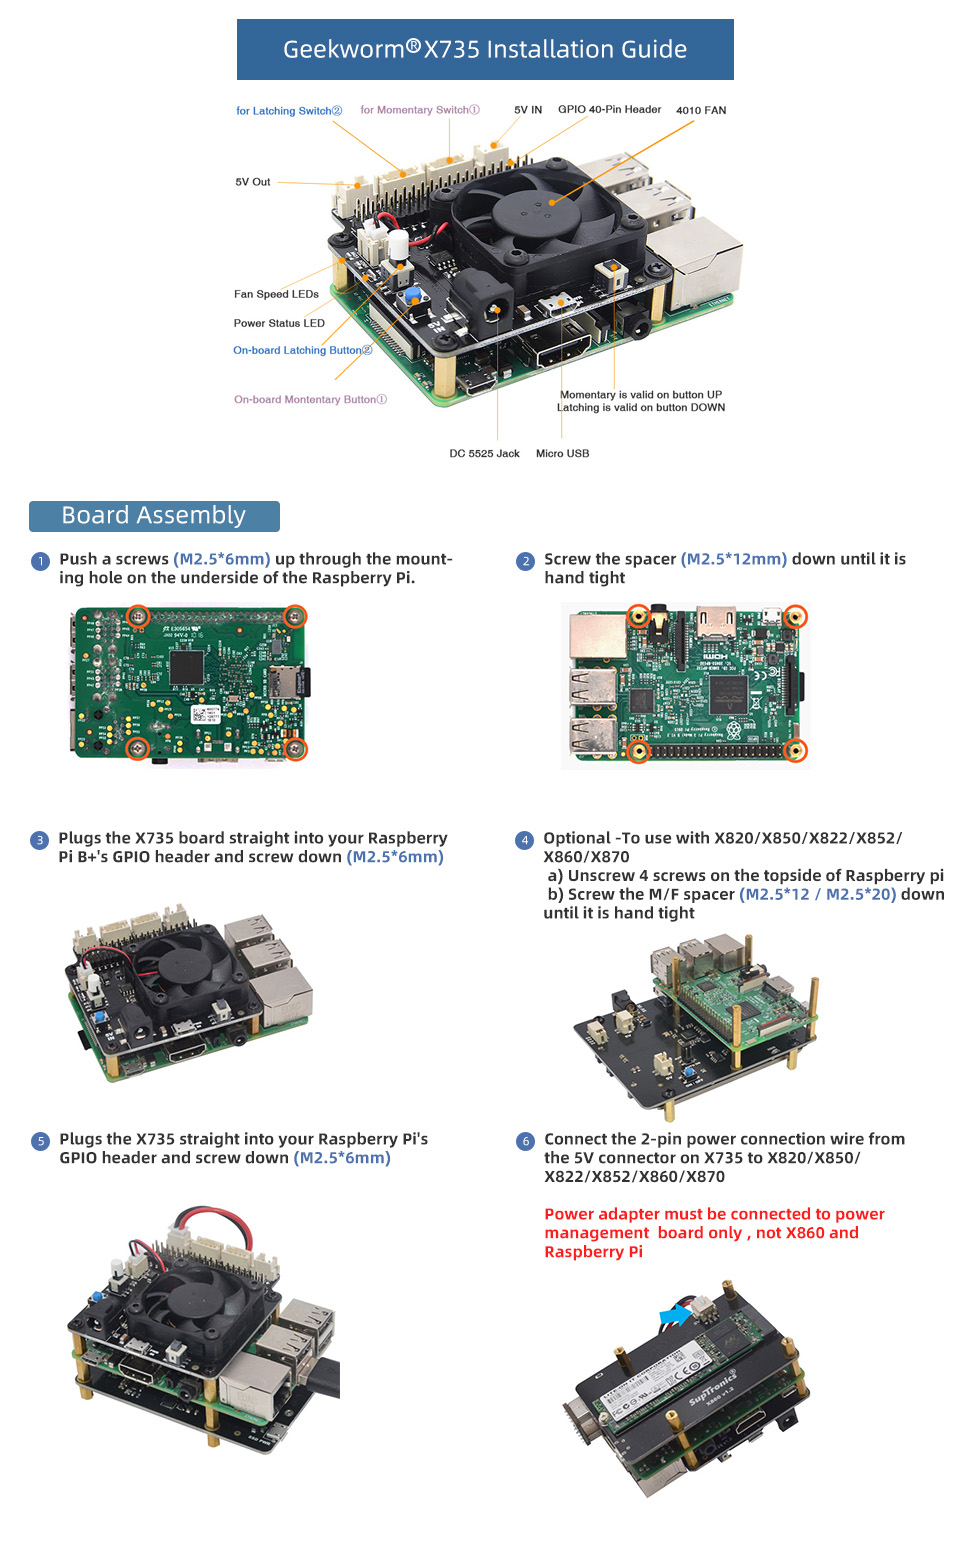
- When use X735 with X825, X828, X829, X857, X856, X855, X820, X850, X872, X862, X860, X870, X822, X852, please power via X735.
- Don't use latching switch if you are using 'AUTO ON'
- Please power off the X735 when you toggle 'AUTO ON' function.
Features
Intelligent and safe power management
- Equipped with both momentary button and latching switch for easy power control
- Press the momentary button or external momentary power switch to turn on
- Press the momentary button or external momentary power switch and hold for 1~2seconds to reboot
- Press the momentary button or external momentary power switch and hold for 3~7seconds to implement safe shutdown
- Press the momentary button or external momentary power switch and hold for more than 8 seconds to force shutdown
- Supports safe shutdown and full poweroff through software
- On-board switch convenient to select latching or momentary power control switches
- Press the latching power switch once to turn on and again to implement safe shutdown
- On-board LED shows the status of power on, reboot and shutdown
- On-board PH2.0 connectors allows to use external latching switch or momentary button
- Powers the Raspberry Pi via the 40-pin header - no additional cabling required
- Allows power input via DC jack or Micro-USB socket or XH2.54 connector
- Allows power output via XH2.54 socket and or the 40-pin header
PWM Cooling Fan for X735 V2.5
- Dedicated PWM cooling fan for Raspberry Pi
- Air flow up to 6.01CFM and maximum speed of 5000 RPM
- Smooth PWM adjustment provides a quiet experience
- Real-Time fan speed reading
- Programmable temperature and fan speed
Auto cooling function for X735 V2.1/V2.0
- Dual trip point temperature controlled cooling fan
- Auto-Control the fan for Cooling / quiet Operation
- Board temperature ≤34C - Fan running at low speed
- Board temperature ≥34C - Fan running at medium speed
- Board temperature ≥45C - Fan running at full speed
- On-board LEDs show the status of fan running low and high
- No driver and additional setting required for the cooling fan
Others
- Reserved 40-pin stackable Header for Add-On Boards
- Works with all current models of the Raspberry Pi using a 40 pin header
- Fully compatible with our products X820, X850, X860, X870, X822, X852 to provide intelligent and safe power management
- Four kinds of power source:(DC5525, Micro USB, Type C, XH2.54 2-Pin cable)
Power supply request
X735 support 4 kinds of power supply:
- DC5525 port: Can provide up to 4A power supply capability.
- Type C power port: specially designed for Raspberry Pi 4 Model B
- Micro USB; Compatible with your original mirco usb power adapter
- XH2.54 2Pin Cable: This is a flexible power supply
Since X735 V3.0 is wide voltage input, so we have some advise to X735 V3.0:
Different voltages have different rated currents. Generally speaking, the lower the voltage, the larger the required rated current. For example, when the voltage is 12V, the rated current of 2A is enough, if the voltage is 36V, 1A is enough, but if the voltage is 6V, the rated current should be more than 3A.
That is to say, the output power of the power adapter should be greater than the normal working power of the Raspberry Pi;
Generally speaking, we require the output power of the power adapter to be above 20W;
Hardware Description
| Model | URL |
|---|---|
| X735 V3.0 | X735 V3.0 Hardware |
| X735 V2.5 | X735 V2.5 Hardware |
| X735 V2.1 (Sold out) | X735 V2.1 Hardware |
| X735 V2.0 (Sold out) | X735 V2.0 Hardware |
| X735 V1.0(Sold out) | X735 V1.0 Hardware |
PCB dimention
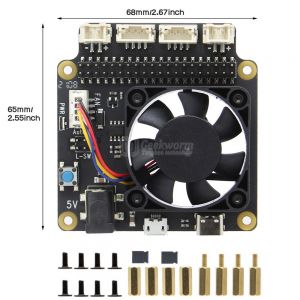
- X735 v3.0 Dimensions source file (DXF): File:X735-PCB-v3.0.dxf - You can view it with Autodesk Viewer online
- X735 V2.1 3D Model: File:X735-V2.1-asm.stp, this is the X735 V2.1 3D drawing for your reference. For the updated versions V2.5 and V3.0, the outline dimensions and the position dimensions of the connectors such as DC Jack, USB-C and micro usb have not changed.
User Manual
Installation Video
- Geekworm Video(X735 with X820): https://youtu.be/I1nnjh9HvGI
- Customer Video: https://youtu.be/rcPbe4wyYbs
Software Installtion
You must install the script to enable PWM fan running and safe shutdown function.
Please choose a different script according to the version number of X735 shield
for Version 3.0/2.5
Please refer to X735-script
for Version 2.1 or more low version
Please refer to Hardware and Software and read them and follow the instructions before ask any questions, thank you!
The safe shutdown script is same with X730.
We test this shell script base official Raspbian '2018-11-13-raspbian-stretch.img' version;other operating systems not be tested!
#Download run script

git clone https://github.com/geekworm-com/x730-script

cd x730-script

#Setting file attributes
sudo chmod +x x730.sh

#Install the script
sudo bash x730.sh

#Setting up the command to turn off X730 from software
printf "%s\\n" "alias x730off='sudo x730shutdown.sh'" >> ~/.bashrc

#Reboot the Raspberry Pi
sudo reboot

#Powering off the Raspberry Pi from software
x730off
X735 V1.0 Installation Guide Manual
FAQ
1.How to use the Auto Power On jumper and Latching Switch Jumper on X735 V2.1 version board?
Answer:
There two jumpers: Auto Power On jumper and Latching Switch Jumper on X735 board.
- Auto Power On jumper
- Short - Auto power-on when power applied
Open - Power on when power button pressed
- Latching Switch Jumper
- Short - Using external latching switch
- Open - Using on-board power button or external external momentary switch
- 1. When use X735 V2.1 with Geekworm X825-C2 Case, we equipped momentary switch in X825 metal case, please remove both of the jumper caps.
- 2. As the auto power on function use latching switch, if you need to use auto power on function, please connect an external latching switch to X735 board or use X735 on board power button.
2. Which GPIOs are used in the X735 V2.1 script?
Answer: The GPIO4, GPIO17 and GPIO18 is used for power management. And the rest GPIO pins are available to use.
3.What if I connect the x820 XH2.54 5v to the IN of the X735, and then connect the power supply to the x820. Will the safe shutdown work?
Answer: This is no suggested, because power supply for X820 cannot be controlled by X735 and safe shutdown won't be implemented as well. You need to power from the X735 5V IN DC port.
4.Does the x735 power board work with the rock64 board? is the 40 pin connector compatible with the rock64 40 pin connector?
Answer: In fact, we didn't test X735 based with ROCK64, and we didn't consider ROCK64 board when we wrote a safe shutdown shell script, so we think X735 is not compatible with ROCK64. Also the PIN definiton of ROCK64 is different with Raspberry Pi. So it is not suggest to use X735 board with ROCK64.
5. What is the pinout for the PWR Switch?
Answer: Please refer to here: PH2.0 Conector Specification
6.Does the X725/X750 support to use with X735 together?
Answer: Please refer to Connecting the X725 UPS to the X735 Power Supply
7.Does the X735 V2.1 support to check the speed of the fan?
Answer: Sorry, no, X735 V2.1 is not support to check the fan speed by software, please refer to new version X735 V2.5.
8. Why my RPi4 will switched off directly after connected to the X735?
1. Please confirm all product connection is correct first. If you are not sure about the connection, please attach some pictures and contact us for help.
2. Please also do the following test and show us the result.
- Remove X735 from the Raspberry Pi
- Connect the power to X735
- Press the blue button on X735. Does the blue LED light up? Does it turn off automatically?
- Press and hold for more than 8 seconds, will the blue LED go out?
9.How to remove/unload the X735 script from your Pi?
A: Open the /etc/rc.local file (sudo nano /etc/rc.local or vim /etc/rc.local to open the /etc/rc.local file;), and seach x735, then comment out that line (add # on the begin of that line);
10. Can the x735 work in harmony with the x765 POE?
- A: Yes, but the X735 must be set as "AUTO ON" mode.
11. Does this supply safe shutdown when power is cut? Or just safe shutdown when power is constant and a signal switch is cut
- A: Sorry, no, the X735 does not support safe shutdown when power is cut. Please consider X728 if you need this function.
12. How to delete X735 script completely?
- A: Run the coomand ./uninstall.sh if you found this command in the x735-script fold.
13. Can I connect DC supply 5V and at the same time connect Powerbank to USBC input of X735 as a some kind of "UPS"?
- A: No. It is not support to do so.
- The POWERBANK output may not have a polarity protection circuit, and there is no path management for this connection.
14. After installing the script, the fan does not turn?
- A: Please run the following command and tell us the result. Or upgrade the system to reinstall the test.
sudo python /home/pi/x735-v2.5/pwm_fan_control.py
- "/Home/pi/x735-v2.5" indicates the path where pwn_fan_control.py is located.
15. Is there any way to check or verify if X735 is physically connected to the Raspberry Pi?
- A: GPIO17=1, X735 connected, GPIO17=0 , X735 discontinued.
16. What is the current draw with power off?
- A: It is less than 1mA.
15.Why does the following message appear: this power supply cannot supply 5 a power to peripherals with be restricted when using raspberry pi 5 hardware?
- A: The following settings are required, from the command line or terminal window start by running the following command:
sudo rpi-eeprom-config -e
- Change the setting of POWER_OFF_ON_HALT from 0 to 1 ,
- Then add PSU_MAX_CURRENT=5000 at the end of the file that reads like this:


Enable comment auto-refresher
Anonymous user #73
Permalink |
Harry
Anonymous user #72
Permalink |
Harry
Anonymous user #71
Permalink |
Lisa
Anonymous user #70
Permalink |
Lisa
Anonymous user #70
Permalink |
Lisa
Anonymous user #69
Permalink |
Lisa
Anonymous user #67
Permalink |
Lisa
Anonymous user #68
Lisa
Anonymous user #66
Permalink |
Lisa
Anonymous user #65
Permalink |
Walker
Anonymous user #64
Permalink |
Walker
Anonymous user #63
Permalink |
Walker
Anonymous user #61
Permalink |
Lisa
Anonymous user #62
Lisa
Anonymous user #60
Permalink |
Lisa
Anonymous user #59
Permalink |
Lisa
Anonymous user #59
Anonymous user #57
Permalink |
Anonymous user #58
Lisa
Anonymous user #56
Permalink |
Lisa
Anonymous user #55
Permalink |
Anonymous user #55
Lisa
Anonymous user #54
Permalink |
Lisa
Anonymous user #52
Permalink |
Lisa
Anonymous user #53
Lisa
Anonymous user #51
Permalink |
Lisa
Anonymous user #51
Permalink |
Lisa
Anonymous user #50
Permalink |
Lisa
Anonymous user #49
Permalink |
Anonymous user #49
Anonymous user #48
Permalink |
Lisa
Anonymous user #47
Permalink |
Lisa
Anonymous user #46
Permalink |
Lisa
Anonymous user #45
Permalink |
Lisa
Anonymous user #44
Permalink |
Anonymous user #44
Lisa
Anonymous user #44
Anonymous user #43
Permalink |
Lisa
Anonymous user #43
Lisa
Anonymous user #42
Permalink |
Anonymous user #39
Permalink |
Anonymous user #41
Lisa
Anonymous user #38
Permalink |
Anonymous user #37
Permalink |
Lisa
Heinemann
Permalink |
Xiali
Anonymous user #36
Anonymous user #35
Permalink |
Xiali
Heinemann
Permalink |
Anonymous user #34
Anonymous user #33
Permalink |
Xiali
Anonymous user #32
Permalink |
Anonymous user #40
Anonymous user #31
Permalink |
Anonymous user #30
Permalink |
Anonymous user #29
Permalink |
Anonymous user #39
Anonymous user #29
Permalink |
Anonymous user #27
Permalink |
Anonymous user #27
Permalink |
Anonymous user #26
Permalink |
Anonymous user #25
Permalink |
Anonymous user #28
Anonymous user #24
Permalink |
Anonymous user #23
Permalink |
Cindy
Anonymous user #22
Permalink |
Cindy
Anonymous user #21
Permalink |
Cindy