KVM-A3
Contents
Update History
X630-A3 (The core expansion shield of this kit) was updated from V1.2 to V1.6 in October 2023.
- Support WatchDog
- RTC function can be used directly, no need to configure.
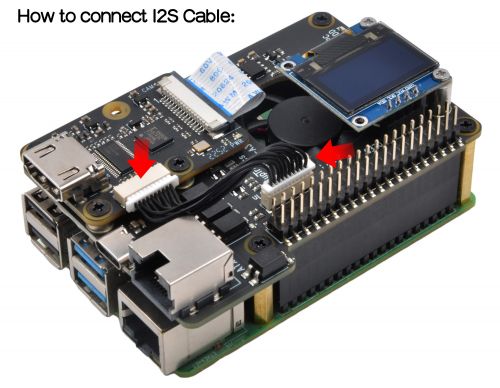
- I2S audio cable added.
Overview
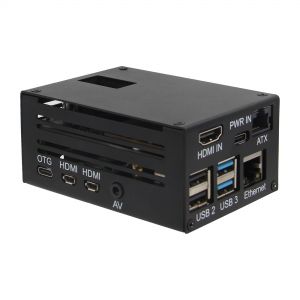
PiKVM-A3 is a member of the PiKVM[1] family, which supports Raspberry Pi 4 with a matching metal case.
Geekworm KVM family products:
| Model | Compatible With | Form Factor | Max Input Resolution | ATX Control | RTC Chipset | OLED display | PoE | RS232 Console | Ethernet | M.2 NVMe Socket | Control of PCs | USB HUB | I2S audio |
|---|---|---|---|---|---|---|---|---|---|---|---|---|---|
| KVM-A3 V1.6 | Raspberry Pi 4 | HAT | 1920x1080 @50Hz | Yes | DS1307 | 0.96" | No | No | 1GbE | No | 1 | No | Yes In-phase I2S wire |
| KVM-A8 V1.8 | Raspberry Pi 4 | PCI | 1920x1080 @50Hz | Yes | PCF8563 | 0.96" (Equipped with a 2P wire to connect the OLED) |
802.3af | No | 1GbE | No | 1 | No | Yes Inverted-phase I2S wire |
| KVM-A4 V2.0 | Raspberry Pi 2W | HAT | 1920x1080 @50Hz | Yes | DS1307 | 0.96" | No | No | No | No | 1 | No | No |
| X680 V1.5 | Raspberry Pi CM4 | Box | 1920x1080 @60Hz | Yes | PCF8563 | 0.96" | No | No | 1GbE | 2280 | 4 | Yes | No |
Updated to V1.5 now |
Raspberry Pi CM4 | Box | 1920x1080 @50Hz | Yes | DS1307 | 0.96" | No | No | 1GbE | 2280 | 4 | Yes | No |
| X651 V1.0 | Raspberry Pi CM4 | PCI | 1920x1080 @60Hz | Yes | DS1307 | 0.96" | 802.3af | No | 1GbE | No | 1 | No | No |
| Raspberry Pi CM4 | PCI | 1920x1080 @50Hz | Yes | DS1307 | No | No | No | 1GbE | No | 1 | No | No | |
| Raspberry Pi CM4 | PCI | 1920x1080 @60Hz | Yes | DS1307 | No | No | No | 1GbE | No | 1 | No | No | |
| Raspberry Pi CM4 | PCI | 1920x1080 @60Hz | Yes | DS1307 | No | 802.3af (POE injector is required due to compatibility issues) |
No | 1GbE | 2280 | 1 | No | No |
Features
- Designed especially for PiKVM ( Raspberry Pi based KVM over IP)
- For use with Raspberry Pi 4 Model B 1GB/2GB/4GB/8GB
- Fully compatible with PiKVM OS (refer to user manual)
- Only compatible with PiKVM V3 OS, NOT support V4
- Control a server and computer using a web browser
- HDMI Full HD capture based on the TC358743 chip
- OTG Keyboard & mouse; Mass Storage Drive emulation
- Hardware Real Time Clock (RTC) with CR1220 coin battery socket
- Equipped with solidstate relays to protect RPi GPIO pins from computer and ESD spikes
- ATX control via RJ45 connector Switch the machine on or off, reset it, and monitor the status of HDD LED & power LED remotely
- Reserves the 10pin SH1.0 connector on X630-A3 for future I2S HDMI audio support
- Reserves the 4pin header & spacers for I2C OLED display
Packing List
- 1 x 0.96 inch OLED: Resolution: 128×64 pixel, with 2 piece of M2*6 screws
- 1 x ATX Conrol Ethernet Cable (Cable length: 100cm)
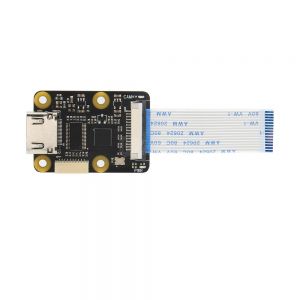
- 1 x X630 HDMI to CSI-2 Module
- 1 x FFC Cable(5cm length)
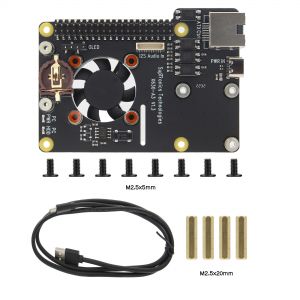
- 1 x X630-A3 Expansion Board(V1.2/V1.3/V1.6)
- 1 x USB-A to USB-C OTG Cable (Cable Length: 100cm / 39.37 inch)
- 4 x M2.5x20mm F/F Spacers
- 7 x M2.5x5mm Screws
- 1 x M2.5x10mm Screws
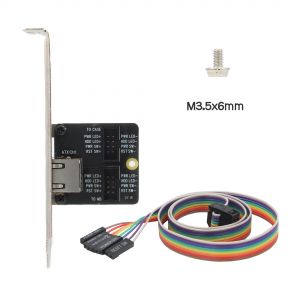
- 1 x X630-A5 V1.0 Adapter Board
- 1 x M3.5x6mm Screw
- 1 x ATX Control Cable (Cable Length: 47cm / 18.50 inch)
ATX Conrol cable:
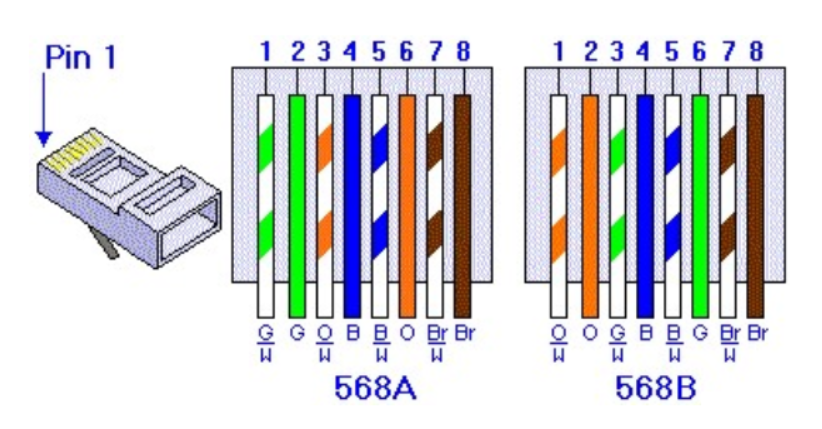
You can make your own ATX control cable, in fact, it is a normal Ethernet cable, and the requirements must be 568B line sequence
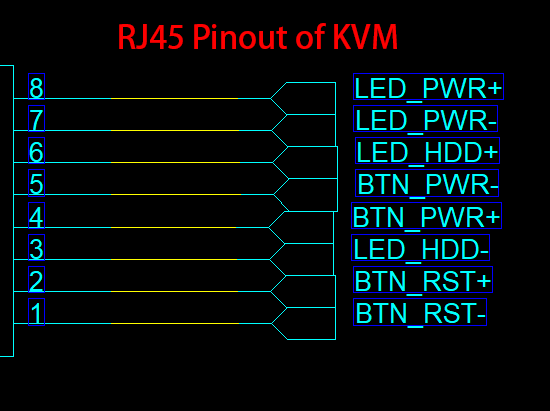
RJ45 Pinout of KVM:
How to Power
- Power Input: 5.1Vdc +/-5% , ≥3A (Power Via USB Type-C port of X630-A3)
- DON'T power via raspberry pi's TYPE-C port, because it is occupied as USB OTG.
How to Cool
- For use with raspberry pi 4, X630-A3 (PiKVM-A3) equipped with a active cooling fan that cool your raspberry pi;
- For use with raspberry pi 4, X630-A8 (PiKVM-A8 PCIe version) equipped with a active cooling fan that cool your raspberry pi;
- For use with raspberry pi zero 2 w, X630-A4 (PiKVM-A4) allows to use C296 aluminum heatsink with your raspberry pi zero 2 w, but user need to prepare 4pcs M2.5*7mm screws yourself.
Hardware Parameters
User Manual
First you need to make sure your hardware connections are correct, please refer to the video and diagram below
Installation Video
PiKVM-A3 Kit: https://youtu.be/KrpHCsK7veA (Note: the X630-A3 V1.2 has been updated to X630-V1.3 and remove one on-board spacer to simplify the installation.)
Connection Diagram
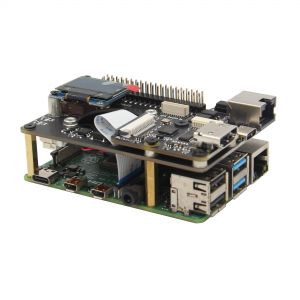
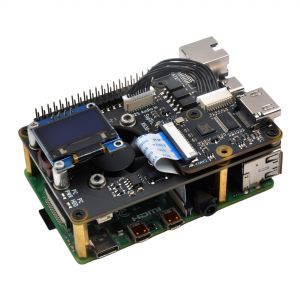
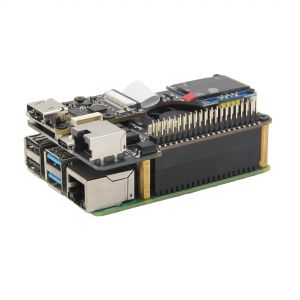
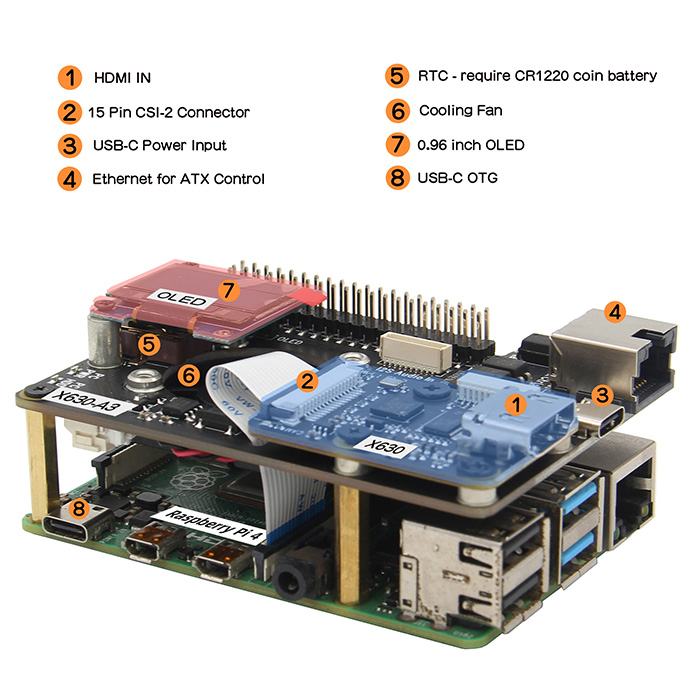
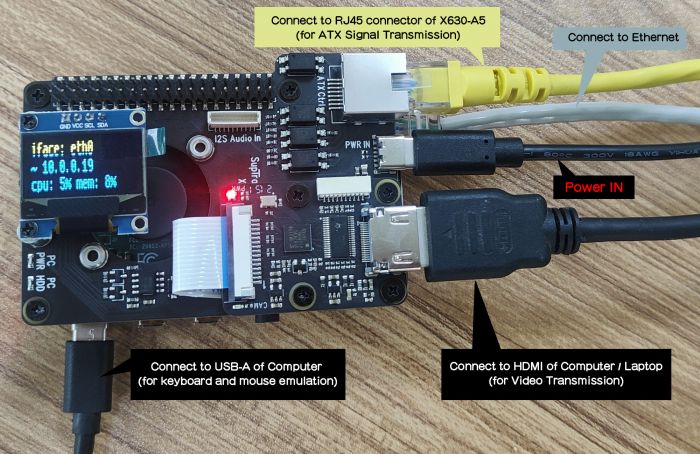
1. The PiKVM-A3 is composed of follow parts:
- X630 HDMI to CSI-2 Board (for video capture)
- X630-A3 HAT Board (for ethernet, cooling, RTC, ATX Control power in etc)
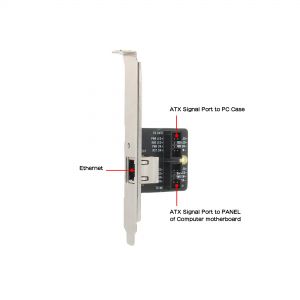
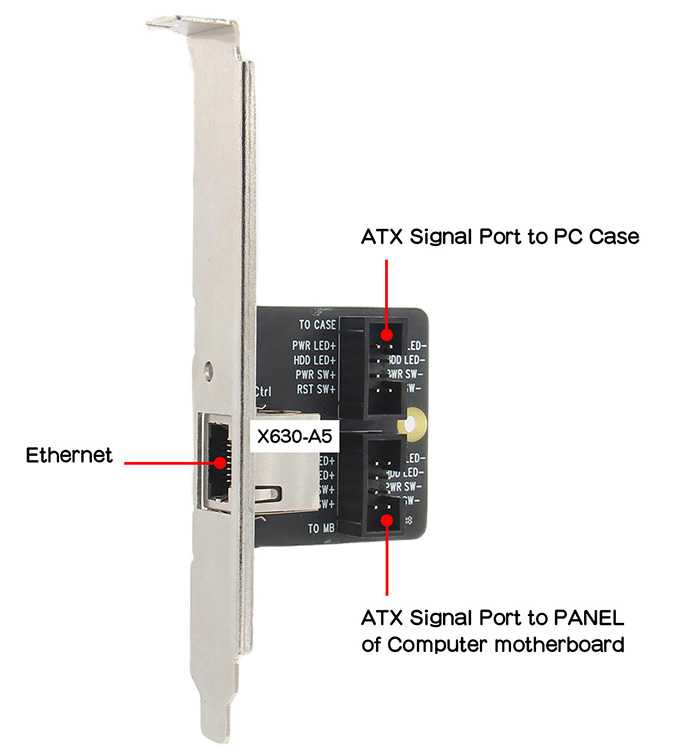
- X630-A5 Adapter Board (it is installed inside the PC case, and it connect the computer motherboard and IO panel cabe of PC case))
- 0.96 inch OLED (for display, Resolution: 128×64 pixel)
- Ethernet Cable (TIA/EIA-568.B connection, and it's ATX control signal cable)
Note:
- Please use the supplied USB Type-C to USB 2.0 A-Male Cable only. USB-C to USB-A cable only with DATA lines(for keyboard and mouse emulation) and no power supply, Using other cable might cause instability or damage to either the host PC or the Pi.
- We need to ensure you isolate the 5v connection between the Raspberry Pi and host PC to prevent backpower issues that can cause instability or damage to either the host PC or the Pi.
- Some PC case may not have HDMI port, you need to use VGA/DVI to HDMI adapter to transfer HDMI port, but VGA to HDMI adapter may not be compatible with PiKVM-A3
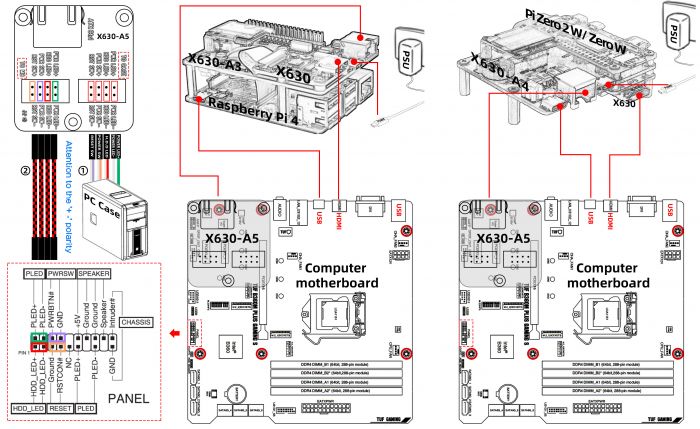
2. Connection Diagram
Click it to zoom in
Note:
- The X630-A5 adapter board will be install into the PC Case.
- The wire group ① connect to X630-A5 comes from the PANEL of PC Case.
- The black and red wires(wire group ②) come from X630-A5 accessories.
OS Download & Installation
1. Firstly, need prepair a micro sd card, a minimum 16 Gb class 10 memory card is recommended.
2. Download an appropriate OS image for the PiKVM, the url link is: https://pikvm.org/download/
- We recommend that you use the 'V3 Pre-Assembled' version, and this image includes OLED display configuration.
- For Raspberry Pi 4, please use PiKVM V3 platform. Only compatible with PiKVM V3 Platform OS, NOT support V4
3. Flash it to a microSD memory card by following the simple instructions or Official installation tutorial
4. Power the device, then open explore to login the pikvm web ui.
5. Blog sharing for reference: https://www.andysblog.de/kvm-over-ip-pikvm-als-bausatz
Enable RTC
Only need to configure the RTC function for the X630-A3 V1.5/V1.3/V1.2 version, X630-A3 V1.6 don't need.
Due to different RTC chips with official PiKVM hardware, you still need to configure RTC to make RTC work normally.
Firstly, insert the CR1220 button battery. run the following command in web terminal window:
1. switch to 'root' user
su root
then type the password, and the default password is 'root' also.
2. Switch OS to writable mode
rw
3. Edit the /boot/config.txt file, and change line dtoverlay=i2c-rtc,pcf8563 to dtoverlay=i2c-rtc,ds1307 (due to use the different RTC chip).
sudo nano /boot/config.txt
Then save & reboot the device;
4.Test & setting RTC, write&read the time of Raspberry Pi to RTC DS1307
date
sudo hwclock -w
sudo hwclock -r
5. Swith OS to readonly mode
ro
Enable OLED display
Run the following command in web terminal window to enable OLED display:
rw
systemctl enable --now kvmd-oled
ro
If you are using PiKVM OS V3 Pre-Assembled, the OLED configuration is already pre-installed, you can ignore this step.
Enable hdmi audio
Refer to Enable pikvm hdmi audio
FAQ
- First of all, we recommend you to get more FAQ information on the official website: official FAQ, or check the following FAQ;
- You can post a issue ticket at Geekworm forum or email to us (support@geekworm.com) and attached your installation pictures or videos to get some help.
- Blog sharing for reference: https://www.andysblog.de/kvm-over-ip-pikvm-als-bausatz
Q1: Which pins are available on the KVM-A3?
A: You only can use GPIO16,26,11,17,25,9,10 pins on KVM-A3
Q2. Why the device does not show the video only display No Signals?
A:
- Please check the hardware connection. Double-check that the video capture device is connected correctly and tightly.
- Make sure you use the original HDMI port. If your desktop only has a VGA display port, there may be no video signal when you use VGA to HDMI adapter, and there is no way to solve this; However, you can try to lower the resolution and restart the PC to test, but the probability of success is very low.
- Change the HDMI cable to test.
- Test the X630 separately to check if there is HDMI output.
- Some laptops do not output any signal until you switch the output (usually via the FN + and an F5 key on the keyboard).
- Your computer maybe enter sleep mode, please exit sleep mode
Q3. How to login pikvm?
A: Input https://pikvm/ or the XX.XX.XX.XX ip address on the web explorer, then input user: admin, the default password is 'admin' also. Or refer to pikvm doc
Q4. How to switch to root user?
A: run the following command:
su root
Then type the password, the default password is 'root' also.
Q5. How to enable OLED display?
A: Run the following command to enable OLED display:
rw
systemctl enable --now kvmd-oled
ro
Q6. Why OLED is not display?
A: Please follow the steps below to check
1. Please confirm that your OS is right:
Due to downloading the wrong firmware, the OLED cannot be displayed. We ALSO made such mistakes during testing.
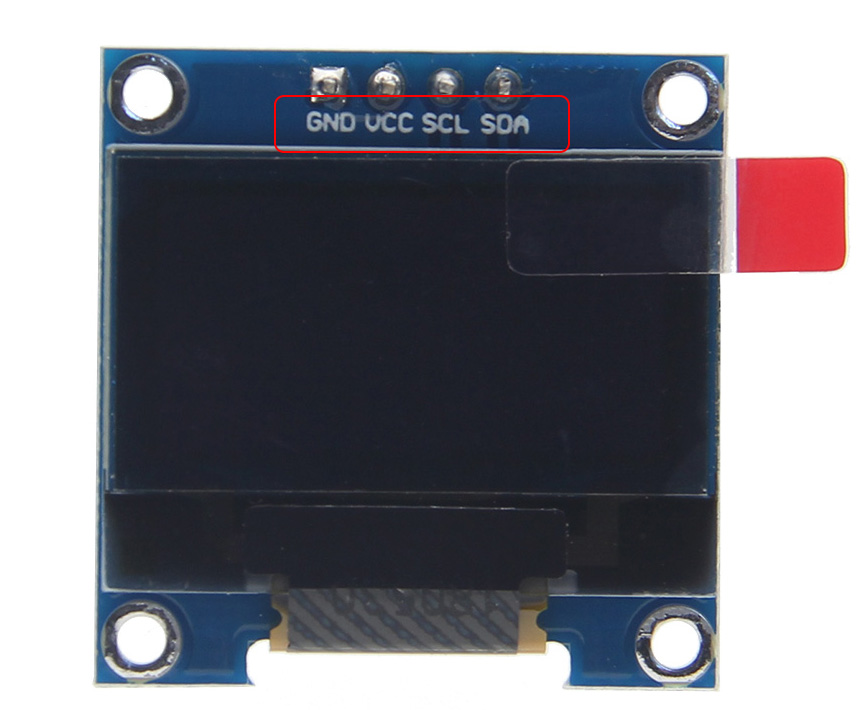
2. Please check if the order of OLED screen pins is correct, please contact us if it's a wrong pin order;
then runt the following command to check i2c address
sudo i2cdetect -y 1
     0  1  2  3  4  5  6  7  8  9  a  b  c  d  e  f
00:                         -- -- -- -- -- -- -- --
10: -- -- -- -- -- -- -- -- -- -- -- -- -- -- -- --
20: -- -- -- -- -- -- -- -- -- -- -- -- -- -- -- --
30: -- -- -- -- -- -- -- -- -- -- -- -- 3c -- -- --
40: -- -- -- -- -- -- -- -- -- -- -- -- -- -- -- --
50: -- -- -- -- -- -- -- -- -- -- -- -- -- -- -- --
60: -- -- -- -- -- -- -- -- -- -- -- -- -- -- -- --
70: -- -- -- -- -- -- -- --
3c is a hexadecimal number, it is the I2C address of OLED, if you can’t find this value, please shut down and reconnect X630-A3&OLED and run this command again, If you still can't find the OLED's I2C address, the OLED screen may be damaged.
PS: The newest PiKVM V3 image does not include i2cdetect tool, and you can use the following command to check the i2c device
ls /sys/class/i2c-dev/i2c-1/devices/
4. Then run the following command to enable OLED display:
rw
systemctl enable --now kvmd-oled
ro
Q7. I want to control several pc power. Is it possible with one PiKVM-A3 and several x630-a5
A. No, one kit can only control one pc, you can refer to X680 to control up to 4 PCs.
- ↑ PiKVM © belongs to https://pikvm.org

Enable comment auto-refresher
Anonymous user #29
Permalink |
Lisa
Anonymous user #28
Permalink |
Lisa
Anonymous user #27
Permalink |
Lisa
Anonymous user #26
Permalink |
Lisa
Anonymous user #26
Anonymous user #26
Lisa
Anonymous user #25
Permalink |
Anonymous user #27
Anonymous user #24
Permalink |
Lisa
Anonymous user #23
Permalink |
Anonymous user #22
Permalink |
Harry
Anonymous user #21
Permalink |
Lisa
Anonymous user #21
Permalink |
Anonymous user #15
Permalink |
Anonymous user #18
Lisa
Anonymous user #20
Permalink |
Anonymous user #15
Lisa
Anonymous user #19
Permalink |
Anonymous user #15
Anonymous user #18
Permalink |
Walker
Anonymous user #17
Permalink |
Walker
Anonymous user #16
Permalink |
Walker
Anonymous user #15
Permalink |
Walker
Anonymous user #15
Lisa
Anonymous user #14
Permalink |
Walker
Anonymous user #13
Permalink |
Harry
Harry
Anonymous user #10
Permalink |
Walker
Anonymous user #9
Permalink |
Anonymous user #10
Walker
Anonymous user #8
Permalink |
Walker
Harry
Walker
Permalink |
Anonymous user #6
Permalink |
Walker
Anonymous user #7
Anonymous user #7
Anonymous user #12
Harry
Anonymous user #15
Anonymous user #5
Permalink |
Walker
Anonymous user #4
Permalink |
Harry
Harry
Anonymous user #11
Anonymous user #12
Anonymous user #3
Permalink |
Anonymous user #3
Anonymous user #3
Anonymous user #3
Walker
Anonymous user #1
Permalink |
Lisa
Anonymous user #2