H402
Jump to navigation
Jump to search
Contents
Overview
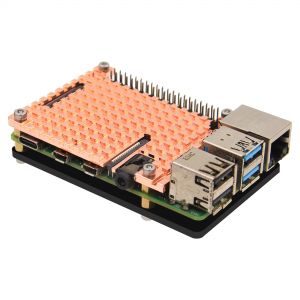
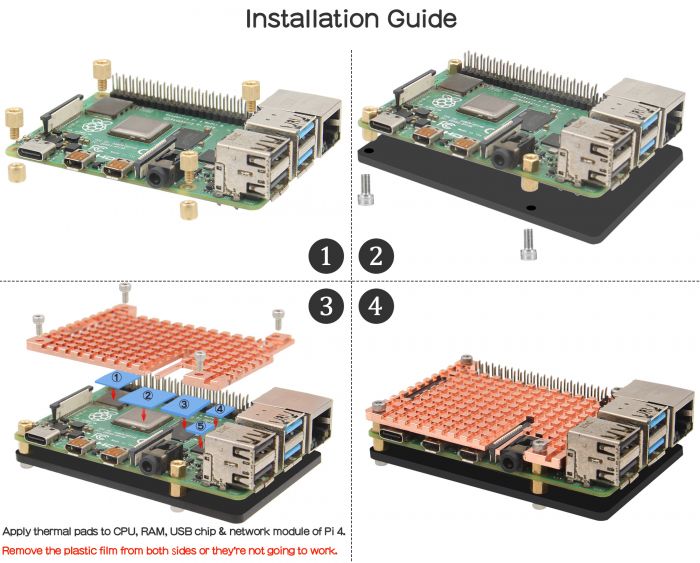
This is an ultra-thin one-piece copper heatsink specially designed for Raspberry Pi 4 Model B. CNC-processed copper heatsink with precise cutouts, designed to seamlessly fit the Raspberry Pi 4B motherboard.
Note: Please tear off the protective films on the surface of acrylic plate before use.
Geekworm Cooler Series:
| Picture | Model | Compatible With | Material | Thickness(mm) | Support Fan |
|---|---|---|---|---|---|
 |
C519 | Raspberry Pi Computer Module 5 (CM5) | Aluminum Alloy | 15mm | √ support fan installation |
 |
Pi 5 official Active Cooler | Raspberry Pi 5 | Aluminum Alloy | 10mm | √ with 4-pin 3010 blower fan |
 |
H505 | Raspberry Pi 5 | Aluminum Alloy | 11.6mm | √ with 4-pin 3007 blower fan |
 |
H509 | Raspberry Pi 5 | Aluminum Alloy | 15mm | × don't support fan installation |
 |
Argon THRML 30-AC | Raspberry Pi 5 | Aluminum Alloy | 9.6mm | √ with 4-pin 3007 blower fan |
 |
H501 | Raspberry Pi 5 | Aluminum Alloy | 9.5mm | √ with 4-pin 3007 blower fan |
 |
H502 | Raspberry Pi 5 | Copper | 4mm | × support 30x30 fan installation |
 |
P165-B | Raspberry Pi 4 | Aluminum Alloy | 11mm | × support 30x30 fan installation |
 |
P165-A | Raspberry Pi 4 | Aluminum Alloy | 7mm | × support 25x25 fan installation |
 |
H402 | Raspberry Pi 4 | Copper | 4mm | × don't support fan installation |
 |
C235 | Raspberry Pi Computer Module 4 (CM4) | Aluminum Alloy | 12mm | × support 30x30 fan installation |
 |
C296 | Raspberry Pi Zero 2 W | Aluminum Alloy | 10mm | × don't support fan installation |
Features
- Model: H402
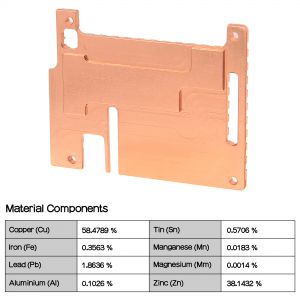
- Material: copper
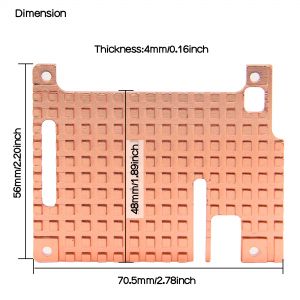
- heartsink Thickness: 4mm / 0.16inch
- Heatsink Net Weight: 59g / 0.13lb
- Comes with thermal pads for both CPU,RAM,USB chip and network module of Raspberry Pi 4
- Includes an acrylic plate for installing under the Raspberry Pi 4 to provide protection
Packing List
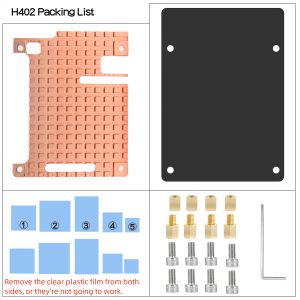
- 1x 4mm thickness copper heatsink
- 1x Acrylic Plate
- 4x M2.5x4+4mm F/M Spacers
- 4x M2.5x4mm F/F Spacers
- 8x M2.5x5 mm Hexagon Socket Screws
Enable comment auto-refresher
Anonymous user #2
Permalink |
Anonymous user #3
Anonymous user #1
Permalink |
Lisa