-
X650: Difference between revisions
Replace <comments/> with <comment-streams /> |
|||
| (14 intermediate revisions by 4 users not shown) | |||
| Line 2: | Line 2: | ||
[[File:X650-IMG-5483.jpg|thumb|right|X650 kvm shield]] | [[File:X650-IMG-5483.jpg|thumb|right|X650 kvm shield]] | ||
[[File:X650-IMG-5611-Interface-Schematic.jpg|thumb|right|X650 kvm hardware diagram]] | [[File:X650-IMG-5611-Interface-Schematic.jpg|thumb|right|X650 kvm hardware diagram]] | ||
[[File:IMG-7148-Dimension.jpg|thumb|right|X650 Dimension]] | |||
[[File:X650-IMG-5476.jpg|thumb|right|10-Pin Header function]] | [[File:X650-IMG-5476.jpg|thumb|right|10-Pin Header function]] | ||
[[File:X650-IMG-5474.jpg|thumb|right|10-Pin Header function]] | [[File:X650-IMG-5474.jpg|thumb|right|10-Pin Header function]] | ||
| Line 17: | Line 18: | ||
Want to know more information for pikvm, please refer to https://pikvm.org/ | Want to know more information for pikvm, please refer to https://pikvm.org/ | ||
<span style="color:red;">X650 V1.5 and X650 V1.3 has been discontinued, you can refer to [[X651]] or [[X652]]. </span> | |||
Key differences between X650 V1.5 & X650 V1.3 include: | |||
'''Input Resolution''' | |||
* X650 V1.3: Supports up to 1920×1080@<span style="color:red;">'''50Hz'''</span> | |||
* X650 V1.5: Supported up to 1920×1080@<span style="color:red;">'''60Hz'''</span> | |||
'''RTC Function''' | |||
* X650 V1.3: Requires manual [[X650#Enable_RTC|RTC configuration]] | |||
* X650 V1.5: No RTC configuration needed | |||
| Line 68: | Line 83: | ||
:We recommend that you use the ''''V3 Pre-Assembled'''' version, and this image includes OLED display configuration. | :We recommend that you use the ''''V3 Pre-Assembled'''' version, and this image includes OLED display configuration. | ||
:<span style="color:red;">Only compatible with PiKVM V3 platform OS, NOT support PiKVM V4 Plus & V4 Mini platform!!!</span> | :<span style="color:red;">Only compatible with '''PiKVM V3''' platform OS, NOT support PiKVM V4 Plus & V4 Mini platform!!!</span> | ||
:[[File:Pi4-V3-HAT.png|800px|PiKVM V3 platform]] | :[[File:Pi4-V3-HAT.png|800px|PiKVM V3 platform]] | ||
| Line 86: | Line 101: | ||
:'''3. Power the Device''' | :'''3. Power the Device''' | ||
:*Power on your device, then open a browser and log in to the PiKVM web UI. | :*Power on your device, then open a browser and log in to the PiKVM web UI. | ||
'''Option 2: CM4 with eMMC (requires additional steps)''' | '''Option 2: CM4 with eMMC (requires additional steps)''' | ||
:'''1. Prepare for flashing''' | :'''1. Prepare for flashing''' | ||
:*Short the nBOOT Pin as shown in the image below. | :*Short the nBOOT Pin as shown in the image below. | ||
::[[File:X650-IMG-5474-1.jpg|500px]] | ::[[File:X650-IMG-5474-1.jpg|500px]] | ||
: '''2. | : '''2. Use the '''USB-C to TYPC-A OTG cable''' included in the X650 box to connect to your computer | ||
: '''3. Power the Device''' | : '''3. Power the Device''' | ||
:*Use a 5V power adapter to power the device via the PWR | :*Use a 5V power adapter to power the device via the PWR Type-C port. | ||
: '''4. Flash the OS Image''' | : '''4. Flash the OS Image''' | ||
:*You need: i) install rpiboot utility, ii) install RaspberryPI imager iii) format the eMMC once connected to the host, iv) select OS, eMMC appearing on the host and flash it via imager | :*You need: i) install rpiboot utility, ii) install RaspberryPI imager iii) format the eMMC once connected to the host, iv) select OS, eMMC appearing on the host and flash it via imager | ||
| Line 139: | Line 151: | ||
==Packing List== | ==Packing List== | ||
* 1 x X650 | * 1 x X650 Expansion Board | ||
* 1 x X680-A1 V1.0 cooling fan Adapter board | * 1 x X680-A1 V1.0 cooling fan Adapter board | ||
* 1 x Colorful ATX Control Cable (Cable Length: 47cm / 18.50 inch) | * 1 x Colorful ATX Control Cable (Cable Length: 47cm / 18.50 inch) | ||
| Line 266: | Line 278: | ||
<!--Add review function! --> | <!--Add review function! --> | ||
< | <comment-streams id="main" /> | ||
<!--Please choose the --> | <!--Please choose the --> | ||
Latest revision as of 10:13, 27 May 2026


Overview
X650 shield is a member of the PiKVM[1] family. It is a Raspberry Pi CM4-based KVM-over-IP remote management PCI Express card that can be easily inserted into 1U and 2U form factors for PC, Sun and Mac platforms. It adds remote, unblocked, BIOS-level access and control to any server. Accessed from any web browser, it provides anytime, anywhere KVM access with security, stability and speed.
This IP KVM PCI card X650 offers KVM control from the BIOS-level onward. Reboot, monitor the entire boot process, and interact with your connected system easily, while the integrated remote ATX power control allows you to switch the machine on/off, reset it, and monitor power & storage LED activity remotely.
The x650 itself has a built-in Toshiba TC358743 chip, so it no longer needs the X630 for the HDMI to CSI function.
The X650 is also equipped with half-height and standard-height bracket, both mini and standard desktop hostsworkable.
Want to know more information for pikvm, please refer to https://pikvm.org/
X650 V1.5 and X650 V1.3 has been discontinued, you can refer to X651 or X652.
Key differences between X650 V1.5 & X650 V1.3 include:
Input Resolution
- X650 V1.3: Supports up to 1920×1080@50Hz
- X650 V1.5: Supported up to 1920×1080@60Hz
RTC Function
- X650 V1.3: Requires manual RTC configuration
- X650 V1.5: No RTC configuration needed
Geekworm KVM family products:
| Model | Compatible With | Form Factor | Max Input Resolution | ATX Control | RTC Chipset | OLED display | PoE | RS232 Console | Ethernet | M.2 NVMe Socket | Control of PCs | USB HUB | I2S audio |
|---|---|---|---|---|---|---|---|---|---|---|---|---|---|
| KVM-A3 V1.6 | Raspberry Pi 4 | HAT | 1920x1080 @50Hz | Yes | DS1307 | 0.96" | No | No | 1GbE | No | 1 | No | Yes In-phase I2S wire |
| KVM-A8 V1.8 | Raspberry Pi 4 | PCI | 1920x1080 @50Hz | Yes | PCF8563 | 0.96" (Equipped with a 2P wire to connect the OLED) |
802.3af | No | 1GbE | No | 1 | No | Yes Inverted-phase I2S wire |
| KVM-A4 V2.0 | Raspberry Pi 2W | HAT | 1920x1080 @50Hz | Yes | DS1307 | 0.96" | No | No | No | No | 1 | No | No |
| X680 V1.5 | Raspberry Pi CM4 | Box | 1920x1080 @60Hz | Yes | PCF8563 | 0.96" | No | No | 1GbE | 2280 | 4 | Yes | HDMI audio supported |
Updated to V1.5 now |
Raspberry Pi CM4 | Box | 1920x1080 @50Hz | Yes | DS1307 | 0.96" | No | No | 1GbE | 2280 | 4 | Yes | HDMI audio supported |
| X651 V1.0 | Raspberry Pi CM4 | PCI | 1920x1080 @60Hz | Yes | DS1307 | 0.96" | 802.3af | No | 1GbE | No | 1 | No | HDMI audio supported |
| Raspberry Pi CM4 | PCI | 1920x1080 @50Hz | Yes | DS1307 | No | No | No | 1GbE | No | 1 | No | HDMI audio supported | |
| Raspberry Pi CM4 | PCI | 1920x1080 @60Hz | Yes | DS1307 | No | No | No | 1GbE | No | 1 | No | HDMI audio supported | |
| Raspberry Pi CM4 | PCI | 1920x1080 @60Hz | Yes | DS1307 | No | 802.3af (POE injector is required due to compatibility issues) |
No | 1GbE | 2280 | 1 | No | No |
Features
- Only Compatible with the Raspberry Pi Compute Module 4 and Compatible with all variants, and full Compatible with PiKVM OS (Raspberry Pi-based KVM over IP)
- Only compatible with PiKVM V3 OS, NOT support V4
- PCI style, installs justs like any PCI card into a tower / desktop PC
- Supports video and audio.
- Low profile and standard profile bracket Inside-both Mini and standard desktop host workable
- HDMI Full HD capture based on the Toshiba TC358743 chip,supports HDMI input resolutions up to 1920x1080
- OTG Keyboard & mouse; Mass Storage Drive emulation
- Hardware Real Time Clock (RTC) with CR1220 coin battery socket
- Gigabit Ethernet socket supporting Power over Ethernet (POE) expansion, reserve the 4-PIN POE Pin.(Need extra PoE module)
- Equipped with cooling fan that allows the heat from your CM4 to dissipate
How to Power
- Power Input: 5.1Vdc +/-5% , ≥3A (Power via USB Type-C PWR port of X650)
- Use splitter to get POE power supply, refer to PoE splitter.

About POE Splitter, refer to PD3005G-3A
How to Cool
- X650 equipped with an active cooling fan board (X680-A1) that can cool your Raspberry Pi CM4, and X680-A1 is included in the Packing List;
- In fact, if you don't like fans, you can try C235, which can fully meet the cooling needs of CM4, but C235 is NOT included in the Packing List;
-
 X680-A1
 -


User Manual
PiKVM is a Free and Open Source Software that is released under the GPLv3 license. The Operating System (OS) image provided here is solely for the purpose of hardware testing. For commercial use, it is advised to directly contact the developers of PiKVM.
Installation Video
X650: https://youtu.be/2nKzQlkTXF8
Connection Diagram
Overall connection diagram:

OS download and install
1. Firstly, need prepair a micro sd card, a minimum 32/64 Gb class 10 memory card is recommended. If you use a CM4 with eMMC, you don't need a micro sd card.
2. Download an appropriate OS image for the PiKVM, the url link is https://pikvm.org/download/ or click this one to download it. (Please use the V3 Pre-Assembled OS image)
- We recommend that you use the 'V3 Pre-Assembled' version, and this image includes OLED display configuration.
- Only compatible with PiKVM V3 platform OS, NOT support PiKVM V4 Plus & V4 Mini platform!!!
Flash OS image
First, decide which CM4 module you wish to use:
- CM4 without eMMC (simpler, but you need a 32GB or 64GB micro sd)
- CM4 with eMMC (requires additional steps)
Option 1: CM4 without eMMC
- 1. Prepair flashing tools:
- You can use Raspberry Pi Imager or one of the following tools:
- balenaEtcher: Compatible with Windows, macOS, and Ubuntu.
- Win32 Disk Imager: Designed for Windows.
- 2. Flash the OS Image to a MicroSD Card
- 3. Power the Device
- Power on your device, then open a browser and log in to the PiKVM web UI.
Option 2: CM4 with eMMC (requires additional steps)
- 1. Prepare for flashing
- Short the nBOOT Pin as shown in the image below.
- 2. Use the USB-C to TYPC-A OTG cable included in the X650 box to connect to your computer
- 3. Power the Device
- Use a 5V power adapter to power the device via the PWR Type-C port.
- 4. Flash the OS Image
- You need: i) install rpiboot utility, ii) install RaspberryPI imager iii) format the eMMC once connected to the host, iv) select OS, eMMC appearing on the host and flash it via imager
- You can refer to Jeff's tutorial or Raspberry Pi Official Tutorial for detailed instructions on flashing the OS.
- 5. Complete the Process
- Remove the nBOOT jumper after the flashing is complete, then restart your device.

Note: For CM4 with eMMC, the SD card cannot be used.
Enable RTC
Since X650 V1.5, we have used the same pcf8563 RTC chip with PiKVM official hardware, so you don't need to do anything, just skip this step, the RTC will work fine. If you are using V1.3, you still need to do this step.
For V1.3 version, you need to configure RTC to make RTC work normally.
Firstly, insert the C1220 button battery. run the following command in web terminal window:
1. switch to 'root' user
su root
then type the password, and the default password is 'root' also.
2. Switch OS to writable mode
rw
3. Edit the /boot/config.txt file, and change line dtoverlay=i2c-rtc,pcf8563 to dtoverlay=i2c-rtc,ds1307 (due to use the different RTC chip).
sudo nano /boot/config.txt
Then save & reboot the device;
4.Test & setting RTC, write&read the time of Raspberry Pi to RTC DS1307
date
sudo hwclock -w
sudo hwclock -r
5. Swith OS to readonly mode
ro
Enable OLED display
Run the following command in web terminal window:
rw
systemctl enable --now kvmd-oled
ro
If you are using PiKVM OS V3 Pre-Assembled, the OLED configuration is already pre-installed, you can ignore this step.
Enable pikvm hdmi audio
Refer to Enable pikvm hdmi audio
Packing List
- 1 x X650 Expansion Board
- 1 x X680-A1 V1.0 cooling fan Adapter board
- 1 x Colorful ATX Control Cable (Cable Length: 47cm / 18.50 inch)
- 1 x Mini HDMI to HDMI Cable (Length: 50cm/19.69)
- 1 x USB-A to USB-C OTG Cable (Length: 50cm/19.69)
- 1 x Standard height PCIe Add-in Card I/O Bracket
- 1 x Low height PCIe Add-in Card I/O Bracket
- 1 x Screws Pack

References
- ↑ PiKVM © belongs to https://pikvm.org
FAQ
- First of all, we recommend you to get more FAQ information on the official website: official FAQ, or check the following FAQ;
- You can post a issue ticket at Geekworm forum or email to us (support@geekworm.com) and attached your installation pictures or videos to get some help.
- Blog sharing for reference: https://www.andysblog.de/kvm-over-ip-pikvm-als-bausatz
Why the device does not show the video only display No Signals?
- Double-check that the video capture device is connected correctly and tightly. For the CSI bridge, this should be exactly the camera port;
- Some laptops do not output any signal until you switch the output (usually via the FN + and an F5 key on the keyboard).
- Your computer maybe enter sleep mode, please exit sleep mode
- If your desktop only has a VGA display port, there may be no video signal when you use VGA to HDMI adapter, and there is no way to solve this; However, you can try to lower the resolution and restart the PC to test, but the probability of success is very low.
Why is the X650 not working?
A:1. First you need to make sure your physical connection is correct, or you can email us at support@geekworm.com to confirm your physical connection;
2. Make sure to use the right pikvm OS.


How to switch to root user?
A: run the following command:
su root
Then type the password, the default password is 'root' also.
Does the x650 support audio?
A: Yes. Refer to Enable pikvm hdmi audio
Does the x650 support OLED display?
A: Yes.
Please connect the OLED shield as shown below (But we actually think OLED displays are pointless):
Then run the following command to enable oled display
rw
systemctl enable --now kvmd-oled
ro
About OLED shield, refer to OLED
Does the X650 support PoE power? How to enable PoE Power?
A: The X650 reserve the POE port, but need to use with customized POE module to support PoE power, and the customized POE module still not release now. And the X650 does not support the Raspberry Pi official PoE module. Recommend to use PiKVM-A8 kit, if you need PoE power.
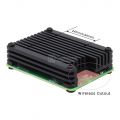
What's the function of mini HDMI?
A: The X650 mini hdmi is to output some information from the PiKVM OS server, please refer to the below picture:
