- First of all, we recommend you to get more FAQ information on the official website: official FAQ, or check the following FAQ;
- You can post a issue ticket at Geekworm forum or email to us (support@geekworm.com) and attached your installation pictures or videos to get some help.
- Blog sharing for reference: https://www.andysblog.de/kvm-over-ip-pikvm-als-bausatz
Q: How to enable oled display on KVM-A4?
A:
- First refer to the [official link | https://docs.pikvm.org/faq/#video-problems] to troubleshoot the problem
- Please check the hardware connection. Double-check that the video capture device is connected correctly and tightly.
- Make sure you use the original HDMI port. If your desktop only has a VGA display port, there may be no video signal when you use VGA to HDMI adapter, and there is no way to solve this; However, you can try to lower the resolution and restart the PC to test, but the probability of success is very low.
- Change the HDMI cable to test.
- Test the X630 separately to check if there is HDMI output.(run the
ls /dev/video0command, if you see anything such as /dev/video0 other than file not found, then it’s available ) - Some laptops do not output any signal until you switch the output (usually via the FN + and an F5 key on the keyboard).
- Your computer maybe enter sleep mode, please exit sleep mode.
- Feedback from users: If you're using something like NGINX Proxy Manager, you must have Websockets Support enabled for it to work correctly – screenshots below:
- Feedback from users: Multiple Network IPs. if you'll have similar thing in the future: janus is using stun servers for determining public ip address, if the network has several public IP addresses and route traffic through multiple of those, janus via stun will detect the change of the network and restart the stream each time
Solution: either lock traffic from pikvm through one gateway (one public IP address) or configure some sort of session persistence (sticky connection)
Q: Which pins are available on the KVM-A3?
A: You only can use GPIO16, 26, 11, 17, 25, 9, 10 pins on KVM-A3
A. No, one kit can only control one pc, you can refer to X680 to control up to 4 PCs.
Q: How to do if KVM-A8 hangs up or reboot or has to be started manually?
A. The KVM-A8 hardware itself does not cause the system to reboot, and [[KVM-A8 shield is controled by raspberry pi 4;
Please ensure these keys:
1. The PiKVM OS version is correct;
2. Check & use a high-quality power supply;
3. Whether the raspberry pi 4 temperature is too high;
4. Contact us via email to support@geekworm.com
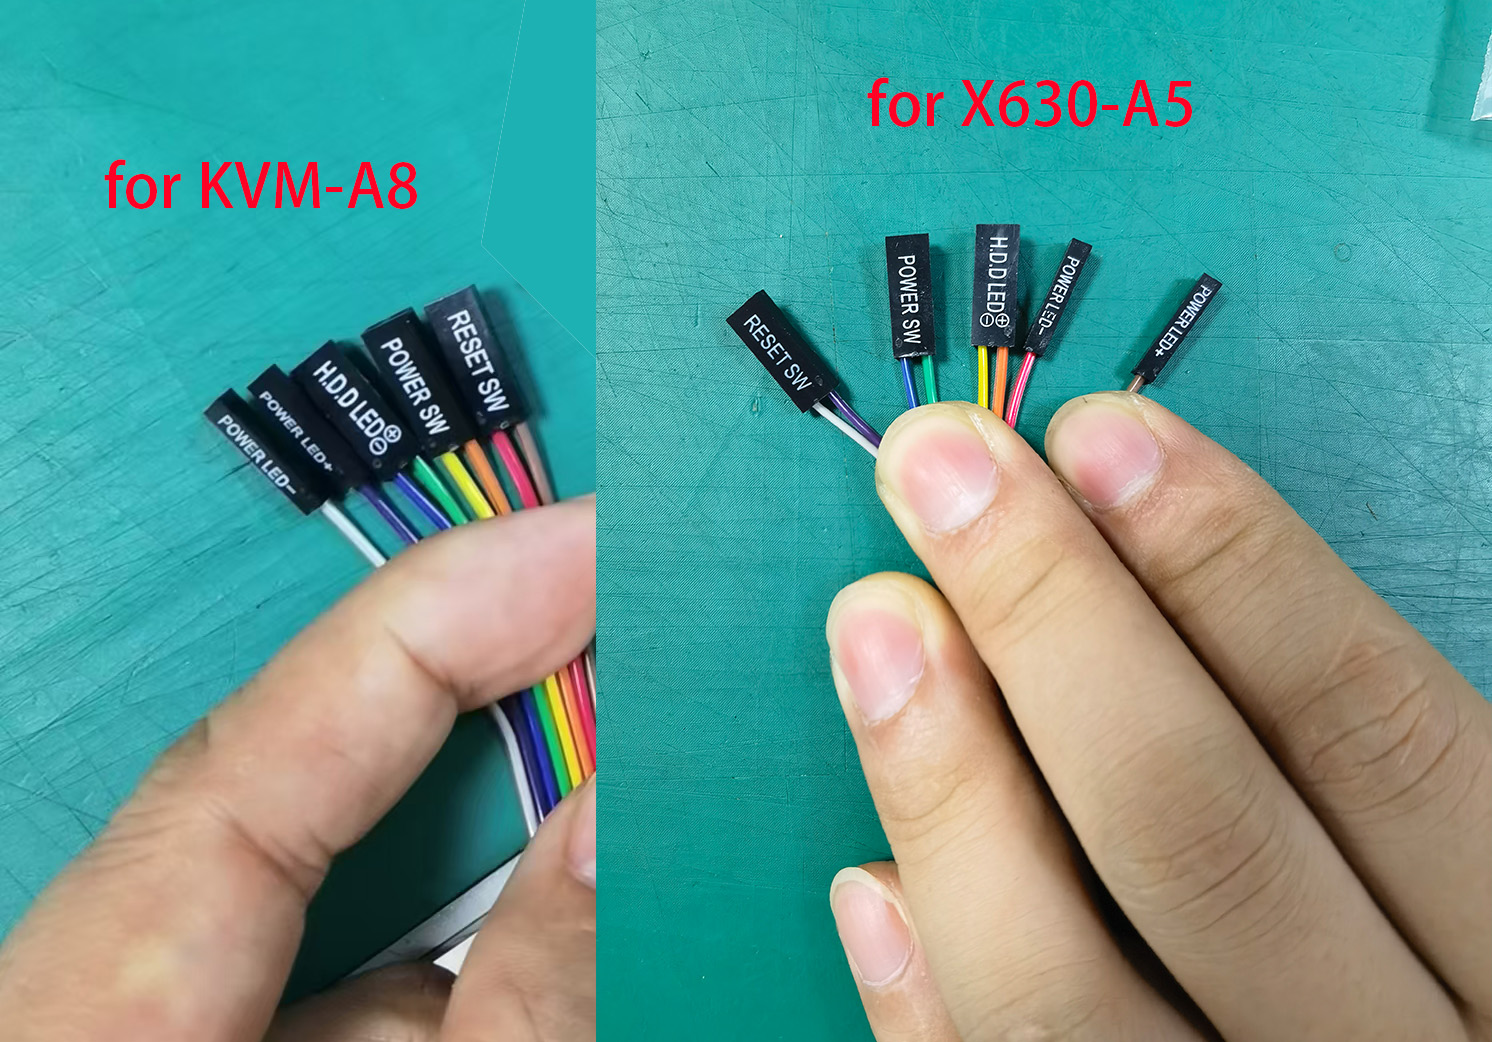
If you find that the color wiring is wrong, please contact us at support@geekworm.com
Q. I want to control several pc power. Is it possible with one KVM-A8
A: No, one PiKVM-A8 can only control one pc. Please refer to X680 4-port IP KVM Switch.
Q. How to login pikvm os?
A: Input the XX.XX.XX.XX ip address on the explorer, then input user: admin, the default password is 'admin' also.
Or refer to GETTING TO KNOW THE INTERFACE
Q: How to connect to wifi?
A: Refer to | Optional setting up Wi-Fi
If you want to connect KVM to a Wi-Fi network, you need to tell the device ESSID and password before first boot. To do this, mount the first partition of the memory card (FAT32) and edit or make the pikvm.txt file there. Do not remove line FIRSTBOOT=1 or FIRST_BOOT-1 for first time booting, just add your wifi settings like this:
FIRSTBOOT=1
WIFI_ESSID='mynet'
WIFI_PASSWD='your password'
There is a possibility that, in countries that support CH13, the device will not connect. You will need to configure your router to disable channels 12-14 or disable Auto scan mode so it will connect.
Save, unmount and follow the next step.
Q. How to switch root user?
A:
su root
#default password  is root also
Q: Will there will be a case for KVM-A4?
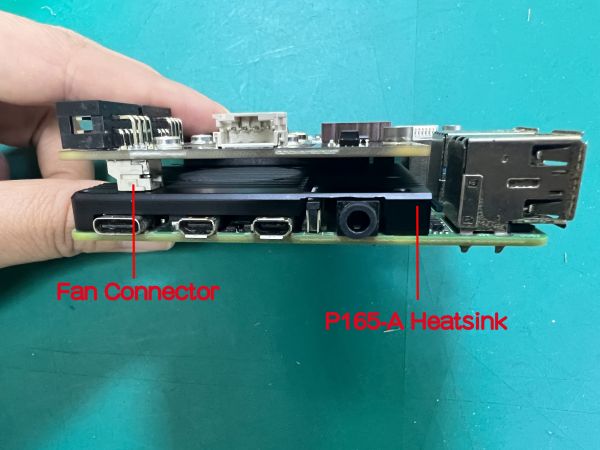
Q. Does KVM-A8 support passive heatsink such as (P165-A or P165-B etc) instead of fan?
A: You can use the P165 aluminium heatsink or the H402 pure copper heatsink, but must remove the X630-A8 fan and fan connector.
①If use P165-A(thickness 7mm), you can use M2.5*5mm spacer instead of M2.5*12mm spacer to fix it;
②if use P165-B(thickness 11mm), you can directly use M2.5*6mm screws to fix it;
③if use H402(thickness 4mm), you can use M2.5*8mm spacer instead of M2.5*12mm spacer.
You can also use other suitable spacers + screws to fix the heatsink.


Enable comment auto-refresher