Raspberry Pi IR Control Expansion Board
Contents
Introduction
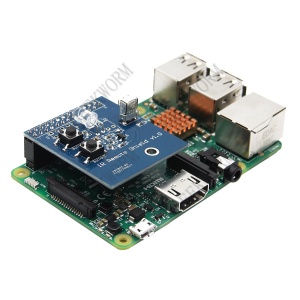
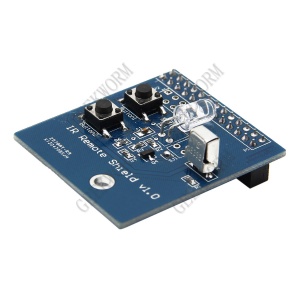
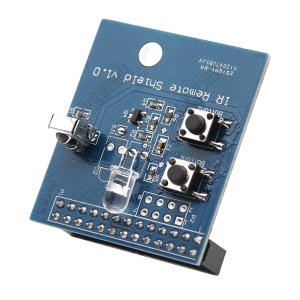
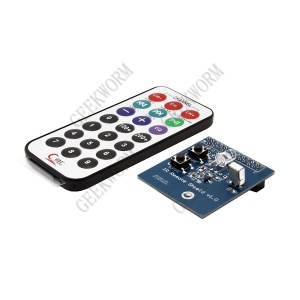
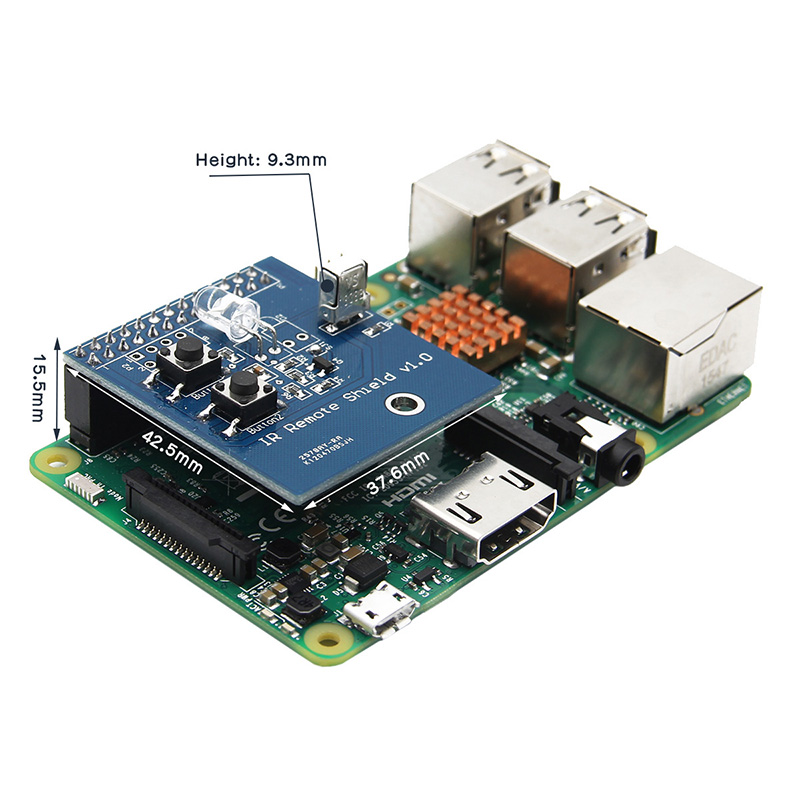
It is specific for Raspberry Pi IR control expansion board, you can use Pi 3B+/3B/2B/ B+ expansion board to realize the IR control function.
Dimensions
Function
1. IR Receive Function
Working frequency: 38KHz
Receive distance: 18-20m
Receive angle: +/-45 angle
2. IR Launch Function
wavelength: 940nm
Launch distance: 7-8m
3. Support launching with IR double LED.(You need to weld backup launch tube D2, and cut off SJ1.)
4. Support LIRC software. You can copy all of the IR remote control function with LIRC and expansion board.(Such as TV, Power amplifier and DVD etc), you can also use commands to control the appliances.
5. Support XBMC system.
6. Support Double GPIO button.
LIRC Software
1. Connect the IR Remote Shield to your Raspberry Pi, turn it on. Log in to the Raspberry Pi. install LIRC software(Linux Infrared remote control) .
sudo apt-get install lirc
2. Edit config.txt, and add configuration. (IR launcher for IR Board=17, IR receiver=18)
PS: For the those expansion board such as DAC II,DiGi+, DAC+ or Stepper/Motor/Servo Robot Expansion Board SKU:418460, only exist Receiver no launcher, and gpio_in_pin=26 (GPIO PIN)
sudo nano /boot/config.txt
Add the following content to config.txt
dtoverlay=lirc-rpi,gpio_in_pin=18,gpio_out_pin=17
Notice: The version under raspbian-02-05 please refer to the below step 2 !!!
2. Edit Modules, and add configuration.
sudo nano /etc/modules
Add the two line content to end of this file
lirc_dev
lirc_rpi gpio_in_pin=18 gpio_out_pin=17
3. Edit the configuration file of LIRC, enables the IR function.
sudo nano /etc/lirc/hardware.conf
modify the following content:
LIRCD_ARGS="--uinput --listen"
DRIVER="default"
DEVICE="/dev/lirc0″
MODULES="lirc_rpi"
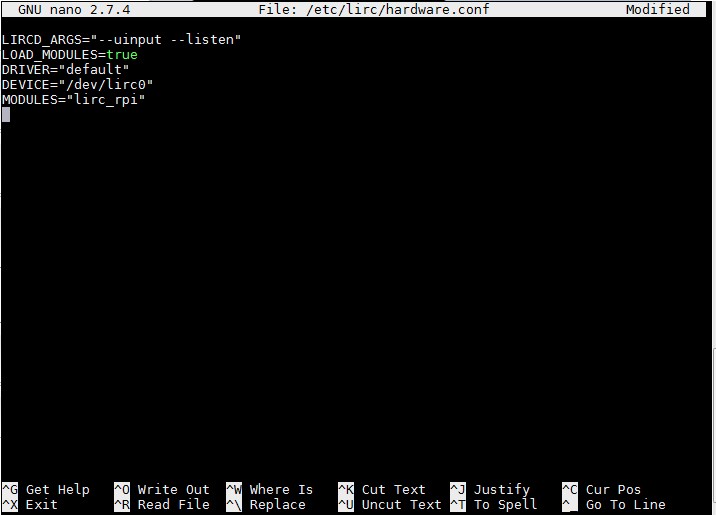
PS: please create a new hardware.conf file if the hardware.conf file is not exist. the comment of file is as following:
LIRCD_ARGS="--uinput --listen"
LOAD_MODULES=true
DRIVER="default"
DEVICE="/dev/lirc0"
MODULES="lirc_rpi"
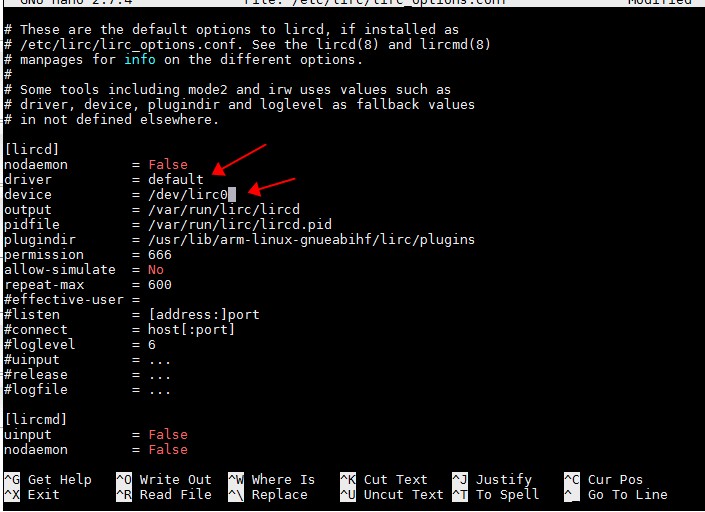
then edit the /etc/lirc/lirc_options.conf file; and modify the following lines;
driver = default
device = /dev/lirc0
4. Restart the LIRC function
sudo /etc/init.d/lirc stop
sudo /etc/init.d/lirc start
Until now the configutarion has been finished!
PS: if you can't find the above command, maybe you use the new lirc versin, please try the following command:1
sudo /etc/init.d/lircd stop
sudo /etc/init.d/lircd start
IR Receive Function
1. Stop LIRC software
sudo /etc/init.d/lirc stop
2. Issue the following command:
mode2 -d /dev/lirc0
3. Press any button of IR remote controller in front of the remote sheild. You should be able to see something like this in your terminal:
space 16300
pulse 95
space 28794
pulse 80
space 19395
pulse 83
space 402351
pulse 135
space 7085
pulse 85
space 2903
And that means your IR Remote Shield is working well!
IR Transmitting Function
1. Stop LIRC software
sudo /etc/init.d/lirc stop
2. Input command ‘irrecord –list-namespace‘. The parameter will provide the tips of valid button name(Write it down as you will need to input these names manually).
irrecord –list-namespace
3. Issue the command of IR code recording.
irrecord -d /dev/lirc0 ~/lircd.conf
Then just follow the instruction printed on the screen. After you’ve finished everything, the information of your remote controller will be saved in /home/pi/lircd.conf.
4. Copy /home/pi/lircd.conf to /etc/lirc/, overwrite the existing file: sudo cp /home/pi/lircd.conf /etc/lirc/lircd.conf
Then restart LIRC:
sudo /etc/init.d/lirc restart
You can double check the keys you just recorded:
irsend LIST /home/pi/lircd.conf ""
You should be able to see something like this:
irsend: 000000000000c837 KEY_VOLUMEDOWN
irsend: 00000000000048b7 KEY_VOLUMEUP
irsend: 00000000000008f7 KEY_VIDEO_PREV
irsend: 0000000000008877 KEY_VIDEO_NEXT
5. Now You can now transmit IR commands:
irsend SEND_ONCE /home/pi/lircd.conf KEY_VIDEO_PREV
irsend SEND_ONCE /home/pi/lircd.conf KEY_VIDEO_NEXT
irsend SEND_ONCE /home/pi/lircd.conf KEY_VOLUMEDOWN
irsend SEND_ONCE /home/pi/lircd.conf KEY_VOLUMEUP
Features of remote control:
- Remote control distance: 8~10m
- 38KHz universal remote control for arduino
Download
Control the Application via web IR
Control the Application via Phone APP
Only IR receive Application under XBMC
FAQ
1. How to add a second IR LED on the board?
If you need to add a second IR LED, you need to remove the solder joint of SJ1. Then weld the second led on D2, same direction as D1.
2. How do I know if my board is working? I followed the instructions on the wiki, and there is no /dev/lirc0.
Newer versions of the RaspberryPi Operating systems use lircd (note the d at the end). Follow the instructions on the wiki (www.raspberrypiwiki.com/index.php/Raspberry_Pi_IR_Control_Expansion_Board). There are other links at the bottom of the wiki which might help. Also, this post helped me: https://gist.github.com/prasanthj/c15a5298eb682bde34961c322c95378b
You may also need to search for other tips on the internet which use lirc (lircd); some of these have test programs, which blink the IR Led so you can see it working - to see it working, watch it with your smartphone camera - the phone camera changes IR to violet so you can see it.
Packing List
- 1 x IR Control Board
- 1 x Remote Controller(without battery, battery type is CR2025 3V button battery )

Enable comment auto-refresher
Anonymous user #10
Permalink |
Anonymous user #9
Permalink |
Anonymous user #7
Permalink |
Anonymous user #8
Anonymous user #6
Permalink |
Anonymous user #6
Permalink |
Anonymous user #5
Permalink |
Anonymous user #4
Permalink |
Anonymous user #3
Permalink |
Anonymous user #3
Permalink |
Anonymous user #2
Permalink |
Admin
Anonymous user #1
Permalink |
Admin
Anonymous user #1
Permalink |
Admin