Robot Expansion Board
Contents
Introduction
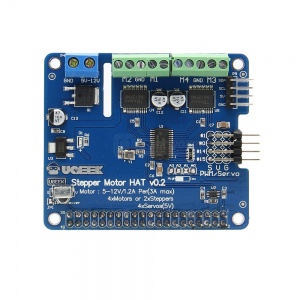
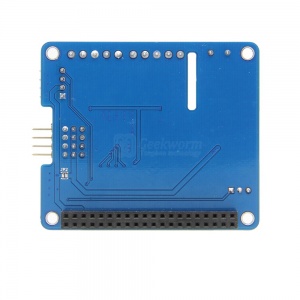
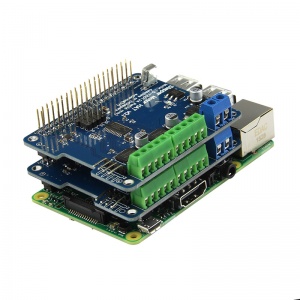
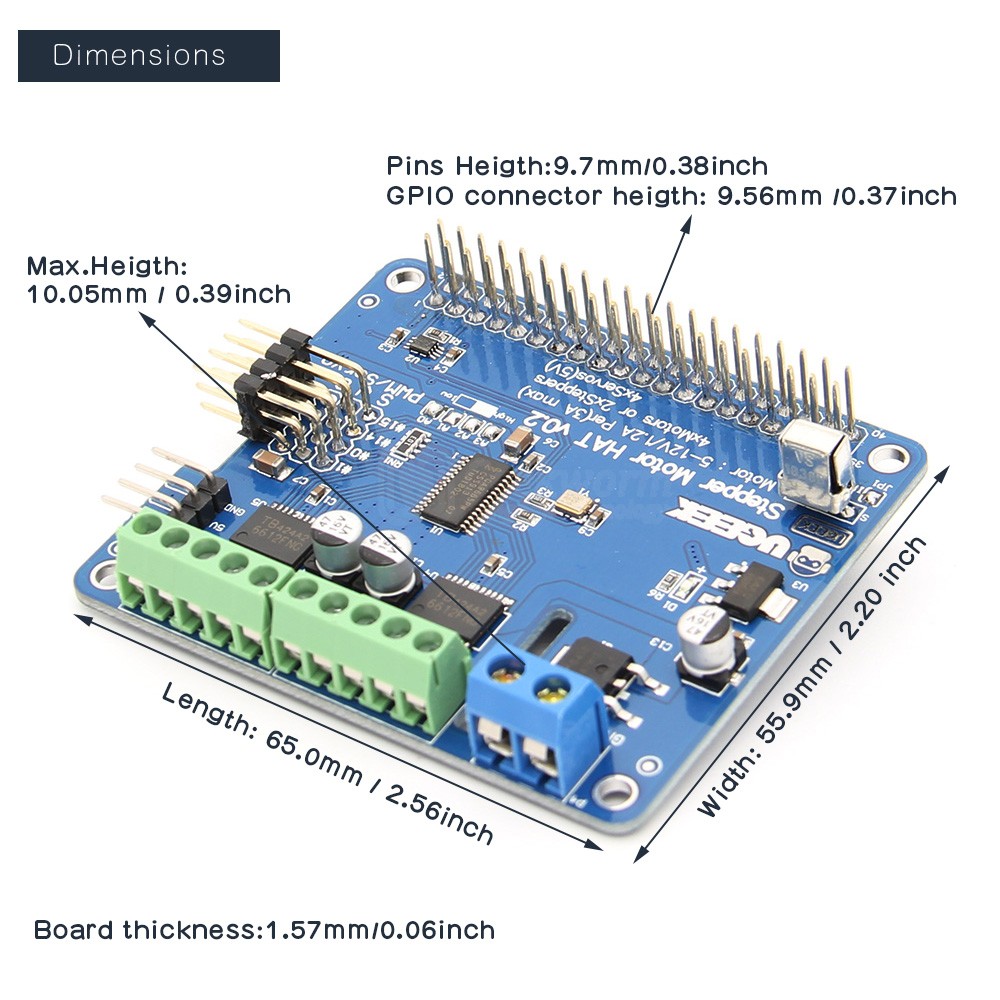
Full function Robot Expansion Board (Support Stepper / Motor / Servo) for Raspberry Pi 3 Model B / 2B / B+
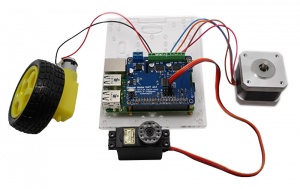
Stepper motors are great for (semi-)precise control, perfect for many robot and CNC projects. This HAT supports up to 2 stepper motors. The python library works identically for bi-polar and uni-polar motors Running a stepper is a little more intricate than running a DC motor but its still very easy
Note: the motor(steering engine)voltage is 5V, the current should be around 200mA. It is suggest to use the 996, 995 series motor (steering engine).
Important Note
[New to Python and/or robotics] please refe to Alictronix/Raspi-MotorHat (Thanks information from Tom Scott)
Please read this file: File:Stepper-Motor-HAT-User-Guide1.docx carefully before ask any questions. This file included all the details, you will find all the information in this file.
Function:
- 4 H-Bridges:provides 1.2A per bridge (3A peak) with thermal shutdown protection, internal kickback protection diodes. Can run motors on 5VDC to 12VDC.
- Up to 4 bi-directional DC motors with individual 8-bit speed selection (so, about 0.5% resolution)
- Up to 2 stepper motors (unipolar or bipolar) with single coil, double coil, interleaved or micro-stepping.
- Up to 4 Channel 12-bit PWM/Servo(5V)
- OneInfrared Receiver(GPIO26)
- Big terminal block connectors to easily hook up wires (18-26AWG) and power
- Polarity protected 2-pin terminal block and jumper to connect external 5-12VDC power
- Works best with Raspberry Pi model A+, B+, or Pi 2;
Voltage requirements
The first important thing to figure out what voltage the motor is going to use. If you're lucky your motor came with some sort of specifications. Some small hobby motors are only intended to run at 1.5V, but its just as common to have 6-12V motors. The motor controllers on this HAT are designed to run from 5V to 12V.
MOST 1.5-3V MOTORS WILL NOT WORK or will be damaged by 5V power
Current requirements
The second thing to figure out is how much current your motor will need. The motor driver chips that come with the kit are designed to provide up to 1.2 A per motor, with 3A peak current.
Note that once you head towards 2A you'll probably want to put a heat-sink on the motor driver, otherwise you will get thermal failure, possibly burning out the chip.
If you don't have to take your project on the go, the 9V 1A, 12V 1A, or 12V 5A will work nicely 99% of 'weird motor problems' are due to having a voltage mismatch (too low a voltage, too high a voltage) or not having a powerful enough supply! Even small DC motors can draw up to 3 Amps when they stall.
Power it up
Wire up your battery pack to the Power terminal block on the right side of the HAT. It is polarity protected but still its a good idea to check your wire polarity. Once the HAT has the correct polarity, you'll see the LED light up
Please note the HAT does not power the Raspberry Pi, and we strongly recommend having two seperate power supplies - one for the Pi and one for the motors, as motors can put a lot of noise onto a power supply and it could cause stability problems!
How to use the IR receive function
Please refer to Raspberry Pi IR Control Expansion Board
PS: Only exist IR receive function for expansion board;
About some syntax errors for Sample Code
Please enable I2C function before you start any action, please refer to How to enable I2C
OK, we relase the sample base Python 3. please refer to File:Raspi-MotorHAT-python3.zip
- Python 2 sample code: File:Raspi-MotorHAT.zip
- Python 3 sample code: File:Raspi-MotorHAT-python3.zip
This is sample code is base Python 2.7;
You will get some syntax and other errors if you use the Python 3;
Some differences between python 2 and python 3: More details
python 2: print is the keyword.
python 3: print is the function; etc.
Please change some code for python 3;
such as:
print s_per_s, " sec per step"
=>
print (s_per_s)
print(" sec per step")
we will update the sample code base on python 3 soon.
Document
- File:Stepper-Motor-HAT-User-Guide1.docx
- Python 2 sample code: File:Raspi-MotorHAT.zip
- Python 3 sample code: File:Raspi-MotorHAT-python3.zip
- More details, please refer to: https://github.com/Alictronix/Raspi-MotorHat
Packing List
- 1 x Robot Board
FAQ
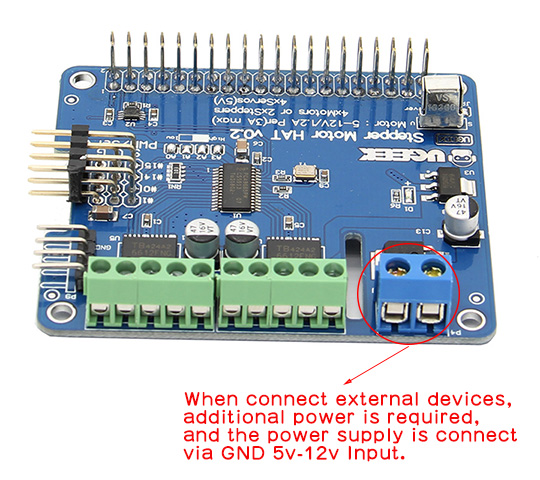
1. Does the board require the additional power supply?
The robot expansion board does not require additional power, and it is powered by the Raspberry Pi; However, external devices controlled by the expansion board, such as the steering gear, require additional power supply. please refer to the following pictures:
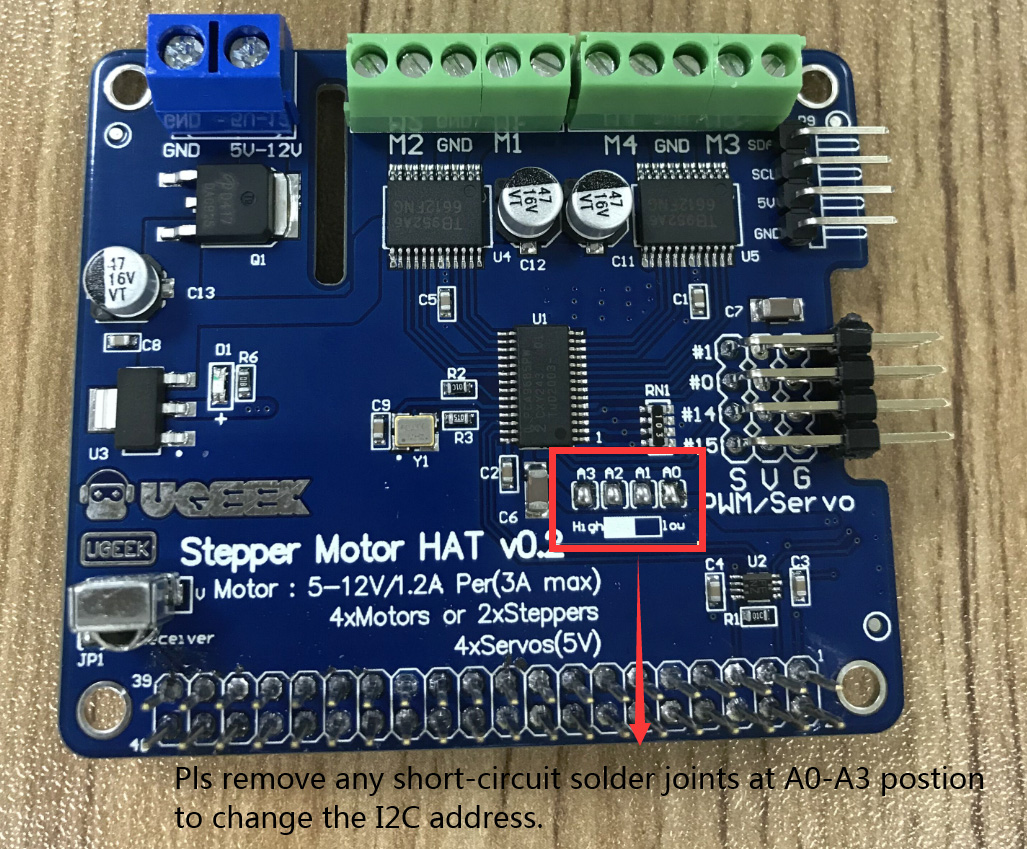
2. Q: What is the I2C address?
A: I2C address is 0x6F
Q: How to change I2C address?
A: Only need to remove any short-circuit solder joints at A0-A3 postion to change the I2C address
3. Can you run a servo and a dc motor at the same time?
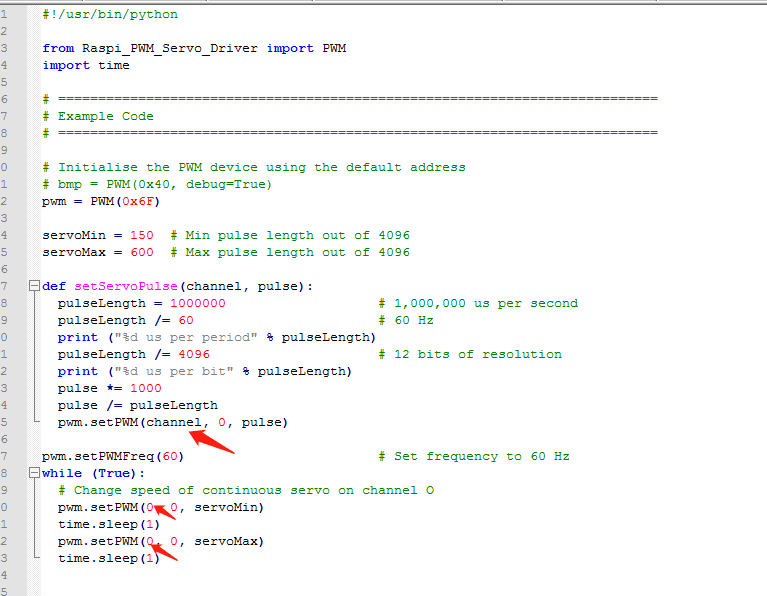
You can run a servo and a dc motor at the same time via python script.If you ignore the time that the python program runs in the while loop, then you can think of it as simultaneous
pwm.setPWMFreq(60)                        # Set frequency to 60 Hz
while (True):
  pwm.setPWM(0, 0, servoMin)
  pwm.setPWM(0, 0, servoMax)
4. Does the servo pwm commands change the signal on all outputs?
You can run a servo and a dc motor at the same time via python script.If you ignore the time that the python program runs in the while loop, then you can think of it as simultaneous
pwm.setPWMFreq(60)                        # Set frequency to 60 Hz
while (True):
  pwm.setPWM(0, 0, servoMin)
  pwm.setPWM(0, 0, servoMax)
5.How to work on channels #1 #14 #15 because the servotest.py is working on channel #0 by default ?
Please refer to the below picture:
6. Does the Stepper Motor Hat v0.2 capable of controlling stepper motors with 6 or 8 lead wires instead of just 4 lead wires?
No, the Stepper Motor Hat v0.2 can only support 4 lead wires or 5 lead wires, do not support 6 or 8 lead wires.
Enable comment auto-refresher
Anonymous user #13
Permalink |
Anonymous user #12
Permalink |
Anonymous user #11
Permalink |
Jinyk
Permalink |
Kawsar
CaptStephan
Anonymous user #10
Permalink |
Anonymous user #9
Permalink |
Anonymous user #8
Permalink |
Anonymous user #14
Anonymous user #7
Permalink |
Admin
Anonymous user #7
Permalink |
Admin
Anonymous user #7
Permalink |
Admin
Anonymous user #6
Permalink |
Admin
Anonymous user #5
Permalink |
Admin
Anonymous user #4
Permalink |
Admin
Anonymous user #2
Permalink |
Admin
Anonymous user #3
Anonymous user #1
Permalink |
Admin