Smart Fan and Power Expansion Board
Contents
Overview
Smart Fan and Power Expansion Board
Features
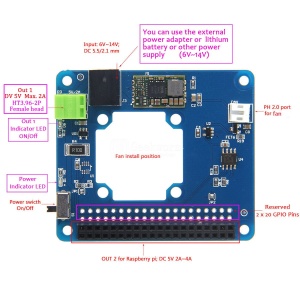
1. Width voltage input: 6V~14V' With power switch
2. Output: DC 5V 4A with two channel outputs:
OUT1 for  external device such as servo, motor, robots, mechanical arm, intelligent card etc. (output interface: HT3.96);
Max current is 2A, and can be programming control to on/off; please refer to SAMPLE CODE 1;
OUT2 (GPIO output for raspberry pi);Max current is up to 4A if the OUT1 be closed;
CAN'T be programming control, it will be output to raspberry pi directly if the switch be turned on;
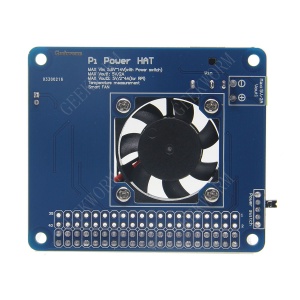
3. Built-in temperature sensor, with active cooling fan, you can control flexibly the ON/OFF of mini fan via I2C command and GPIO programming. please refer to SAMPLE CODE 2;
4. Support hardware pwm to control fan, please refer to SAMPLE CODE 3;
Temperature range and accuracy
- -25 ℃ ~ + 100 ℃ when the ± 2 ℃
- -55 ℃ ~ +125 ℃ when the ± 3 ℃
5. Cooling Fan can be replaced, please refer to FAN SPECIFICATIONS;
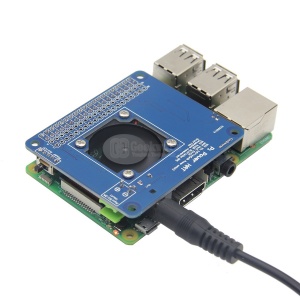
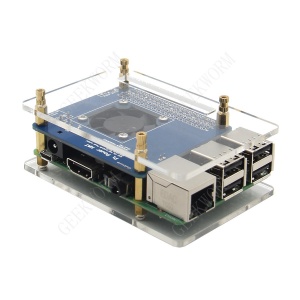
6. Standard HAT size;
Packing List
- 1 x Board;
- 1 x Mini fan (with install screws)
SAMPLE CODE 1
#demonstrates how to control the output of OUT1
import RPi.GPIO as GPIO
import time

GPIO_PIN = 27

GPIO.setmode(GPIO.BCM)
GPIO.setup(GPIO_PIN, GPIO.OUT)
GPIO.setwarnings(False)
while True:
	#turn on the power output, LED is on
	GPIO.output(GPIO_PIN,GPIO.HIGH)
	print "Turn on the power output"
	time.sleep(10)
	#turn off the power output, LED is off
	GPIO.output(GPIO_PIN,GPIO.LOW)
	print "Turn off the power output"
	time.sleep(10)
Download it: File:Out1-onoff.zip
or
wget http://raspberrypiwiki.com/download/battery-fan-board/out1-onoff.py
Run this sample code, if you can found the out1 led turns on, after 10 seconds, out1 led turns off, in turn.
SAMPLE CODE 2
#coding=utf-8

import RPi.GPIO as GPIO
import struct
import smbus
import sys
import time
import os

Sensor_ADDRESS		= 0x48

#Set global alert temperature;
ALERT_CON_TEMPERATURE   = 36

#Set global CPU temperature
ALERT_CPU_TEMPERATURE   = 70

TEMP_REGISTER 	    = 0
CONF_REGISTER 	    = 1
#THYST_REGISTER 	  = 2
#TOS_REGISTER 	    = 3

#CONF_SHUTDOWN       = 0
#CONF_OS_COMP_INT    = 1
#CONF_OS_POL 	    = 2
#CONF_OS_F_QUE 	    = 3

GPIO_PIN = 12
g_on = False

def regdata2float (regdata):
	return (regdata / 32.0) / 8.0

def toFah(temp):
	return (temp * (9.0/5.0)) + 32.0

def setAlertTemp():
	g_bus.write_byte_data(Sensor_ADDRESS,TEMP_REGISTER,ALERT_CON_TEMPERATURE)

def clearAlert():
	g_bus.write_byte_data(Sensor_ADDRESS,CONF_REGISTER,0x00)

#Initialize the sensor and others.
def init():
	GPIO.setmode(GPIO.BCM)
	GPIO.setup(GPIO_PIN, GPIO.OUT)
	GPIO.setwarnings(False)
	setAlertTemp()
	clearAlert()

def getTemp(self):
	#msg = "Reads the temp from the sensor";
	raw = g_bus.read_word_data(Sensor_ADDRESS, TEMP_REGISTER) & 0xFFFF
	raw = ((raw << 8) & 0xFF00) + (raw >> 8)
	ret = regdata2float(raw)
	print "Current condition temperature is ", ret, "℃", "[", ALERT_CON_TEMPERATURE,"℃]"
	return ret

def getCPUtemp():
	cTemp = os.popen('vcgencmd measure_temp').readline()
	ret = float(cTemp.replace("temp=","").replace("'C\n",""))
	print "Current CPU temperature is ", ret, "℃", "[", ALERT_CPU_TEMPERATURE,"℃]"
	return ret

def checkTemperature():
	return (getTemp(g_bus) > ALERT_CON_TEMPERATURE) or (getCPUtemp() > ALERT_CPU_TEMPERATURE)

def setFan(need_to_open):
	#turn on the fan
	global g_on
	if (g_on and need_to_open) :
		return

	if (g_on == False and need_to_open == False) :
		return

	if need_to_open :
		if g_on == False :
			print "starup fan!"
		GPIO.output(GPIO_PIN,GPIO.LOW)
		g_on = True
	else:
		if g_on :
			print "Stop fan!"
		GPIO.output(GPIO_PIN,GPIO.HIGH)
		g_on = False

g_bus = smbus.SMBus(1)
init()
while True:
	print "------------------"
	print time.strftime("[%Y-%m-%d %H:%M:%S] ", time.localtime())
	setFan(checkTemperature())
	time.sleep(3);
Download it: File:Smartfan.zip
or:
wget http://raspberrypiwiki.com/download/battery-fan-board/smartfan.py
SAMPLE CODE 3
FAN SPECIFICATIONS
Side length is 30mm;
Thickness is 7mm;
PS: the thickness is not more 8mm;

Enable comment auto-refresher
Anonymous user #6
Permalink |
Lisa
Anonymous user #4
Permalink |
Anonymous user #5
Anonymous user #2
Permalink |
Admin
Anonymous user #1
Permalink |
Anonymous user #3