X825v
Jump to navigation
Jump to search
Overview
The X825v V2.0 Version is updated from X825 V1.5 Version.
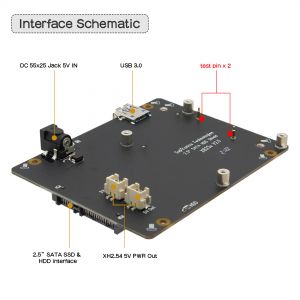
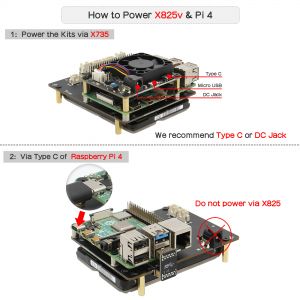
① Add 2 test pins to achieve powered between X825 V2.0 and Pi4 without additional cable. Please power to the X825v board via Pi 4. Only when the X825v power supply is insufficient, you can use the DC JACK to add power to X825v board.
② Removed the on-board power button and 4-pin external switch interface. You can connect the X735 board for software safe shutdown & power management .
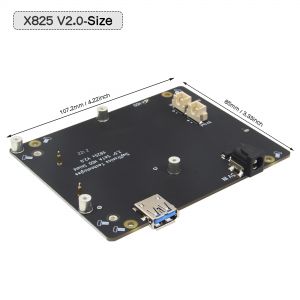
③ Use more shorter USB 3.0 jumper/connector, so the matching metal case is X825-C8 NOT X825-C6.
Features
- Supports upto 4TB 2.5-inch SATA hard disk drives (HDD) / solid-state drive (SSD) (Theoretically it can work with 6TB or 8TB as well. But actually we do not test the X825 board with 6tb or 8tb HDD, you can have a try.)
- Ideal storage solution for Raspberry Pi 4 Model B
- UASP supported for Raspberry Pi 4, NOT support TRIM
- Use a shorter USB 3 connector to reduce the overall height
- Use new 4pcs test pins to power each other with raspberry pi 4, no additional wire required
- LED blue indicator indicates drive status
- USB 3.1 Gen1 to SATA 6Gb/s Bridge Controller
- Quick file transfer with high-speed USB 3.1 connectivity from a PC or a Mac
User Manual
- File:Usb3-frequency-interference-papers.pdf
- How to Run Raspberry Pi 4 or 3 Off an SSD or Flash Drive: Does the X825/X855 support USB boot
- Tutorial – How to Initialize, Partition and Format a Brand New SSD in Windows: File:Tutorial Initalize New SSD.pdf
- How to set up OpenMediaVault on Raspberry Pi 4
Some Tips
- Properly Mount USB Storage on Raspberry Pi
- Auto Mount an NTFS USB Drive on Raspberry Pi
- Difficulty booting from SSD drive
Packing List
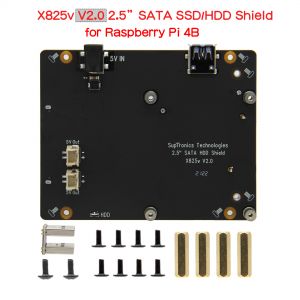
- 1 x X825v V2.0 2.5" SATA HDD Shield
- 1 x USB 3.1 connector
- 2 x M3x6 Screws
- 8 x M2.5x6 Screws
- 4 x Spacer F/F M2.5x14mm


Enable comment auto-refresher