Difference between revisions of "How to enable I2C"
Jump to navigation
Jump to search
(No difference)
|
Latest revision as of 16:39, 24 July 2023
How to enable I2C funcion on Raspbian:
Please run the following command after you start the Raspberry Pi
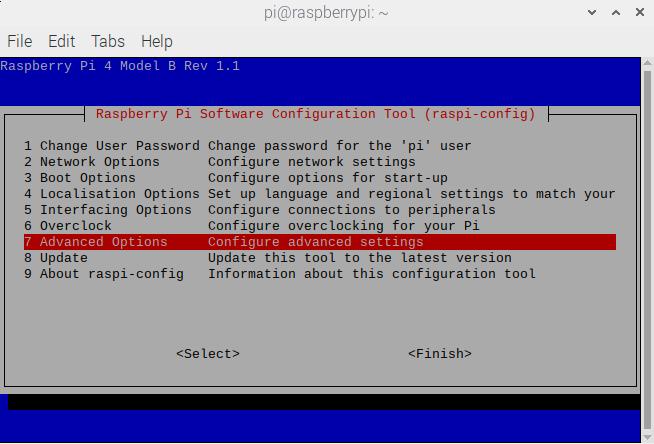
sudo raspi-config
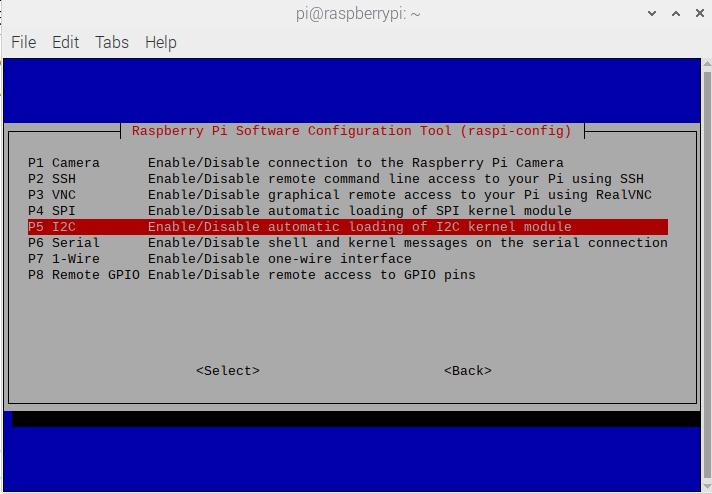
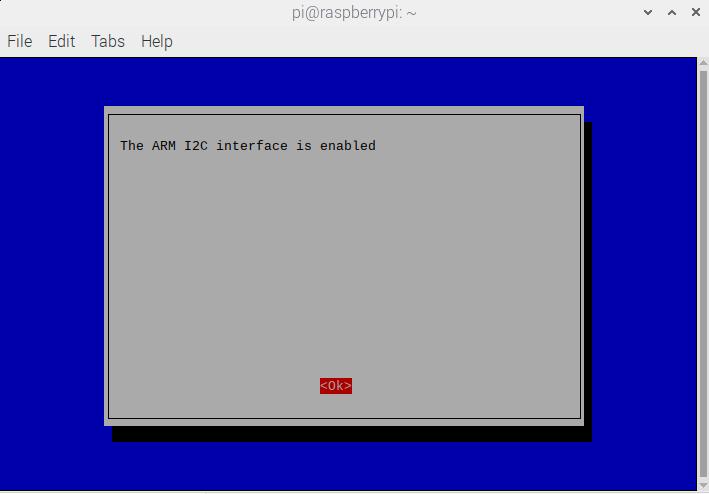
Select 5 Interfacing Options and then P5 I2C - Enable/Disable automatic loading. A prompt will appear asking Would you like the ARM I2C interface to be enabled?, select "Yes"
Select "OK"
Select "Finish" to return to the command line and reboot your raspberry pi.
sudo reboot
The Raspberry Pi will reboot and the 'i2c' interface will be enabled.
Then run the following command to check i2c port
sudo i2cdetect -y 1
The following is the I2C address of X729
pi@raspberrypi:~ $ sudo i2cdetect -y 1
     0  1  2  3  4  5  6  7  8  9  a  b  c  d  e  f
00:                         -- -- -- -- -- -- -- --
10: -- -- -- -- -- -- -- -- -- -- -- -- -- -- -- --
20: -- -- -- -- -- -- -- -- -- -- -- -- -- -- -- --
30: -- -- -- -- -- -- 36 -- -- -- -- -- 3c -- -- --
40: 40 -- -- -- -- -- -- -- -- -- -- -- -- -- -- --
50: -- -- -- -- -- -- -- -- -- -- -- -- -- -- -- --
60: -- -- -- -- -- -- -- -- 68 -- -- -- -- -- -- --
70: -- -- -- -- -- -- -- --
#36 - the address of the battery fuel gauging chip
#3c - OLED display
#40 - TI INA219 12-bit current/voltage/power monitor
#68 - the address of the RTC chip
PS: Different hardware products may have different I2C addresses


Enable comment auto-refresher
Anonymous user #5
Permalink |
Lisa
Anonymous user #4
Permalink |
Anonymous user #3
Permalink |
Harry
Anonymous user #2
Permalink |
Anonymous user #1
Permalink |
Harry