Difference between revisions of "X820"
(No difference)
|
Revision as of 18:33, 3 July 2023
Contents
Note
Please send your issue information with order numbers and purchase link to our support email: support@geekworm.com if you need after-sale support, that will do great help to solve the problem quickly, thanks in advance.
What do you need to make the X820 work?
- A Raspberry Pi board(Pi 3B+, 3B, 2B, B+)
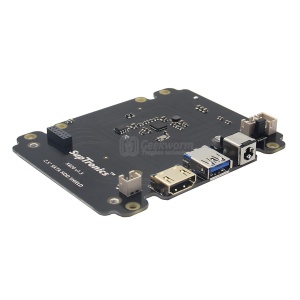
- A X820 V3.0 2.5 inch SATA Storage Board (this product)
- A 2.5 inch SATA hard disk drives (HDD) or solid-state drive (SSD)
- A Power Adapter (Power requirement are different epending on the product used, please refer to X820#How to Power)
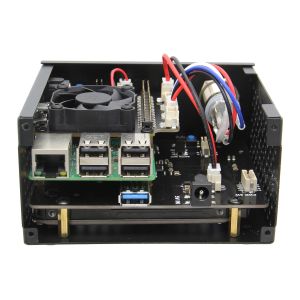
- A X820 Metal Case (Optional)
- A X735 Expansion Board (Optional,provide function like cooling fan, safe shutdown)
Note:
- X820 board does not limit the thickness of the hard disk, but the X820 case supports a hard disk thickness of max. 10.4mm/0.41inch. The stander 2.5" SATA SSD/HDD is 9.2mm/0.36inch.
- USB mass storage boot is available on Raspberry Pi 3B, 3B+, 3A+, and 2B v1.2 only.
USB mass storage device boot
Please refer to https://www.raspberrypi.org/documentation/hardware/raspberrypi/bootmodes/msd.md
Overview
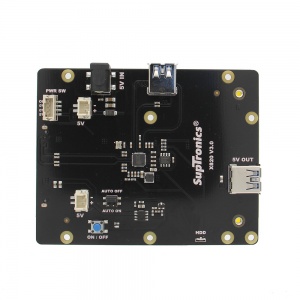
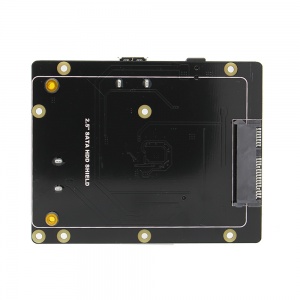
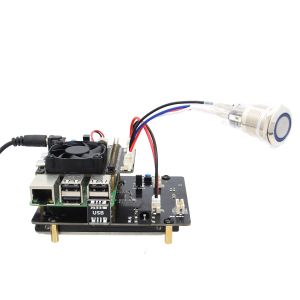
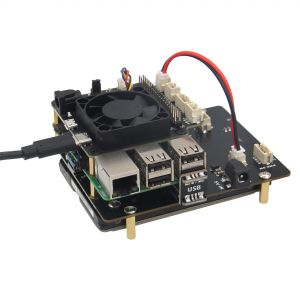
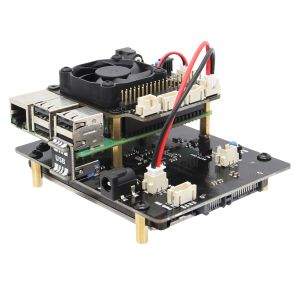
The X820 expansion board provides a complete storage solution for Raspberry Pi 3 Model B+ / 3B / 2B / B+, only 2.5 inch SATA interface HDD/SDD hard disk is suitable for X820 Board;
Features
- Operating System: All Raspberry Pi operating systems
- Supports up to 4TB 2.5-inch SATA hard disk drives (HDD) / solid-state drive (SSD)
- USB 3.1 Gen1 to SATA 6Gb/s Bridge Controller
- USB 2.0 connectivity offers plug-and-play functionality on your Raspberry Pi 3B+/3B
- Quick file transfer with high-speed USB 3.0 connectivity from a PC or a Mac
- Powers the Raspberry Pi - no additional power supply for RPi
- Duplicated Raspberry Pi HDMI port
V3.0 Upgrade Features
- Using patch process to improve the quality of the X820 V3.0 Board;
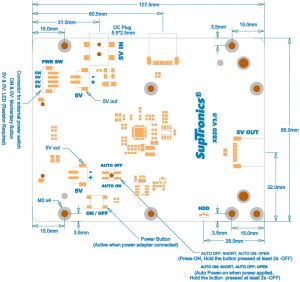
- On-board powers button switch for power control
- Add upgraded external 5V 2A power output USB port for external device such as cellphone and other device, of course. User can power the raspberry pi via this USB port when GPIO pins are occupied by other expansion board.
- User can directly use the X820 V3.0 board as a mobile hard disk even if you don't power it (tested; with our USB3.0 cable or use a good quality and relatively short USB3.0 cable); PS: In the V1.3 version, you need to power the X820 at the same time as when you use the X820 V1.3 board as a mobile Hard disk;
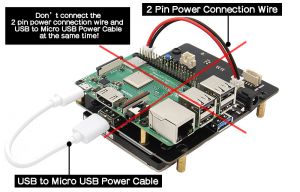
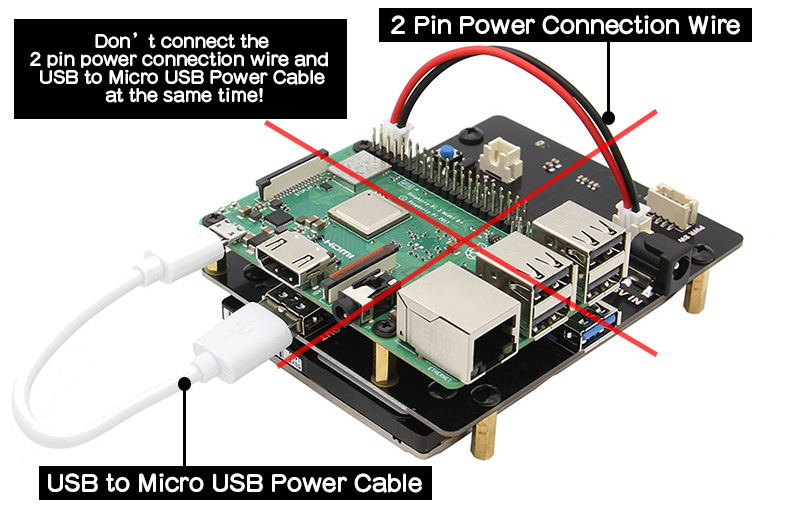
- Two kinds of power supply modes are supported; One of mode is that power the raspberry pi via 2 pin cable by connecting to GPIO2 (5V) and GPIO3(GND) pins, the other one of mode is power the raspberry pi via USB port; PS: DON'T USE THE TWO KIND MODES AT THE SAME TIME;
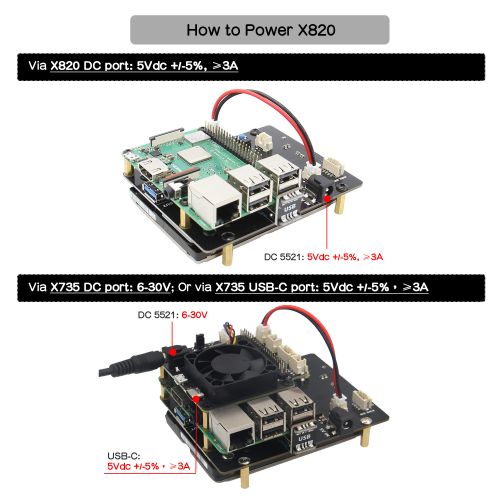
How to Power
Use X820 Board only:
- DC 5V/4A with 5.5x2.1mm Jack
Use X820 + X735 V3.0:
- DC 6-30V with 5.5x2.1mm Jack(refer to PSU60) to power via X735 DC port; or USB-C 5V ≥3A(refer to PSU20) to power via X735 USB-C port
Use X820 + X735 V2.5, V2.1, V2.0, V1.0:
- DC 5V with 5.5x2.5mm Jack to power via X735 DC port; or USB-C 5V ≥3A(refer to PSU20) to power via X735 USB-C port
Note:
Power requirment is different depends on different kits.
Please use high quality power supply, otherwise the SSD/HDD may not be identified or be damaged!!!
Packing List
- 1 x X820 Expansion Board
- 1 x USB to Micro USB Power Cable (Length:14.5cm / 5.71inch)
- 1 x 2 Pin Power Connection Wire (Length: 10cm / 3.93inch)
- 1 x USB connector
- 1 x Install Screws pack
Matching Metal Case
Case for X820 V3.0 Version (Recommend)
Please refer to X820 Metal Case V3.0 Version
Case for X820 V1.3 Version(off production)
Please refer to X820 Metal Case V1.3 Version
FAQ
Q:Does the X820 support Trim?
- The X820 does not support TRIM,the current X820 version only UASP supported. For LINUX and USB2.0, UASP is better.
Q: Don't detect HDD/SDD?
- This is a complicated question, but we can check it from these points. Please refer to How to check the X820
Q: With a hard drive installed, could you eleminate the need for a micro sd card and boot straight from drive?
- Please refer to #How to boot from a USB Mass storage device on a raspberry pi 3
Q: What is a recommended HDD for this board?
- Basically it can support all the 2.5-inch HDD with SATA 2 or STATA 3 interface.
Q: Why can't boot from the SSD or HDD?
- Customer Feedback 1: I have followed the same steps you provided and my ssd is not able to boot. I have tried again with a normal sata hard drive and it works fine. My original ssd (Patriot Burst 240gb) draws too much power. Thus, do not boot.
Q:Can you stack the module with itself? is the usb cable and bridge crossover?
- Theoretically, you can stack the X820 module to use by USB cable.
But you need to solve the problem of how to power them, if you stack them together, it may need more power. Actually we do not test on how to stack them together, hope to get your understanding!
Q: Why the voltage warnings shows on my Pi? Customer feeback: The board works as advertised with the 4a power supply they recommend but seems to lie really close to the voltage limit. I get a number of voltage warnings while using until I stopped using the KVM switch (which had a separate power supply) and just used a USB keyboard. Outside of that, assembled just fine and was able to configure a SSD 2.5 drive without issue.
- To a large extent, we doubt that voltage warnings maybe caused by the power supply.
- Our power supply has an idling output voltage of 5.2V , even when the working current reaches 4A, the output voltage will be around 4.9V, this is the reason why the Raspberry Pi system does not have undervoltage.
- So we suggest that you can measure the output voltage of your power supply when under load your device. Please test directly the voltage value between GND and 5V PIN.
- We found that many power supplies on the market are known as 5V 4A output, but when use this power adapter at high current output , the voltage often drops very badly, with only about 4.7V or lower than 4.7V.
Q: What is the pinout for the PWR Switch?
- A: Please refer to here: PH2.0 Conector Specification
Q: How to do if I don't like the blue light on the power switch?
- It is ok to disable the blue light on the power switch, you just need to pull out the white cable. Please refer to the picture.
Q: Does the X820 Power off switch work when the Pi is powered by USB (or PoE)?
- A: The X820 Power off switch cannot work when the Pi is powered by USB (or PoE).
For more questions, please refer to blog FAQ of Raspberry Pi X820 V3.0 USB 3.0 2.5" SATA HDD/SSD Storage Expansion Board
User Guide
Installation Video
Geekworm Video (Pi 3 + X820 V3.0+X735+X820 Case): https://youtu.be/I1nnjh9HvGI
Customer Video 1 (Pi 3 + X820 V3.0): https://youtu.be/oYQWG9MPuY0
Customer Video 2 (Pi 3 + X820 V3.0): https://youtu.be/IGxRA_JgoRc
Customer Video 3 (Pi 3 + X820 V3.0): https://youtu.be/JsrjKcfi1mg
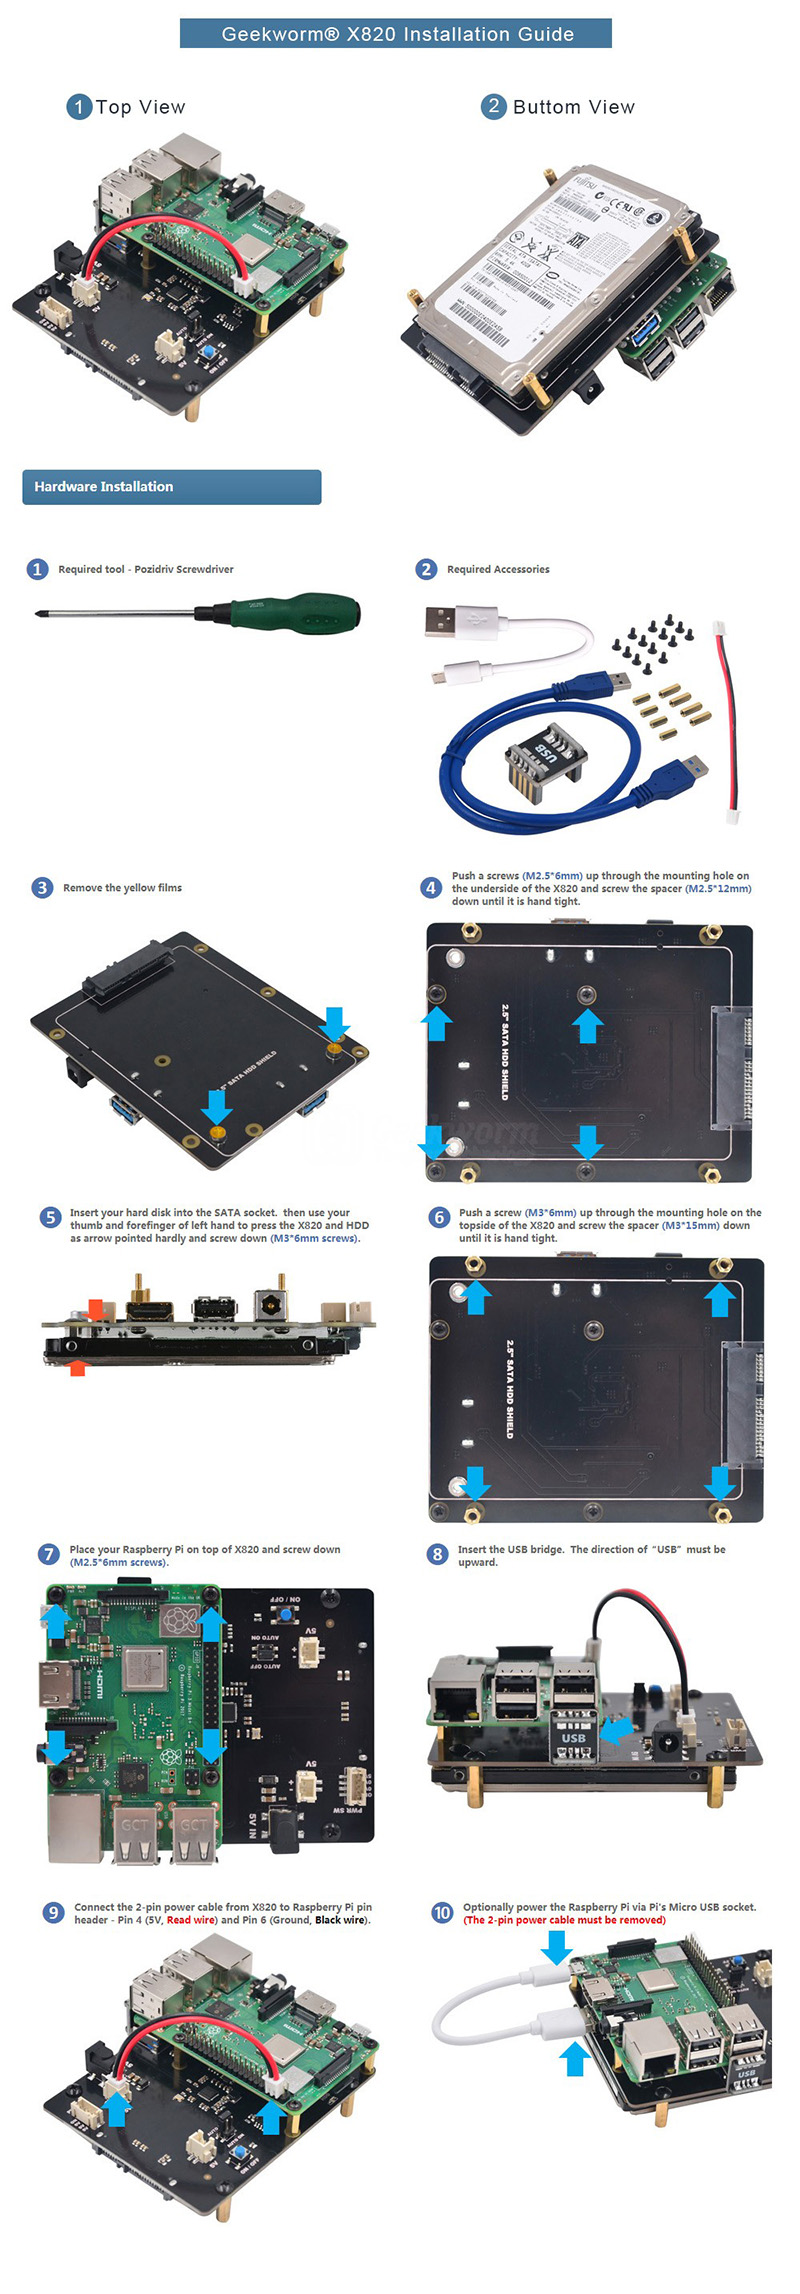
Installation Guide(V3.0 Version)
Video Guide from our friends: https://www.youtube.com/watch?v=GxNKpuhVsX8
Some Tips
- Properly Mount USB Storage on Raspberry Pi
- Auto Mount an NTFS USB Drive on Raspberry Pi
- Chinese User Manual: File:X820-V3.0Guide-CN.pdf
How to boot from a USB Mass storage device on a raspberry pi 3
This tutorial explains how to boot your Raspberry Pi 3 from a USB mass storage device such as a flash drive or USB hard disk. Be warned that this feature is experimental and does not work with all USB mass storage devices. See this blog post from Gordon Hollingworth for an explanation of why some USB mass storage devices don't work, as well as some background information.
Program USB Boot Mode
Before a Raspberry Pi 3 will boot from a mass storage device, it needs to be booted from an SD card with a config option to enable USB boot mode. This will set a bit in the OTP (One Time Programmable) memory in the Raspberry Pi SoC that will enable booting from a USB mass storage device. Once this bit has been set, the SD card is no longer required. Note that any change you make to the OTP is permanent and cannot be undone.
You can use any SD card running Raspbian or Raspbian Lite to program the OTP bit. If you don't have such an SD card then you can install Raspbian or Raspbian Lite in the normal way - see installing images.
- First, prepare the /boot directory with up to date boot files:
sudo apt-get update
sudo apt-get upgrade
The above step is not required if you use the 2017-04-10 release of Raspbian / Raspbian Lite or later, (PS: use or update the last Raspbian version is always recommend)
- Then enable USB boot mode with this code:
echo program_usb_boot_mode=1 | sudo tee -a /boot/config.txt
sudo reboot
This adds program_usb_boot_mode=1 to the end of /boot/config.txt. Reboot the Raspberry Pi with sudo reboot, then check that the OTP has been programmed with:
vcgencmd otp_dump | grep 17:
17:3020000a
Ensure the output 0x3020000a is shown. If it is not, then the OTP bit has not been successfully programmed.
If you wish, you can remove the program_usb_boot_mode line from config.txt, so that if you put the SD card in another Raspberry Pi, it won't program USB boot mode. Make sure there is no blank line at the end of config.txt. You can edit config.txt using the nano editor using the command sudo nano /boot/config.txt, for example.
Prepare the operating system image
Starting with the 2017-04-10 release of Raspbian you can install a working Raspbian system to a USB mass storage device by copying the operating system image directly onto your USB device, in the same way that you would for an SD card. To perform this step, follow the instructions HERE, remembering to select the drive that corresponds to your USB mass storage device.
Once you have finished imaging your USB mass storage device, remove it from your computer and insert it into your Raspberry Pi 3.
[Boot your Raspberry Pi 3 from the USB mass storage device]
Attach the USB mass storage device to your Raspberry Pi 3 and power it up. After between five and ten seconds the Raspberry Pi 3 should begin booting, and display the rainbow splash screen on an attached screen.
Please refer to here: USB mass storage device boot

Enable comment auto-refresher
Anonymous user #30
Permalink |
Lisa
Anonymous user #29
Permalink |
Walker
Anonymous user #28
Permalink |
Walker
Anonymous user #27
Permalink |
Lisa
Anonymous user #26
Permalink |
Lisa
Lisa
Anonymous user #26
Lisa
Anonymous user #26
Lisa
Anonymous user #25
Permalink |
Lisa
Anonymous user #25
Lisa
Anonymous user #25
Anonymous user #24
Permalink |
Lisa
Anonymous user #23
Permalink |
Lisa
Lisa
Permalink |
Anonymous user #22
Permalink |
Anonymous user #21
Permalink |
Lisa
Anonymous user #20
Permalink |
Lisa
Anonymous user #18
Permalink |
Anonymous user #19
Anonymous user #17
Permalink |
Anonymous user #19
Anonymous user #16
Permalink |
Admin
Anonymous user #15
Permalink |
Admin
Admin
Anonymous user #14
Permalink |
Admin
Anonymous user #13
Permalink |
Admin
Anonymous user #12
Permalink |
Admin
Anonymous user #11
Permalink |
Admin
Anonymous user #10
Permalink |
Admin
Anonymous user #9
Permalink |
Admin
Anonymous user #8
Permalink |
Admin
Anonymous user #7
Permalink |
Admin
Anonymous user #6
Permalink |
Admin
Anonymous user #6
Permalink |
Admin
Anonymous user #4
Permalink |
Admin
Anonymous user #3
Permalink |
Admin
Anonymous user #1
Permalink |
Anonymous user #2
Admin
Anonymous user #5