Difference between revisions of "How to enable OLED display"
Jump to navigation
Jump to search
| Line 3: | Line 3: | ||
1. Update your Pi and Install the required dependencies | 1. Update your Pi and Install the required dependencies | ||
| − | |||
<syntaxhighlight lang="Shell"> | <syntaxhighlight lang="Shell"> | ||
sudo apt-get update | sudo apt-get update | ||
Revision as of 17:56, 19 November 2022
How to enable OLED display on Raspbian:
1. Update your Pi and Install the required dependencies
sudo apt-get update
sudo apt-get -y upgrade
sudo apt-get -y install i2c-tools python3-smbus python-smbus
sudo apt-get -y install python3-pip python3-pil
sudo pip3 install --upgrade setuptools
sudo pip3 install --upgrade adafruit-python-shell
sudo pip3 install adafruit-circuitpython-ssd1306
sudo pip3 install pi-ina219
sudo pip3 show pi-ina219
2. Run the following command to check the oled i2c port
sudo i2cdetect -y 1
for X729, the I2C address is 0x3c
3. Installation
cd ~
cd oled
3.1 Install the Adafruit CircuitPython library
pi@raspberrypi:~/oled $ sudo python3 raspi-blinka.py
3.2 Answering Y and hitting Enter when reboot prompted. Then renavigate to the oled directly by entering:
pi@raspberrypi ~ $ cd oled
3.3 Run the script to test the display
pi@raspberrypi:~/oled $ sudo python3 x729.py
3.4 Run the script at Raspberry Pi boot
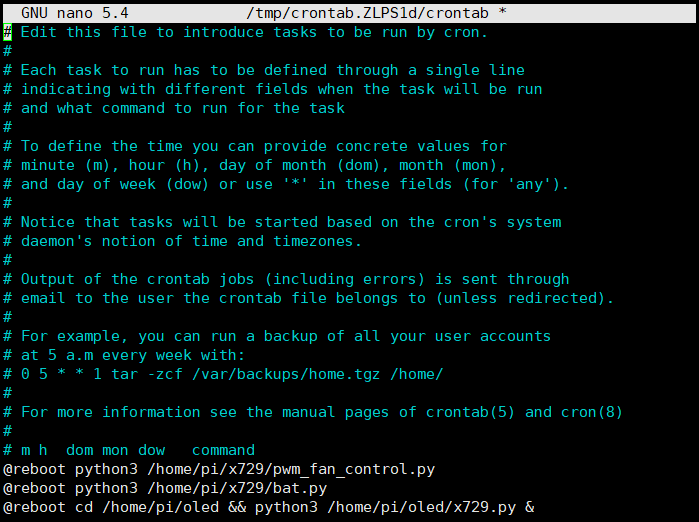
pi@raspberrypi:~/oled $ sudo crontab -e
3.5 Add a line at the end of the file that reads like this:
@reboot cd /home/pi/oled && python3 /home/pi/oled/x729.py &

Save and exit. In nano, you do that by hitting CTRL + X, answering Y and hitting Enter when prompted.
Enable comment auto-refresher
Anonymous user #1
Permalink |
Harry