How to Burning System for the eMMC of Raspberry Pi Compute Module
How to Burning System for the eMMC of Raspberry Pi Compute Module
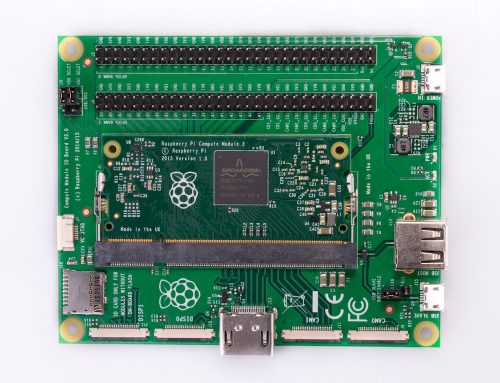
Tutorial
1.First you need to prepare the CM module (CM1/CM3/CM3L)
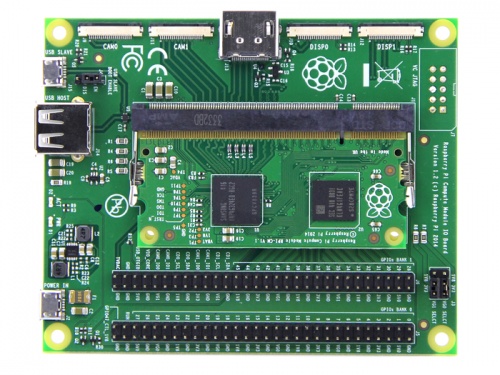
2. Prepare the CM IO Expansion Board
3.Download and extract the driver of the WIN system and install the boot tool( bcm270x-boot-driver ,CM-Boot-Installer)
4. Plug the CM module into the CM IO Expansion Board, jump the jumper cap in the upper left corner to the EN USB BOOT, then connect the USB SLAVE to the PC, and finally connect the POWER IN power supply to the CM IO Expansion Board.
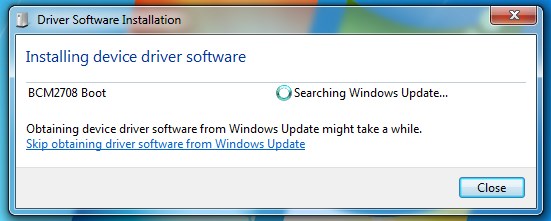
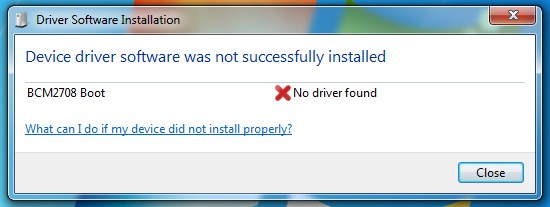
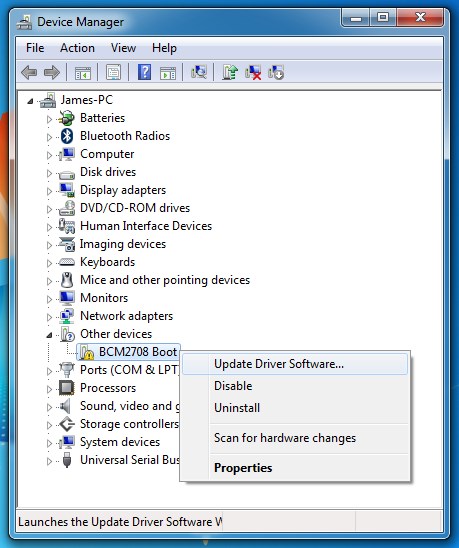
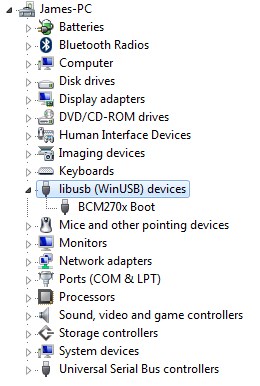
5.The WIN system will remind to install the driver, you can cancel the automatic update driver, then manual update driver (bcm270x-boot-driver), until the driver installation is normal as below
6.Run the installed boot tool "RPiBoot.exe". Then the eMMC of the CM module will be simulated as a memory card and appear in the system directory.
7.According to the usual TF card burning system method, you can Burning System for the eMMC of Raspberry Pi Compute Module (for the TF card burning system method, please refer to How to Burning the Raspberry Pi system image into the Micro-SD card)
Note: At present, the eMMC of the CM module is only 4G, and most of the systems provided by the official system are over 4G. The programming may be interrupted and the space is insufficient, so the player should select the image below 4G when burning the CM system.
How to Burning the Raspberry Pi system image into the Micro-SD card
1. A 2G+ SD card, preferably a high-speed card, recommend a card above Class4, because the speed of the card directly affects the running speed of the Raspberry Pi.
2. Download the Raspberry Pi system image file with the following address:
Https://www.raspberrypi.org/downloads/
There are many operating system images for the Raspberry Pi, choose the suitable one.
3. The USB Image Tool for installing images under WinXP and Win7 can also be found on the above page.
Installation Guide:
1. Unzip the downloaded operating system image compressed file to get the img image file.
2. Connect the SD card to the PC after using the card or card reader.
3. Unzip and run the USB Image Tool .
4. Select the system image (img file) in the software, select "Restore", then select the corresponding system image img file, and then confirm.
5. The installation process may be slow, depending on the speed of your SD card.
Wait until the dialog box appears 100% to indicate success.

