RPI 10.1 inch Capacitive IPS HDMI LCD 1280*800
Contents
Instroduction
RPI Display 10.1 inch Capacitive LCD IPS Screen 1280×800 HDMI LCD Shield with Acrylic Stander for Raspberry Pi 3 Model B/ Pi 2B/ B+/ BB Black/ Banana Pi, Supports Multi mini-PCs, Multi Systems
Hardware connection
Please make sure the connections are done in a right sequence, or else the LCD may not work well.
- Connect the Power Only Port of the LCD to a 5V 2.5A power adapter with a Type A to micro USB cable (Normally, the LCD will perform screen-clear and self-checking. If there is nothing displayed on the screen, please check whether the switch on the back side has been turned on. In case that the screen is ON, please check if the FFC cable is connected properly and in a good contact).
- Connect the Touch port of the LCD to one of the USB ports on your PC.
- Connect the HDMI port of the LCD to the HDMI port on your PC with an HDMI cable
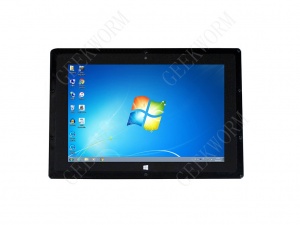
When multiple displays are detected by your PC, the LCD can only be used to control the cursor on main display. So it is proposed to set the LCD as the main display. Generally, you will see the screen displays the interface as the figure shows below. In this interface, slightly click the screen can perform the left-key mouse action, and long press the screen can perform the right-key mouse action. (You can also control the Back light of the screen with the back light adjustment button; see the mark 1 shows in the following figure.)
Working with Raspberry Pi
For the Windows OS on PC, the resolution of the LCD is automatically identified. Hence, you do not need to make the relative settings. When working with Raspberry Pi, you should set the resolution of the LCD by yourself, or else the LCD screen will not work. For more detail information, please read the following section.
At the beginning, you should download the latest image file, RASPBIAN or UBUNTU MATE, from the website: http://www.raspberrypi.org/downloads/.
- Download the image file (zipped) into your PC, and extract it, then you will get a file with the expansion name .img
- Connect a TF card to your PC, and format your TF card with the software SD Formatter. Notices: The capability of TF card in used here should be more than 4GB. In this operation, a TF card reader is also required, which has to be purchased separately.
- Start the software Win32DiskImager, and select image file downloaded in the first step, then, click the button Write to program the system image file.
- When the programming finished, open the config.txt file under the root directory in the TF card, and add the following lines at the end of the file. Then, save the modification and pop-out the TF card.
max_usb_current=1
hdmi_group=2
hdmi_mode=1
hdmi_mode=87
hdmi_cvt 1280 800 60 6 0 0 0
hdmi_drive=1
Hardware connection
- Connect the Power Only interface of the LCD to a 5V 2.5A power adapter with a Type A to micro USB cable (Normally, the LCD will perform screen-clear and self-checking. If there is nothing displayed on the screen, please check whether the LCD screen has been turned on. In case that the screen is ON, please check if the FFC cable is connected properly and in a good contact).
- Connect the HDMI interface of the LCD to the HDMI interface on your Raspberry Pi with a HDMI cable
- Connect the Touch interface of the LCD to one of the USB interfaces on your Pi.
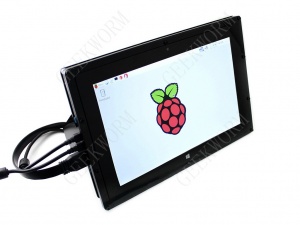
- Insert a TF card into the TF card socket on the Raspberry Pi, and then power up the Pi. Waiting for a while, you may see the following interface. (Now, you can control the back light of the LCD with the back light adjustment button; see the mark 1 shows in the following figure.)
Working with BeagleBone Black
If the LCD is used as a normal display only, you just need to program the latest Angstrom image to the BeagleBone Black without making any settings. Then, BeagleBone will read the display parameters of the 10.1 inch HDMI LCD, and set the resolution to 1280*800 automatically. When the LCD works as a touch display, you need to program the 10.1inch HDMI LCD (B) Angstrom boot up image. Here are the steps for programming the image file:
- Download the packaged image file into your PC, and extract it, then you will get a file with the expansion name .img
- Connect a TF card to your PC, and format your TF card with the software SD Formatter. Notices: The capability of TF card in used here should be more than 4GB. In this operation, a TF card reader is also required, which has to be purchased separately.
- Start the software Win32DiskImager, and select image file downloaded in the first step, then, click the button Write to program the system image file.
- When the image file has been written into the TF card, you can insert the card to the BeagleBone Black. Powering up the BeagleBone Black, it will enter the OS installed in the TF card. After a while, you will see the graphic interface.
Notes: If the eMMC of the BeagleBone Black has been installed an OS, you should boot up the BeagleBone Black from Micro SD card. Press the Boot Button, and power up the BeagleBone Black. Don’t releases the Boot Button until the USER LEDS start blinking.
Hardware connection
- Connect the LCD to the HDMI interface of the BeagleBone with a HDMI to micro HDMI cable (purchased separately).
- Connect the Touch interface of the LCD to the host USB interface on BeagleBone with a type A to micro USB cable. (BeagleBone provides a host USB interface and a slave USB interface. This LCD should be connected to the host USB interface.)
- Connect the Power Only interface of the LCD to a 5V 2.5A power adapter with a Type A to micro USB cable
Working with Banana Pi
Since the Banana Pi can read out the resolution parameters of the LCD on its start-up, you should connect the Banana Pi to the LCD before powering up the Pi. When the Pi has been entered desktop, the LCD can be removed and then connected again as required.
Working under the Raspbian OS on the Banana Pi Program the image Raspbian for Banana Pi. This image file supports BananaPi Pro and BananaPi.
- Download the packaged image file into your PC, and extract it, then you will get a file with the expansion name .img
- Connect a TF card to your PC, and format your TF card with the software SD Formatter. Notices: The capability of TF card in used here should be more than 4GB. In this operation, a TF card reader is also required, which has to be purchased separately.
- Start the software Win32DiskImager, and select image file downloaded in the first step, then, click the button Write to program the system image file.
Hardware connection
- Connect the LCD to the HDMI interface with a HDMI cable
- Connect the Touch interface of the LCD to one of the USB interface on the Banana Pi with a type A to micro USB cable
- Connect the Power Only interface of the LCD to the 5V 2.5A power adapter with a type A to micro USB cable
Loading the WiFi driver for BananaPi Pro
Comparing with Banana Pi, BananaPi Pro has an additional on-board WiFi model. When you use BananaPi Pro, you can use SSH method to connect it. Here is the command for loading the WiFi driver:
sudo modprobe ap6210
Working under the Lubuntu OS on the Banana Pi Program the image Lubuntu for Banana Pi. This image file supports Banana Pi Pro and Banana Pi.
User name: bananapi, Password: bananapi
Feature
LCD and Main Board
- IPS Screen with the resolution of 1280 × 800.
- Capacitive LCD, supports 10 point touch.
- Supports Raspbian、Ubuntu、Windows 10 IoT. No drive with single touch.
- Supports BB Black, provide Angstrom and related mirroring.
- HDMI interface is used for display while USB interface is used for touch.
- Supports Backlight Control
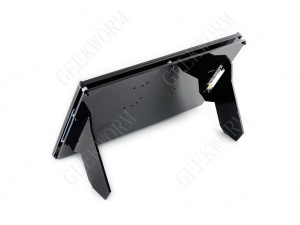
Acrylic Stander
- Adopts the high-quality meterials of black acrylic.
- Slope: 30°or 45°
- Reserved mounting holes for external board. Supports Raspberry Pi 3B/ 2B/ B+/ A+/ B, BB Black AND Banana Pi
Dimension & Installation
FAQ
Q1: How to use the LCD on Raspberry Pi?
Answer:
- Download the newest version mirroring(raspbian, ubuntu)
- Burn the mirroring to TF card, open the config.txt file in the catalog.
- Revise the config.txt file, then add the code at the end of the file as following:
max_usb_current=1
hdmi_group=2
hdmi_mode=1
hdmi_mode=87
hdmi_cvt 1280 800 60 6 0 0 0
- Insert the TF card into Raspberry Pi and power.
Q2: How to do if the LCD can not work when connect with PC?
Answer:
- Ensure the normal function of HDMI interface on PC
- Ensure the PC only connect with LCD as display device
- Connect the power cable at first then to the HDMI cable.
- Some PC needs to reboot.
(Attention: The PC must be windows system)
Q3: What' s the operating current of 10.1 inch HDMI LCD(B)?
Answer: Powered by 5V. It' s around 750mA about the on backlight, 300mA about the off backlight.
Enable comment auto-refresher