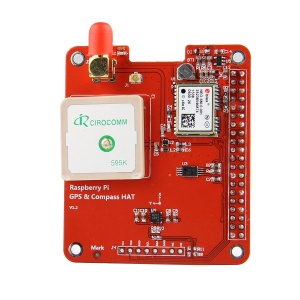
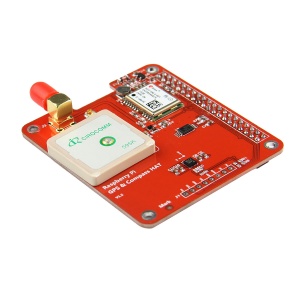
Raspberry Pi Add-On GPS HAT Module
Contents
Instruction
SKU:424254
This is an GPS expansion board designed specifically for the both the version 1 and version 2 Raspberry Pi+ Models (This board is NOT compatible with the original Raspberry Pi A and B boards). This board is designed for applications that use a GPS connected via the serial ports to the Raspberry Pi such as timing applications or general applications that require GPS information. To facilitate PPS the time pulse output is connected to GPIO5 so you can utilise this board to give NTP PPS discipline. this board is equipped with the latest Ublox NEO-6M/NEO-M8N positioning module.
Feature
| PCB size | 65mm X 55mm X 1.6mm |
| Input voltage | 5V |
| Interface | UART for GPS, IIC for compass |
| Baud rate | 9600(default), 19200,38400,115200 |
- Multi-constellation GNSS module with integrated high performance 25 x 25*4 mm antenna
- Compliant with GPS, SBAS.
- Plug & play use with embedded connector
- Low power processing core delivers current optimized multi-constellation tracking
- Ultra-sensitive -161 dBm (tracking) RF front-end
- Supports ephemeris file injection (A-GPS)
- Satellite Based Augmentation System (SBAS) compliant
Pinouts
2x20 way header is supplied and 2 suitable standoffs providing a very robust solution .The board follows Raspberry Pi's HAT physical layout with camera and display port notches. It is possible to stack additional HAT's on top of this board with a suitable header.
This HAT takes over the Pi's hardware UART to send/receive data to and fromthe GPS module. So, if you need to use the RX/TX pins with a console cable, you cannot also use this HAT.
Serial Console Pins
The Raspberry Pi has only one serial port, and you do need serial to chat to a GPS so we will takeover the RXD and TXD pins.
PPS Pin
GPS's can output a 'pulse per second' for synchronizing the time. We have a breakout for this and aclosed jumper that connects it to GPIO5.
Compass
The HMC5883L is a 3 axis digital compass which can communicate via I2C to the Raspberry Pi using only 2 data lines.
External Antenna
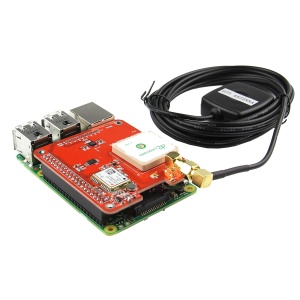
All Ultimate GPS modules have a built in patch antenna - this antenna provides -162 dBm(NEO-6M)or -167 dBm(NEO-M8n)sensitivity and is perfect for many projects. However, if you want to place your project in a box, it might not be possible to have the antenna pointing up, or it might be in a metal shield, or you may need more sensitivity. In these cases, you may want to use an external active antenna. GPS antennas use SMA connectors or uFL->SMA adapter cable. Then connect the GPS antenna to the cable. The uFL cable and The SMA connectors.
How to use
This tutorial assumes you are using an up-to-date Raspbian install, have access to either LXTerminal or SSH and have an internet connection!
By default, the Raspberry Pi serial port console login is enabled. We need to disable this before we can use the serial port for ourselves.
To do this, simply load up the raspberry pi configuration tool:
sudo raspi-config
Then go to option 8 – Advanced Options
Then go to option A8 – Serial
Over to “No”
And finally “Ok”
Now go to “Finish” and power off your Pi with:
sudo halt
With the Raspberry Pi powered off, we can now plug our GPS HAT in and attach an aerial.
Once everything is plugged in, we can power up the Pi.
Before we go any further we need to make sure our GPS HAT has a “lock”. To find this out, you’ll need to refer to your GPS HAT manual, or if you are using the HAB Supplies GPS HAT, look for a blinking green led, labelled “timepulse”. Keep in mind that it can take a long time for the HAT to get a lock, so be patient. If you are struggling to get a lock after 30mins try moving you’re aerial. For best results make sure the aerial is outside and has direct line of sight to the sky.
Once we have a GPS lock, we can do a quick test to make sure our Pi is able to read the data provided by the HAT.
So, log in to your Pi. You can do this via SSH or via the normal method!
Please Note. We're running Raspian from Terminal and have an internet connection!
Start by setting up the serial port:
stty -F /dev/ttyAMA0 raw 9600 cs8 clocal -cstopb
Now simply run:
cat /dev/ttyAMA0
You should see something like this:
What you are seeing here is the raw GPS “NMEA sentence” output from the GPS module. The lines we are interested in are the ones beginning with $GNGGA (again, this might vary depending on the GPS HAT you have, but the line also contains “GGA” at the beginning.)For more NMEA information, refer to file< u-blox 6 Receiver Description .pdf>
If your $GNGGA lines are looking a little empty, and contains a lot of commas “,” with nothing in between them, then you don’t have a GPS lock.
How to access this information in a python script
We are going to use 2 libraries in our script
- serial(we don’t need to install anything, this is a default library and will be pre-installed with Raspbian.)
- pynmea2(we need to install. pynmea2 is an easy to use library for parsing NMEA sentences. We could write our own parser, but why re-invent the wheel!)
If you don’t already have “pip” installed, start by installing it:
sudo apt-get install python-pip
Once pip is installed we can then go ahead and install pynmea2 using pip:
sudo pip install pynmea2
refer to https://github.com/modmypi/GPS/blob/master/gps.py to download the python script to our Raspberry Pi, downloads the Git repository to your current directoy. You can change this or create a new folder if you wish.
git clone git://github.com/modmypi/GPS
browse to the repo we just downloaded to change the directory to the GPS folder
cd GPS
run our Python script! To start, simply type
sudo python gps.py
You should see some results like these:
now tracking your GPS data
CODE
import serial
import pynmea2
def parseGPS(str):
if str.find('GGA') > 0:
msg = pynmea2.parse(str)
print "Timestamp: %s -- Lat: %s %s -- Lon: %s %s --
Altitude: %s %s" % (msg.timestamp,msg.lat,msg.lat_dir,msg.lon,msg.lon_dir,msg.altitude,msg.altitude_units)
serialPort = serial.Serial("/dev/ttyAMA0", 9600, timeout=0.5)
while True:
str = serialPort.readline()
parseGPS(str)
Document
Packing List
- 1 x GPS Module
- 1 x Antenna(Cable: 290cm)


Enable comment auto-refresher
Anonymous user #1
Permalink |