Difference between revisions of "X1100 Hardware"
Jump to navigation
Jump to search
(No difference)
|
Latest revision as of 00:23, 8 December 2023
[Required hardware]
- X1100 USB3.0 to SATA HDD/SSD shield
- Raspberry Pi 5 Model B
- 16GB micro-SD card x1 (Optional)
- 27W USB-C Power Supply
[Hardware installation]
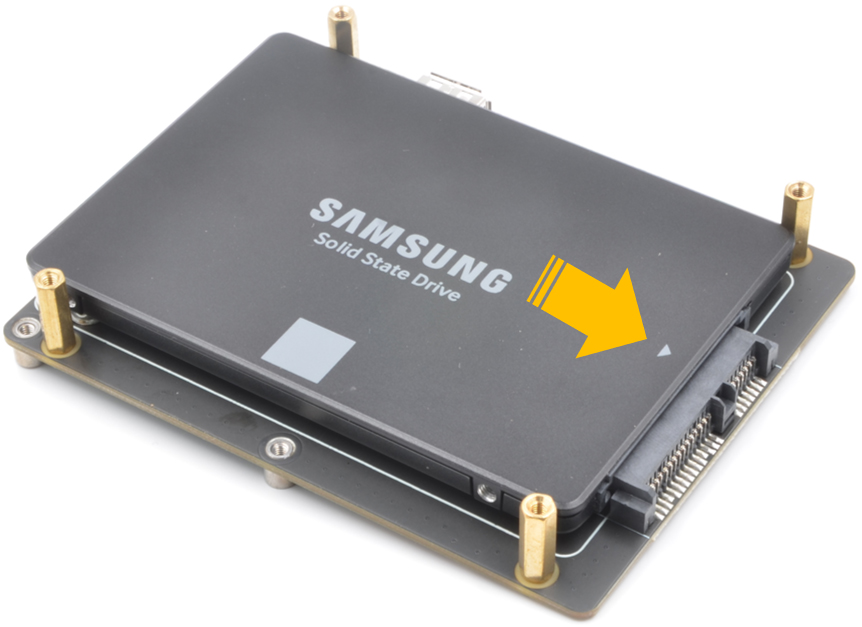
1. Insert the SSD into the SATA socket. Make sure it’s lined up with the corresponding holes underneath before screwing it into position
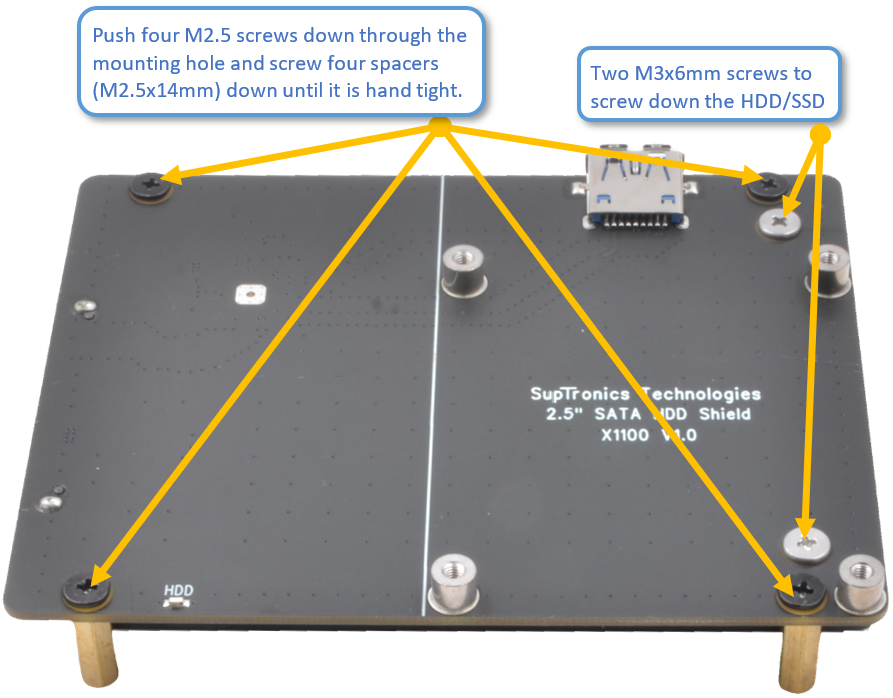
2. Push four M2.5 screws down through themounting hole and screw four spacers(M2.5x14mm) down until it is hand tight.
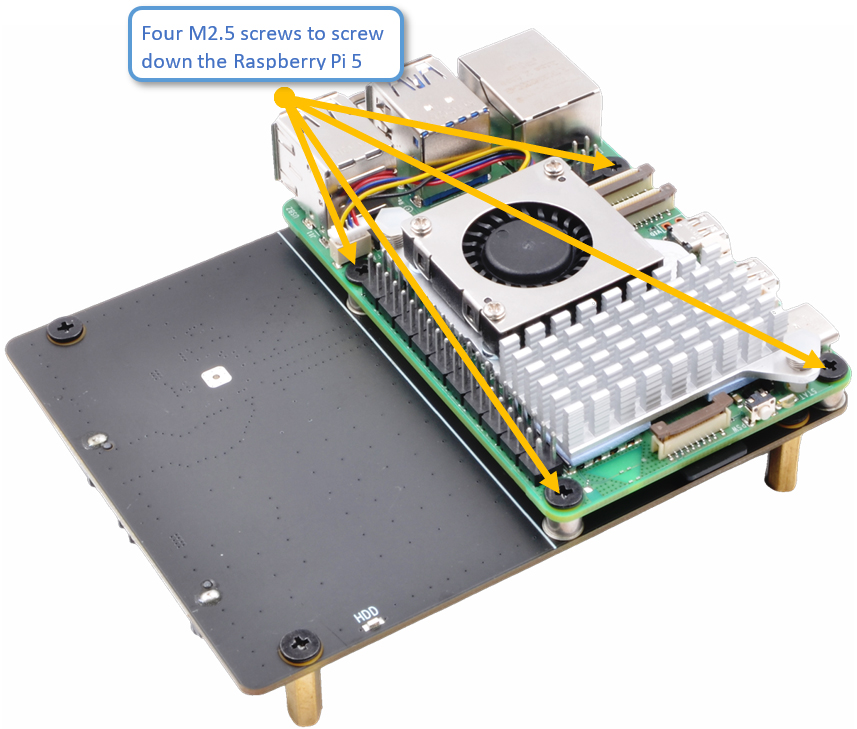
3. Four M2.5 screws to screwdown the Raspberry Pi 5
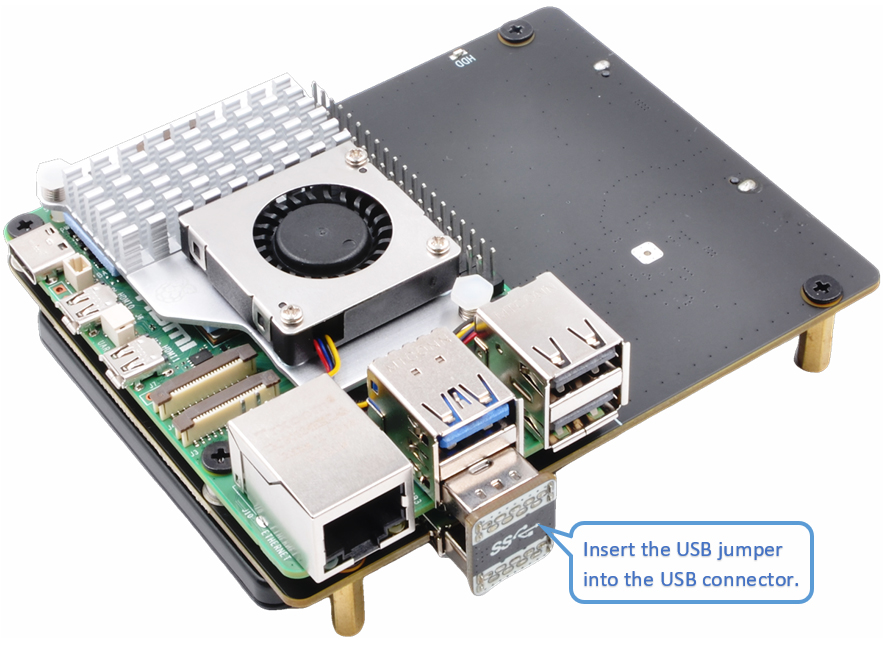
4. Insert the USB jumper into the USB connector
Return to X1100
Enable comment auto-refresher