Difference between revisions of "2.8 inch Touch Screen for Pi zero"

From Geekworm Wiki
Jump to navigation Jump to search
 
(No difference)

Latest revision as of 12:09, 8 September 2021

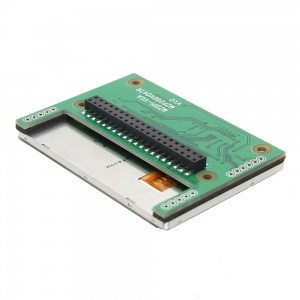
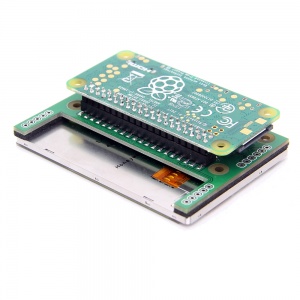
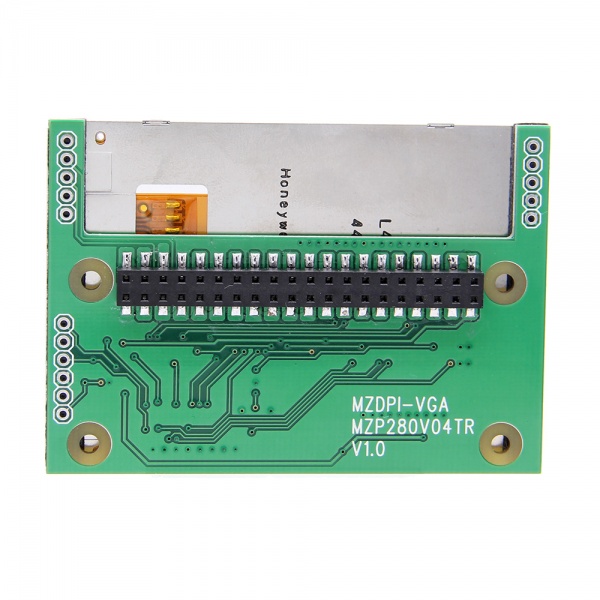
Version-A 2.8 inch Touch Screen for Pi zero W
Version-B 2.8 inch Touch Screen for Pi zero W
Version-C 2.8 inch Touch Screen for Pi zero WH

Overview

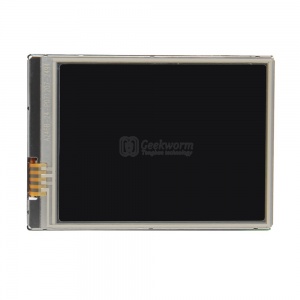
Fastest 2.8 inch Touchscreen for Raspberry Pi Zero /W and Raspberry pi 3 model b+ /3B/2B/B+/CM3 etc,Super HD 640x480 Resolution,60+ fps

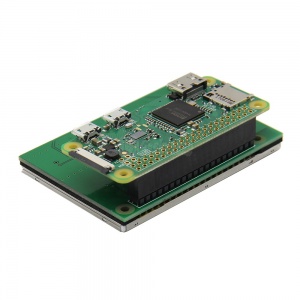
Perfect fit your Pi zero/ zero w, PORTABLE MONITOR

Customized circuit board for 2.8-inch

High speed Raspberry Pi screen

Working Current: 100 mA

Notice: Not including Raspberry Pi zero / Pi zero W board

In fact, this screen fits to Raspberry Pi 3B/2B/B+; but you must use the bread cables to connect them, because it's male pins on the this screen, and it's male pins on the pi 3B also;

Use Guide

ZERO PIN: File:ZERO-PIN.xls

Github project: https://github.com/tianyoujian/MZDPI

Setup screen via script (Recommend)

cd ~/
git clone https://github.com/tianyoujian/MZDPI.git
cd MZDPI/vga
sudo chmod +x mzdpi-vga-autoinstall-online
sudo ./mzdpi-vga-autoinstall-online
sudo reboot

How to solve the blue/yellow on Raspberry pi 4?

Please run the following shell or refer to above github project:

sudo raspi-gpio set 8 a2
sudo raspi-gpio set 7 a2

For linux kernel 4.9 (old)

Download File:Mzdpi-vga-4.9.x.zip, and unzip it;

Copy the mzdpi.dtbo to the directory /boot/overlays, and copy the the other files to directory /boot;

then restart the raspberry pi;

Note: We only test the screen on Raspbian OS and Retropie now;

How to check the kernel version?

uname -a


For linux kernel4.4 or Earlier (old)

Which GPIO Pins are Occupied by this screen? Please refer to here: File:PI ZERO W LCD PIN.ZIP

Picture

Raspberry-Pi-Zero-Screen.jpg

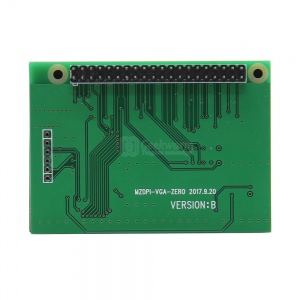
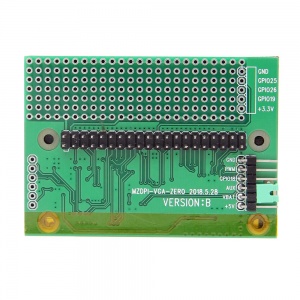
For Version-B

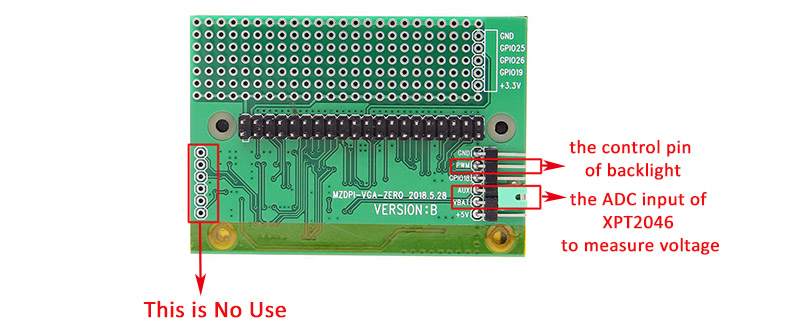
What is the purpose of the NEW 2.8 inch display pins VBAT, AUX (with jumper), PWM and left-side pins ?

1.VBAT and AUX are the ADC inputs of the XPT2046 and can be used to measure voltage. The XPT2046 is a touch control chip.

2.The PWM pin is the control pin of the backlight. The brightness of the PMW signal can be adjusted externally.

3.The left-side pins (on New Version B photo) is no use.

New 2.8 inch screen information.jpg

FAQ of Version-B

Question: 1. How is it possible to control the backlight brightness with the pins on the back? Can I use an adjustable resistor? Do I need to solder those pins to the raspberry and use some software?

/How is it possible to turn off the screen in software on the raspberry? Is there a command? An external switch with the pins on the back? Perhaps just turning down the brightness to 0 level?

Answer:

1. Please use the short circuiter to connect the pin of PWM and GPIO 18, then can control the backlight brightness by software.

2.The Raspberry Pi GPIO 18 can output the signal of PWM.

3.When the GPIO 18 output low level (PWM duty cycle is 0), the backlight is off.

Question:

2.Is this screen is SPI? Or HDMI? 16 bit color or 24 or 32?

Answer:

The 2.8inch screen is consist of display screen and touch screen, The display screen is DPI, and the touch screen is SPI.And it is 16 bit color and RGB565 mode.

For Version-C

2.8 inch Touch Screen for Pi zero WH-Version-C.jpg

Update of the Version C:

FAQ of Version-C

Question 1:

Why the LCD cannot light up?

Answer:

(1)It is directly control via software:

sudo raspi-gpio set 18 op dh (turn on the backlight)

sudo raspi-gpio set 18 op dl (turn off the backlight)

(2)Or you could add

gpio=18=op,dh

into the config.txt. then the backlight will be turned on as soon as the system is running.

Application

Add your comment
Geekworm Wiki welcomes all comments. If you do not want to be anonymous, register or log in. It is free.


Anonymous user #68

one month ago
Score 0++

For those looking for info on the mzp280v00br with the pi zero w:

Use the legacy pi os install through the Raspberry P Imager. Enable the legacy Gl driver in raspi-config.

I used the 32 bit os as I was on the pi zero. This is the only os that worked.

Have fun!

Anonymous user #67

8 months ago
Score 0++

Any chance, we can get support to make the MZDPI-display work with bookworm on a Pi Zero?

-Thanks in advance!

Anonymous user #65

26 months ago
Score 0++
what is the pinout for this?

Lisa

26 months ago
Score 0++
Please refer to the User Guide above.

Anonymous user #64

30 months ago
Score 0++
not working

Lisa

30 months ago
Score 0++

Hello,

Could you please provide more details? And where did you buy it, please tell us your order number.Thanks

Anonymous user #63

34 months ago
Score 0++
hello, do you have any updates on the availabilities?

Lisa

34 months ago
Score 0++

Hello,

Realy sorry, we are not sure yet.

Geekworm

Anonymous user #62

34 months ago
Score 0++
you can get this screen working with bullseye by using raspi-config to select the legacy GL driver.

Anonymous user #66

23 months ago
Score 0++
To get the MZDPI 2.8 inch screen working with the current Raspberry Pi OS images, you need to use `sudo raspi-config` to set Advanced Options -> GL Driver -> G1 Legacy (because the MZDPI/vga software is not compatible with the new GL driver). Many thanks to the anonymous person who suggested this below!

Anonymous user #59

36 months ago
Score 0++

matchbox-keyboard is already the newest version (0.2+git20160713-1). 0 upgraded, 0 newly installed, 0 to remove and 1 not upgraded. /boot/tmp.dts: Warning (simple_bus_reg): /soc/i2c0mux: missing or empty reg/ranges property /boot/tmp.dts: Warning (simple_bus_reg): /soc/gpu: missing or empty reg/ranges property /boot/tmp.dts: Warning (simple_bus_reg): /soc/axiperf: simple-bus unit address format error, expected "7e009800" /boot/tmp.dts: Warning (simple_bus_reg): /soc/firmware: missing or empty reg/ranges property /boot/tmp.dts: Warning (simple_bus_reg): /soc/power: missing or empty reg/ranges property /boot/tmp.dts: Warning (simple_bus_reg): /soc/gpiomem: simple-bus unit address format error, expected "7e200000" /boot/tmp.dts: Warning (simple_bus_reg): /soc/fb: missing or empty reg/ranges property /boot/tmp.dts: Warning (simple_bus_reg): /soc/vcsm: missing or empty reg/ranges property /boot/tmp.dts: Warning (simple_bus_reg): /soc/sound: missing or empty reg/ranges property /boot/tmp.dts: Warning (simple_bus_reg): /soc/i2c0mux: missing or empty reg/ranges property /boot/tmp.dts: Warning (simple_bus_reg): /soc/gpu: missing or empty reg/ranges property /boot/tmp.dts: Warning (simple_bus_reg): /soc/axiperf: simple-bus unit address format error, expected "7e009800" /boot/tmp.dts: Warning (simple_bus_reg): /soc/firmware: missing or empty reg/ranges property /boot/tmp.dts: Warning (simple_bus_reg): /soc/power: missing or empty reg/ranges property /boot/tmp.dts: Warning (simple_bus_reg): /soc/gpiomem: simple-bus unit address format error, expected "7e200000" /boot/tmp.dts: Warning (simple_bus_reg): /soc/fb: missing or empty reg/ranges property /boot/tmp.dts: Warning (simple_bus_reg): /soc/vcsm: missing or empty reg/ranges property /boot/tmp.dts: Warning (simple_bus_reg): /soc/sound: missing or empty reg/ranges property /boot/tmp.dts: Warning (simple_bus_reg): /soc/i2c0mux: missing or empty reg/ranges property /boot/tmp.dts: Warning (simple_bus_reg): /soc/gpu: missing or empty reg/ranges property /boot/tmp.dts: Warning (simple_bus_reg): /soc/axiperf: simple-bus unit address format error, expected "7e009800" /boot/tmp.dts: Warning (simple_bus_reg): /soc/firmware: missing or empty reg/ranges property /boot/tmp.dts: Warning (simple_bus_reg): /soc/power: missing or empty reg/ranges property /boot/tmp.dts: Warning (simple_bus_reg): /soc/gpiomem: simple-bus unit address format error, expected "7e200000" /boot/tmp.dts: Warning (simple_bus_reg): /soc/fb: missing or empty reg/ranges property /boot/tmp.dts: Warning (simple_bus_reg): /soc/vcsm: missing or empty reg/ranges property /boot/tmp.dts: Warning (simple_bus_reg): /soc/sound: missing or empty reg/ranges property /boot/tmp.dts: Warning (simple_bus_reg): /soc/i2c0mux: missing or empty reg/ranges property /boot/tmp.dts: Warning (simple_bus_reg): /soc/gpu: missing or empty reg/ranges property /boot/tmp.dts: Warning (simple_bus_reg): /soc/axiperf: simple-bus unit address format error, expected "7e009800" /boot/tmp.dts: Warning (simple_bus_reg): /soc/firmware: missing or empty reg/ranges property /boot/tmp.dts: Warning (simple_bus_reg): /soc/power: missing or empty reg/ranges property /boot/tmp.dts: Warning (simple_bus_reg): /soc/gpiomem: simple-bus unit address format error, expected "7e200000" /boot/tmp.dts: Warning (simple_bus_reg): /soc/fb: missing or empty reg/ranges property /boot/tmp.dts: Warning (simple_bus_reg): /soc/vcsm: missing or empty reg/ranges property /boot/tmp.dts: Warning (simple_bus_reg): /soc/sound: missing or empty reg/ranges property /boot/tmp.dts: Warning (simple_bus_reg): /soc/i2c0mux: missing or empty reg/ranges property /boot/tmp.dts: Warning (simple_bus_reg): /soc/gpu: missing or empty reg/ranges property /boot/tmp.dts: Warning (simple_bus_reg): /soc/axiperf: simple-bus unit address format error, expected "7e009800" /boot/tmp.dts: Warning (simple_bus_reg): /soc/firmware: missing or empty reg/ranges property /boot/tmp.dts: Warning (simple_bus_reg): /soc/power: missing or empty reg/ranges property /boot/tmp.dts: Warning (simple_bus_reg): /soc/gpiomem: simple-bus unit address format error, expected "7e200000" /boot/tmp.dts: Warning (simple_bus_reg): /soc/fb: missing or empty reg/ranges property /boot/tmp.dts: Warning (simple_bus_reg): /soc/vcsm: missing or empty reg/ranges property /boot/tmp.dts: Warning (simple_bus_reg): /soc/sound: missing or empty reg/ranges property /boot/tmp.dts: Warning (simple_bus_reg): /soc/i2c0mux: missing or empty reg/ranges property /boot/tmp.dts: Warning (simple_bus_reg): /soc/gpu: missing or empty reg/ranges property /boot/tmp.dts: Warning (simple_bus_reg): /soc/axiperf: simple-bus unit address format error, expected "7e009800" /boot/tmp.dts: Warning (simple_bus_reg): /soc/firmware: missing or empty reg/ranges property /boot/tmp.dts: Warning (simple_bus_reg): /soc/power: missing or empty reg/ranges property /boot/tmp.dts: Warning (simple_bus_reg): /soc/gpiomem: simple-bus unit address format error, expected "7e200000" /boot/tmp.dts: Warning (simple_bus_reg): /soc/fb: missing or empty reg/ranges property /boot/tmp.dts: Warning (simple_bus_reg): /soc/vcsm: missing or empty reg/ranges property /boot/tmp.dts: Warning (simple_bus_reg): /soc/sound: missing or empty reg/ranges property /boot/tmp.dts: Warning (simple_bus_reg): /soc/virtgpio: missing or empty reg/ranges property /boot/tmp.dts: Warning (simple_bus_reg): /soc/i2c0mux: missing or empty reg/ranges property /boot/tmp.dts: Warning (simple_bus_reg): /soc/gpu: missing or empty reg/ranges property /boot/tmp.dts: Warning (simple_bus_reg): /soc/axiperf: simple-bus unit address format error, expected "7e009800" /boot/tmp.dts: Warning (simple_bus_reg): /soc/firmware: missing or empty reg/ranges property /boot/tmp.dts: Warning (simple_bus_reg): /soc/power: missing or empty reg/ranges property /boot/tmp.dts: Warning (simple_bus_reg): /soc/gpiomem: simple-bus unit address format error, expected "7e200000" /boot/tmp.dts: Warning (simple_bus_reg): /soc/fb: missing or empty reg/ranges property /boot/tmp.dts: Warning (simple_bus_reg): /soc/vcsm: missing or empty reg/ranges property /boot/tmp.dts: Warning (simple_bus_reg): /soc/sound: missing or empty reg/ranges property /boot/tmp.dts: Warning (simple_bus_reg): /soc/i2c0mux: missing or empty reg/ranges property /boot/tmp.dts: Warning (simple_bus_reg): /soc/gpu: missing or empty reg/ranges property /boot/tmp.dts: Warning (simple_bus_reg): /soc/axiperf: simple-bus unit address format error, expected "7e009800" /boot/tmp.dts: Warning (simple_bus_reg): /soc/firmware: missing or empty reg/ranges property /boot/tmp.dts: Warning (simple_bus_reg): /soc/power: missing or empty reg/ranges property /boot/tmp.dts: Warning (simple_bus_reg): /soc/gpiomem: simple-bus unit address format error, expected "7e200000" /boot/tmp.dts: Warning (simple_bus_reg): /soc/fb: missing or empty reg/ranges property /boot/tmp.dts: Warning (simple_bus_reg): /soc/vcsm: missing or empty reg/ranges property /boot/tmp.dts: Warning (simple_bus_reg): /soc/sound: missing or empty reg/ranges property /boot/tmp.dts: Warning (simple_bus_reg): /soc/virtgpio: missing or empty reg/ranges property

HOW I CAN FIX IT?

Anonymous user #60

36 months ago
Score 0++

I had the same issue when using the latest Raspbian OS from Raspberri PI Imager App (bullseye).

Switched back to buster and is working again (cat /etc/os-release)

Lisa

35 months ago
Score 0++
Hello,We are not sure what has changed in the new system, but this requires an update to the installation script. We will update the new script as soon as possible.

Anonymous user #58

36 months ago
Score 0++
When will this be available again?

Lisa

35 months ago
Score 0++

Hello,

Realy sorry, we are not sure yet.

Geekworm

Anonymous user #57

36 months ago
Score 0++
Hi, I've run through what broken instructions I was able to find and the screen backlight comes on, but no display. I've looked through the comments and noticed an answer asking "check the pins 3, 5, 27, and 28 of the header." What am I looking for? What should they show? Do they need to be remapped?

Lisa

36 months ago
Score 0++
Hi, It is best to have an oscilloscope to view the waveform. But please make sure that the system settings are correct first, that is the 【config.txt file】

Lisa

36 months ago
Score 0++
If you don’t have an oscilloscope, or you can try to use a multimeter to measure the voltage for a simple judgment

Anonymous user #56

36 months ago
Score 0++
Hi yes I had the blue tint on my screen so I set the GPIO as stated above and that got rid of the blue tint but now my color scheme seems to be off I watch video on my pi and it shows on like peoples faces like light green tint but the neck and other parts seem to render normal skin color also noticed some other colors are off. Ive checked all the solder points and are all solid. Is it a gpio or dpi or overlay possibly?

Lisa

36 months ago
Score 0++
Hello,It may not be a hardware problem.The screen is 65k colors, may be a color conversion problem.

Anonymous user #55

37 months ago
Score 0++

Hi,

will these screens be available again?

Lisa

37 months ago
Score 0++
Hi,Sorry, we are not sure yet, but currently out of stock.

Anonymous user #50

37 months ago
Score 0++
I have the version B+, which I don't know is real or not, but it has male pins on the top like version A and also shorter male pins in the middle like version B. Using the middle pins works, but using the top male pins only turns on the backlight. I would like to make it fully work using the top male pins. Would you know the solution?

Lisa

37 months ago
Score 0++
Hi,Where did you buy it, could you please tell us your order number? [support@geekworm.com] Because the product you bought seems to be different from ours

Anonymous user #54

37 months ago
Score 0++

im only getting a backlight but no screen what do i do?

Pi zero b+ screen, please help!

Lisa

37 months ago
Score 0++
Hello,please troubleshoot the hardware first, please check the pins 3, 5, 27, and 28 of the header.

Anonymous user #53

38 months ago
Score 0++

Hi everyone, I have installed software folliwing instructions. I have welded on the gpio riser and attached the screen. The backlight is on, but I have no display. I have wiped and reinstalled several times.

Is my unit defective? Is there any way to troubleshoot?

Thank you

Lisa

38 months ago
Score 0++
Hello,You need to troubleshoot the hardware, please check the pins 3, 5, 27, and 28 of the header.

Anonymous user #52

38 months ago
Score 0++
I have a B+ with a raspberry pi zero. The screen works but its too oversaturated, is there a way to adjust?

Lisa

38 months ago
Score 0++
Hi,sorry it is a fixed parameter, it cannot be adjusted.

Anonymous user #51

38 months ago
Score 0++
I can't reach the GPIO 18 and PWM jumper anymore because I soldered my raspberry pi already. Is there any other way to make that connection?

Lisa

38 months ago
Score 0++
Hello,If you are using a type B screen, please refer to the {FAQ of Version-B};If not, sorry that there is no other solution.

Anonymous user #50

38 months ago
Score 0++
Hi! When laying a raspberri pi zero onto the Version B, it kind of doesn't sit and wobbles. It's perfectly ok to just solder it while it is flat and it will hold right?

Lisa

38 months ago
Score 0++
Hi,The B screen is also connected to the Raspberry Pi zero through the pin header, so it will not wobbles.

Anonymous user #49

38 months ago
Score 0++

Hi, I have just recoeved a screen, The back states it is "Version B+", (MZDPI-VGA-ZERO 2018.3.28). It does not appear to be one listed in the article above? It looks almost idenitical to Version B, but it only has 5 pins on the right (GND, PWM, AUX, VBAT, +5V).

It is missing the GPIO18 pin? How do i control this board via the software using GPIO18? Thanks

Lisa

38 months ago
Score 0++
Hi,We only have three 2.8-inch screens(A,B,C). Where did you buy it from?

Anonymous user #49

38 months ago
Score 0++

@Lisa Thanks for the reply I must have bought a fake then!

Bought it from eBay :(

Lisa

38 months ago
Score 0++
Yes,We are not selling products on eBay yet.

Anonymous user #48

38 months ago
Score 0++
I've installed the driver for Version A, but when I put the screen on the Pi Zero immediately shuts down. If I try boot it, no lights come on.

Lisa

38 months ago
Score 0++
Hi,Please check if the connection is correct. If you are not sure, please send connection picture for us to confirm. 【support@geekworm.com】;and note your order NO. please. thanks

Anonymous user #47

38 months ago
Score 0++

Sorry I don't understand the pin file very well.

Can you tell me which GPIO pins are not used by the screen?

Are they the ones with NC listed next to them?

Sorry nowhere in the file does it say Not Used or Free?

Thanks

Lisa

38 months ago
Score 0++
Hi,Please tell us which one are you using, VersionA, B, C?

Anonymous user #46

39 months ago
Score 0++
Does Version C have a short circuiter for GPOI18 & PWM, or is this enabled as default?

Lisa

39 months ago
Score 0++
Hi,It is enabled by default

Anonymous user #45

43 months ago
Score 0++

Hi everyone, I have installed software folliwing instructions. I have welded on the gpio riser and attached the screen. The backlight is on, but I have no display. I have wiped and reinstalled several times.

Is my unit defective? Is there any way to troubleshoot?

Thank you

Anonymous user #43

44 months ago
Score 0++
Hi. Where can I find the datasheet for the Epson 2.8 L4S00242P00 used in this display?

Anonymous user #42

44 months ago
Score 0++

Question 1: Where do i buy this screen from? I dont see an e shopping link to it here. Am I

supposed to configure my pi from your imagination?

Anonymous user #41

45 months ago
Score 0++

Is it possible to switch between HDMI output and touchscreen output, or even output to both?

Thanks!

Anonymous user #40

45 months ago
Score 0++
Those of you getting the "Unrecognized check name gpios_property", I went into the raspi-config tool and disabled just about every interface and set the display resolution to match that of the device (i.e., 640x480) and that seemed to fix my problems with being able to boot to the display

Anonymous user #38

46 months ago
Score 0++

Can someone provide a working RetroPie image for the Pi Zero W with the MZP280V00BR screen?

Using auto-install script I run into the gpios_property error and don't know if it is fixable.

Anonymous user #39

45 months ago
Score 0++
Same thing for I don't know why

Anonymous user #38

46 months ago
Score 0++

Running the autoinstall script gives me FATAL ERROR "Unrecognized check name gpios_property" in the end.

Touch function works after running the acript, but display output does not work. How to fix?

Anonymous user #38

46 months ago
Score 0++
This is on Raspbian 9 stretch with kernel 4.14

Anonymous user #37

47 months ago
Score 0++
This does not work on a Raspberry Pi 4

Cindy

46 months ago
Score 0++
Hi, yes, this screen is for Raspberry Pi Zero /W use.

Anonymous user #36

47 months ago
Score 0++
Is there any unused GPIO pins on version C?

Anonymous user #35

47 months ago
Score 0++

This UI is not compatible with ALLO (mini) BOSS DAC by HW. In Volumio I was not able to turn the UI into operation due to (I guess) kernel/settings limitations. In Moode Audio I was able to have the UI working but then the DAC was not working. I was able to remove one conflict - Backlight PWM control on pin 18 is used by ALLO mini BOSS DAC to be enabled. I used 40pin cable and switched lines 17 and 18, then changed pin 17 to 18 for configuration control. Unfortunately, when both components are activated in /boot/config.txt, the DAC is failing and you get Alsa HW error when trying to play a song. My guess is SPI. Config.txt: disable_splash=1 disable_overscan=1 hdmi_drive=2 hdmi_blanking=1 hdmi_force_edid_audio=1 hdmi_force_hotplug=1 hdmi_group=0 dtparam=i2c_arm=on dtparam=i2s=on dtparam=audio=off dtoverlay=allo-boss-dac-pcm512x-audio

  1. dtoverlay=disable-wifi
  2. dtoverlay=disable-bt

gpio=17=op,dh

  1. gpio=7-8=a2

dtparam=spi=on dtoverlay=ads7846,penirq=27,swapxy=1,xmin=200,xmax=3850,ymin=200,ymax=3850 display_rotate=3 dtoverlay=mzdpi framebuffer_width=640 framebuffer_height=480 enable_dpi_lcd=1 display_default_lcd=1 dpi_group=2 dpi_mode=87 dpi_output_format=0x07f003 hdmi_timings=480 0 41 20 60 640 0 5 10 10 0 0 0 60 0 32000000 1

Question to developer: are you able to check if there is another pinout conflict that can be solved? Regards,

Konrad

Anonymous user #35

47 months ago
Score 0++

Hi, I tested the UI on raspbian OS and it works nicely. Then I switched to Volumio and during installation there are errors related to DTC (the DTC itself was not installed by default): FATAL ERROR: Unrecognized check name "gpios_property". Same for clocks-property, unique_unit_address and avoid_unn.... .

Any idea how to solve it?

Regards!

Anonymous user #34

49 months ago
Score 0++

Hello, Geekworm team and community! I've got the Version-A display (without additional right-side pins on the back). How is it possible to control the backlight brightness or turn off the screen in software or configuration files on the Raspberry? It is possible turn off the backlight by disconnect +5V wire? Or maybe it is possible to solder wire to the tracks on the back of the board and plug to the not connected GPIO18 Raspberry pin?

I hope for your help, thanks.

Anonymous user #33

49 months ago
Score 0++
Not sure anyone will read this, but how do I disable the touchscreen so that I can utilize i2c for an RTC????

Anonymous user #32

51 months ago
Score 0++
Can you please get this working with pi Musicbox and Volumio systems (Linux kernel v4.14.**)?

Anonymous user #31

51 months ago
Score 0++

Facing issues with version B and a raspberry pi zeor w.

Installed all the drivers. The screen is connected, and is obviously receiving power. But the screen itself just doesn't show anything, it is a black screen.

Anonymous user #44

43 months ago
Score 0++
...check what your board actually looks like, instead of the model number printed on it. Mine says version B, but it's definitely version A hardware

Christr

52 months ago
Score 0++

How do you rotate the touch part? I wanted to rotate display and set display_rotate=1 which works, but how do you also rotate the touch portion?

thanks

--chris

Anonymous user #28

52 months ago
Score 0++

Found my own fix.

edited: /etc/X11/xorg.conf.d/99-calibration.conf

reversed the Calibration section options a bit. Mine is now this after calibration:

Section "InputClass" Identifier "calibration" MatchProduct "ADS7846 Touchscreen" Option "Calibration" "3964 151 3843 240" Option "SwapAxes" "0"

EndSection

Anonymous user #27

52 months ago
Score 0++
I've also received MZP280V00BR model and I only get the backlight with Raspberry Pi 3B. The backlight becomes a bit brighter/dimmer during the boot time, but nothing is displayed on the screen.

Anonymous user #37

47 months ago
Score 0++
Same thing happens to me on PI 4

JdeFalconr

53 months ago
Score 0++

Hello,

I've just connected this screen to my Pi Zero W but I get no output. The Pi boots normally but the screen's backlight just flickers intermittently and nothing displays on the screen. I went through the online setup script and rebooted afterwards, also doing an apt-get update too for good measure.

JdeFalconr

53 months ago
Score 0++
OK I was able to get the backlight to stay on (bad connection) but the screen is still empty. On which GPIO pins should I check connection to make sure that my remaining connections are good?

Anonymous user #29

52 months ago
Score 0++
@jdeFalconr: Any luck troubleshooting this issue? I'm attempting to use the MZP280V04TR V1.0 model screen with a raspberry pi zero w. I've followed the Read.me instructions for installing the device drivers. Once I 'sudo reboot' the screen backlight turns on, but there is no image displayed (i.e., no raspbian desktop). I haven't found any additional information online to help me troubleshoot this issue. Has anyone been able to get this screen working?

Anonymous user #30

51 months ago
Score 0++
I think I am having the same problem. The screen is connected, and is obviously receiving power. But the screen itself just doesn't show anything! I followed their driver instructions, and after reboots, it simply doesn't do anything beside turn on the backlight.

Gtejias

53 months ago
Score 0++
Hi.. after a lot of search over the internet, I still can't manage to solve the blue/yellow screen problem... tried any of the advices mentioned, but no one works!!! Has anyone done it NOT entering terminal to write sudo raspi.. everytime?

Christr

52 months ago
Score 0++

So the issue with the Blue/Yellow appears to be when the serial driver loads, it for some reason resets GPIO 7 & 8. So the setting that the vendor put in /boot/config.txt gets overridden.

So, I put the following mini startup script in to run on boot. Script location-name: /etc/systemd/system/fixgpio.service Script contents below:

[Unit] Description=fix gpio for screen

[Service] Type=simple ExecStart=/usr/bin/raspi-gpio set 7-8 a2

[Install] WantedBy=multi-user.target

Then run service fixgpio enable and reboot.

--Chris

Zakukashi

54 months ago
Score 0++

Hello,

I connected this screen to my PI Zero, everything works great with colors and brightness etc.. However my screen seems to have permanent black lines in a weird circle configuration. Almost looks like artefacts left from someone drawing on the screen. How can I remove this? IT seems to be always there, even when PI is booting I can see the lines "stuck".

Heres what it looks like:

https://imgur.com/a/ppxY7Al

Anonymous user #26

54 months ago
Score 0++

Hello. I have just received this screen, model B. I did all the steps that this webpage is saying, but, even with that, it is not working. The thing is that the pi zero is not even booting, the led to indicate it is off. But, magically, when I remove the screen, the pi boots without problem.

Can someone help me with this issue. Thank you!

Abby

54 months ago
Score 0++

Hi, Do you install the driver? Please refer to: https://rasp...or_Version-B

If it still not work, please kindly attach some picture to show your installation and steps, and we will reflect to our engineer.

Anonymous user #26

54 months ago
Score 0++

Thanks for your quick answer. Finally, I managed to make it work, the problem was the pi zero, it was giving only 3v to the screen. I tried with other pi zero and it works perfectly when I use raspbian.

I tried to use RetroPie (I want to create a portable console) but I don't manage to make it work, when I execute the installer I get an error saying that /boot/tmp.dts does not exist and FATAL ERROR.

Any ideas about this? Thank you and have a nice day.

Anonymous user #25

55 months ago
Score 0++
Hello. My C versión shows small vertical lines forming a circle. Can it be caused by software?

Negens

55 months ago
Score 0++

Hello,

After digging a lot, I made it. Forget the raspi-gpio program. I could never install it because of the messy buggy nodejs package.

Here is the method I used :


Create a file "gpio_alt.c" :

==========================================

/* Utility to switch Raspberry-Pi GPIO pin functions Tim Giles 01/04/2013

Usage: $ gpio_alt -p PIN_NUMBER -f ALT_NUMBER

Based on RPi code from Dom and Gert, 15-Feb-2013, <http://elinu...ipherals#C_2> and Gnu getopt() example <http://www.g...le-of-Getopt>

  • /
  1. include <ctype.h>
  2. include <stdio.h>
  3. include <stdlib.h>
  4. include <unistd.h>
  5. include <fcntl.h>
  6. include <sys/mman.h>
  1. define BCM2708_PERI_BASE 0x20000000
  2. define GPIO_BASE (BCM2708_PERI_BASE + 0x200000) /* GPIO controller */
  3. define PAGE_SIZE (4*1024)
  4. define BLOCK_SIZE (4*1024)

int mem_fd; void *gpio_map; volatile unsigned *gpio; void setup_io();

// GPIO setup macros. Always use INP_GPIO(x) before using OUT_GPIO(x) or SET_GPIO_ALT(x,y)

  1. define INP_GPIO(g) *(gpio+((g)/10)) &= ~(7<<(((g)%10)*3))
  2. define OUT_GPIO(g) *(gpio+((g)/10)) |= (1<<(((g)%10)*3))
  3. define SET_GPIO_ALT(g,a) *(gpio+(((g)/10))) |= (((a)<=3?(a)+4:(a)==4?3:2)<<(((g)%10)*3))
  1. define GPIO_SET *(gpio+7) // sets bits which are 1 ignores bits which are 0
  2. define GPIO_CLR *(gpio+10) // clears bits which are 1 ignores bits which are 0


int main (int argc, char **argv) { int opt, flag, n_pin, n_alt; flag=0;

while ((opt = getopt (argc, argv, "hp:f:")) != -1) { switch (opt) { case 'h': break; case 'p': n_pin = atoi(optarg); flag |= 0b0001; break; case 'f': n_alt = atoi(optarg); flag |= 0b0010; break; case '?': // getopt() prints error messages, so don't need to repeat them here return 1; default: abort (); } }

if (flag != 0b0011) { fprintf (stderr, "Usage:\n$ gpio_alt -p PIN_NUM -f FUNC_NUM\n"); return 1; }

setup_io(); // Set up gpi pointer for direct register access INP_GPIO(n_pin); // Always use INP_GPIO(x) before using SET_GPIO_ALT(x,y) SET_GPIO_ALT(n_pin, n_alt);

printf("Set pin %i to alternative-function %i\n", n_pin, n_alt);

return 0; }


void setup_io() { /* open /dev/mem */ if ((mem_fd = open("/dev/mem", O_RDWR|O_SYNC) ) < 0) { printf("can't open /dev/mem \n"); exit(-1); }

/* mmap GPIO */ gpio_map = mmap( NULL, //Any adddress in our space will do BLOCK_SIZE, //Map length PROT_READ|PROT_WRITE,// Enable reading & writting to mapped memory MAP_SHARED, //Shared with other processes mem_fd, //File to map GPIO_BASE //Offset to GPIO peripheral );

close(mem_fd); //No need to keep mem_fd open after mmap

if (gpio_map == MAP_FAILED) { printf("mmap error %d\n", (int)gpio_map);//errno also set! exit(-1); }

// Always use volatile pointer! gpio = (volatile unsigned *)gpio_map; }

=======================

Then run following commands to compile and copy it on PATH : gcc gpio_alt.c -o gpio_alt sudo chown root:root gpio_alt sudo chmod u+s gpio_alt sudo mv gpio_alt /usr/local/bin/


Create a systemd file /etc/systemd/system/mzdpi.service

=========================

[Unit] Description=mzdpi screen blue yellow fix service

[Service] Type=oneshot ExecStart=/usr/local/bin/gpio_alt -p 7 -f 2 ; /usr/local/bin/gpio_alt -p 8 -f 2

[Install] WantedBy=multi-user.target Alias=mzdpi.service

=========================

systemctl daemon-reload

systemctl enable mzdpi.service

Anonymous user #61

35 months ago
Score 0++
can you walk me through how to do this?

Anonymous user #24

55 months ago
Score 0++
Hi, how can i get this to work with Kali Linux??

Cindy

55 months ago
Score 0++
Hi, sorry, not tested on Kali Linux.

Anonymous user #23

59 months ago
Score 0++
Is there any way i can just use the a couple of the pins for just screen and not touch. I need 12 of the gpio pins

Anonymous user #22

61 months ago
Score 0++

Finally got a solution to make sudo raspi-gpio set 8 a2 sudo raspi-gpio set 7 a2 get executed boot


Add those lines right before "EXIT" Block of file "/etc/rc.local"

Anonymous user #21

62 months ago
Score 0++

Hello, my display is a Version B - MZP280V00BR. I have installed the drivers like it is explained on this page, but only the backlight turns on. The image of the display is still black.

Which driver should i take for online installation of the MZP280V00BR display?

Anonymous user #20

62 months ago
Score 0++

How can I use rechargeable battery board like this one: https://bit.ly/32pqyj6

with Version-C

Anonymous user #19

62 months ago
Score 0++
Hi, try to get rid of the blue/yellow tint with no success. followed the instruction and also check /boot/mzp280v01br.txt already with "gpio=0-8=a2". but the screen does change back normal if i type the raspi-gpio command manually after boot up ... strange, any advice? setup is rp0w, version a screen, 07-10-buster